




Warning! The content within this article is over 36 months old and, therefore, may be out of date.
VCAP6-CMA Deploy - Objective 8.2: Configure vRealize Business Standard Costing and Reporting
Share this article on:



VMware VCAP6 VCAP6-CMA
Published on 15 March 2017 by Christopher Lewis. Words: 1212. Reading Time: 6 mins.
Objective 8.2 - Configure vRealize Business Standard Costing and Reporting
### Objective Overview
- Configure cost drivers according to a deployment plan:
- Assign cost for operating system licensing
- Edit cost for server hardware, storage, and network
- Create a monthly cost for facilities and maintenance
- Configure CPU and memory utilization costs
- Configure Consumption Analysis:
- Edit consumer hierarchy
- Edit price value according to a deployment plan
- Edit/Import budget to estimate your cost
- Generate vRealize Business vCenter Server report
- Generate a vRealize Automation Report
- Select and export the appropriate report
- Filter and Search for specific reports based on customer requirements
Note:
The steps in this guide utilise vRealize Business for Cloud. This is because vRB Standard does not support vRA 6.2.5, and this is required because I am running VMware vSphere 6.5. The steps will be similar but not identical in vRealize Business Standard.
Objective Prerequisites
The following prerequisites are assumed for this Objective:
- A fully deployed vRealize Automation Solution.
- VMware vRealize Business for Cloud is installed and configured ( Objective 7.1 )
Objective Breakdown
Configure Cost Drivers according to a Deployment Plan
- Navigate to the vRealize Tenant Automation Portal (
https://vra.fqdn/vcac)
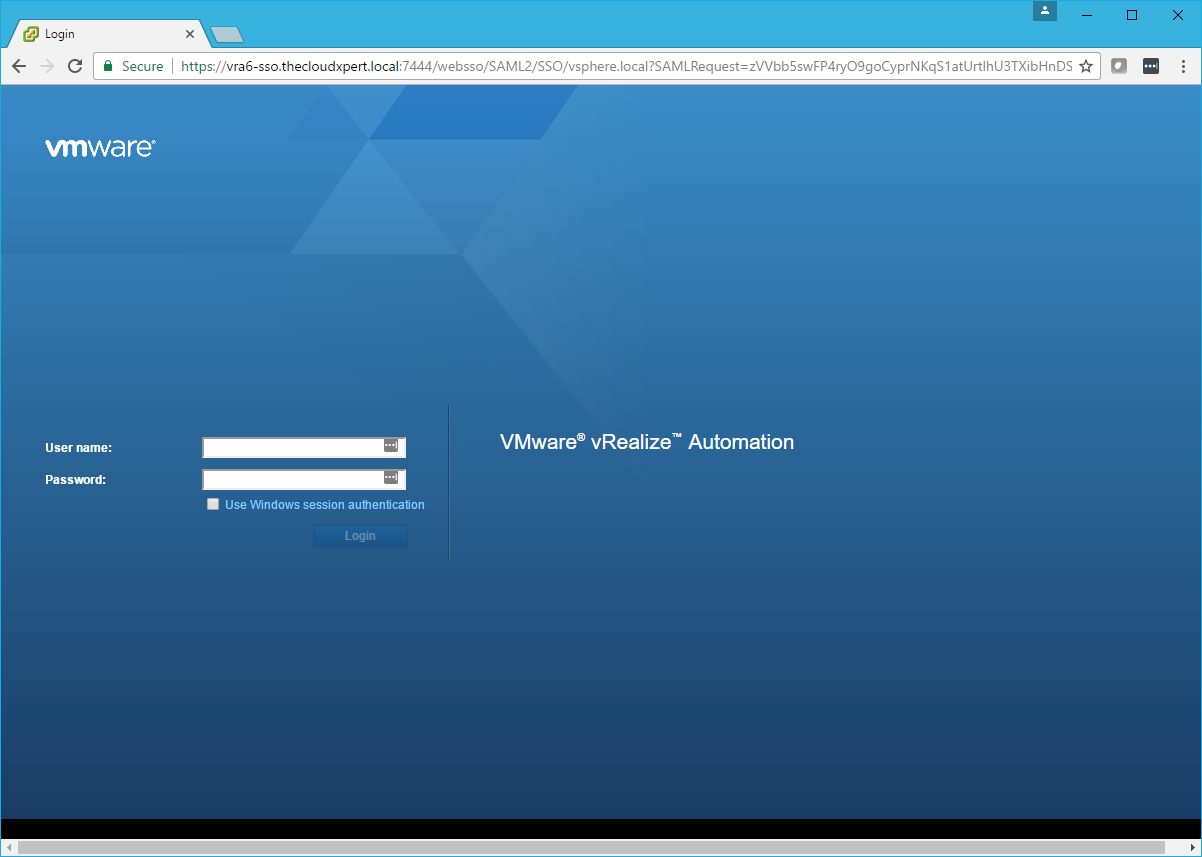
- Login with a User with the Business Management Administrator role assigned.
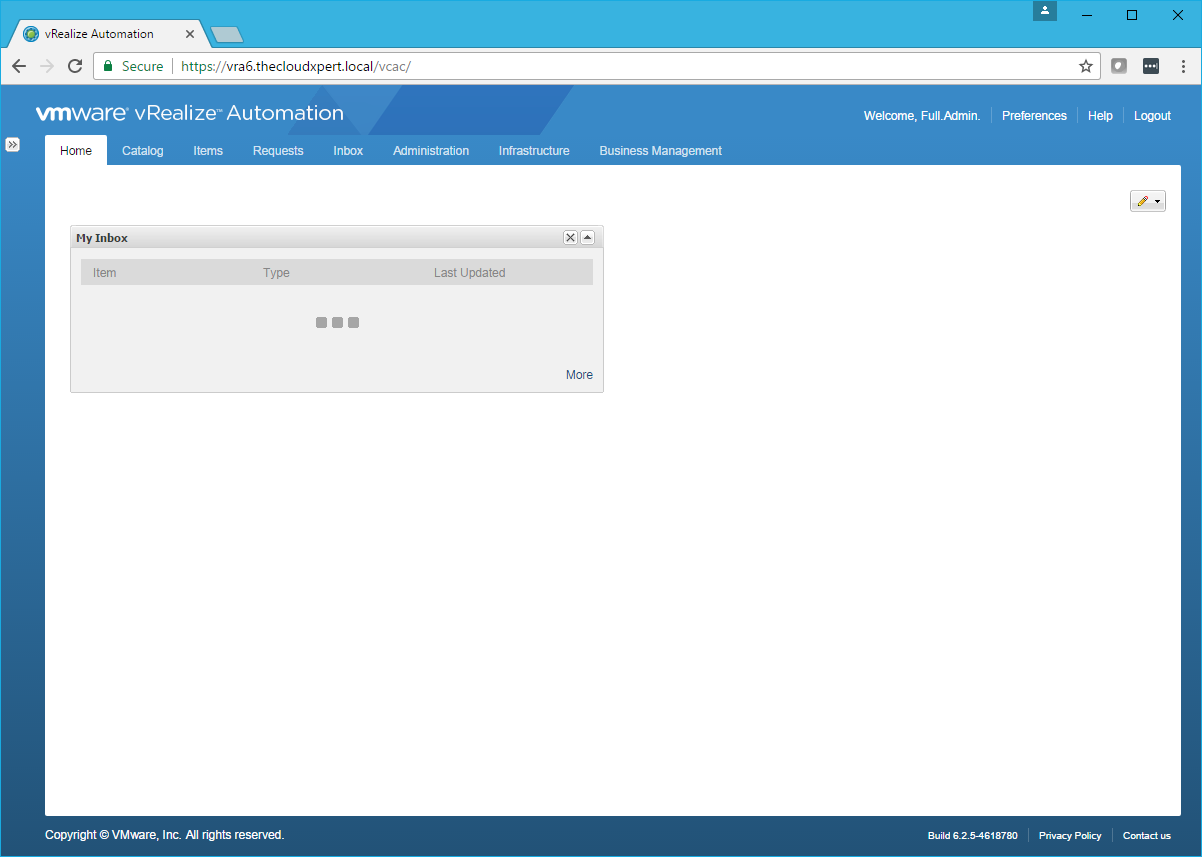
- Click Business Management.
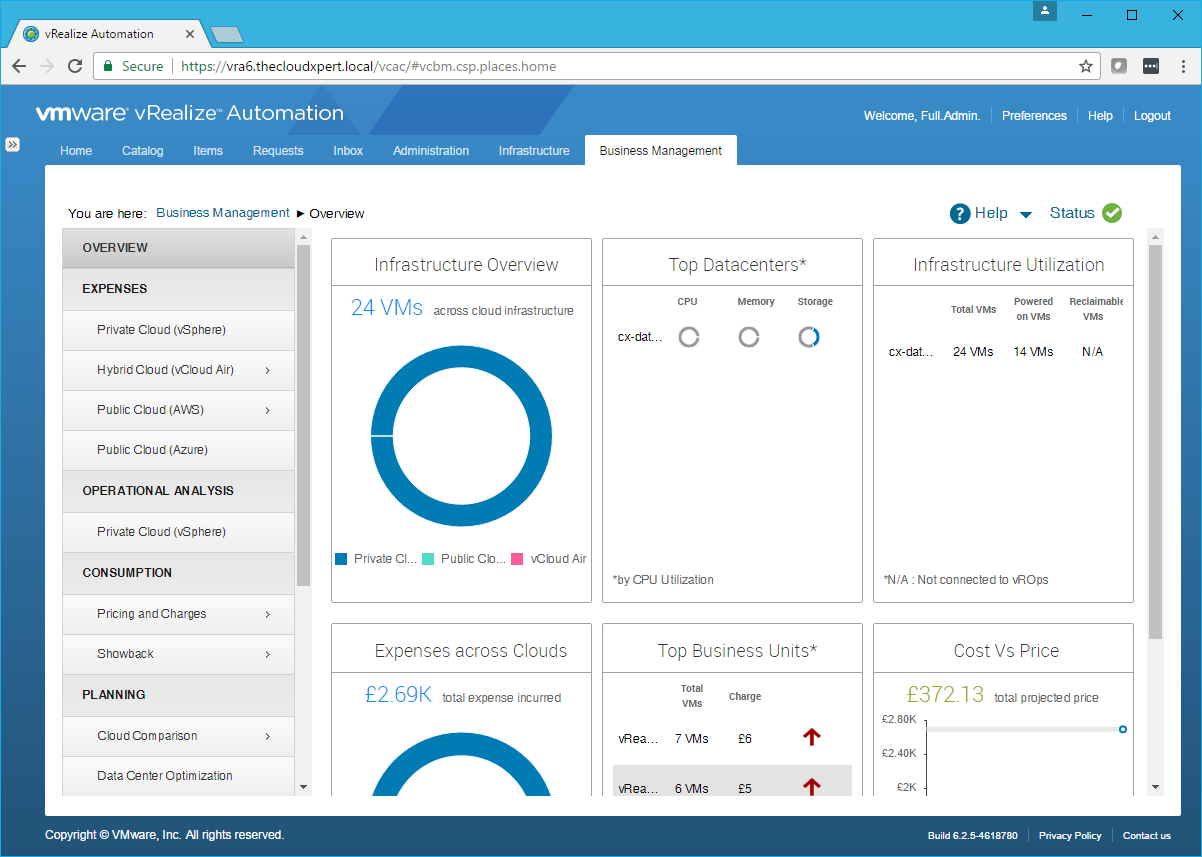
- Click Private Cloud (vSphere).
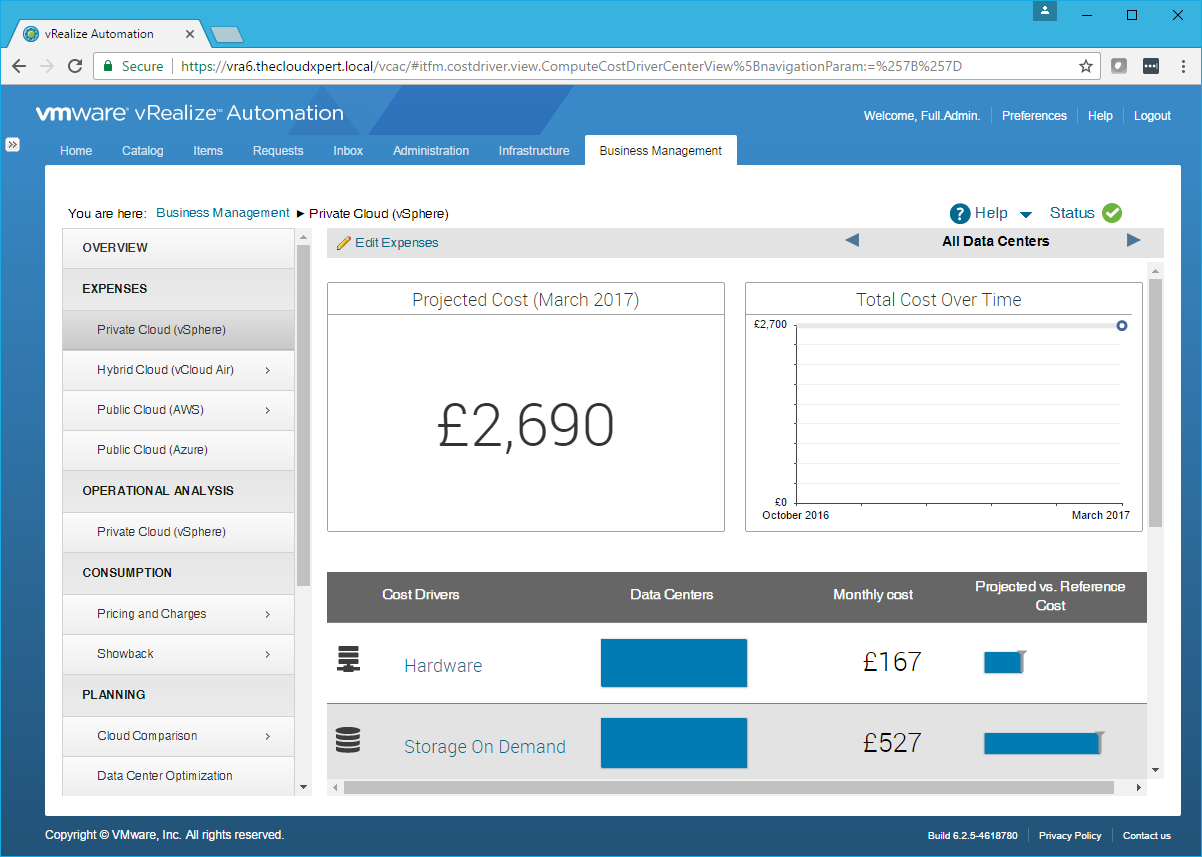
- Click Edit Expenses.
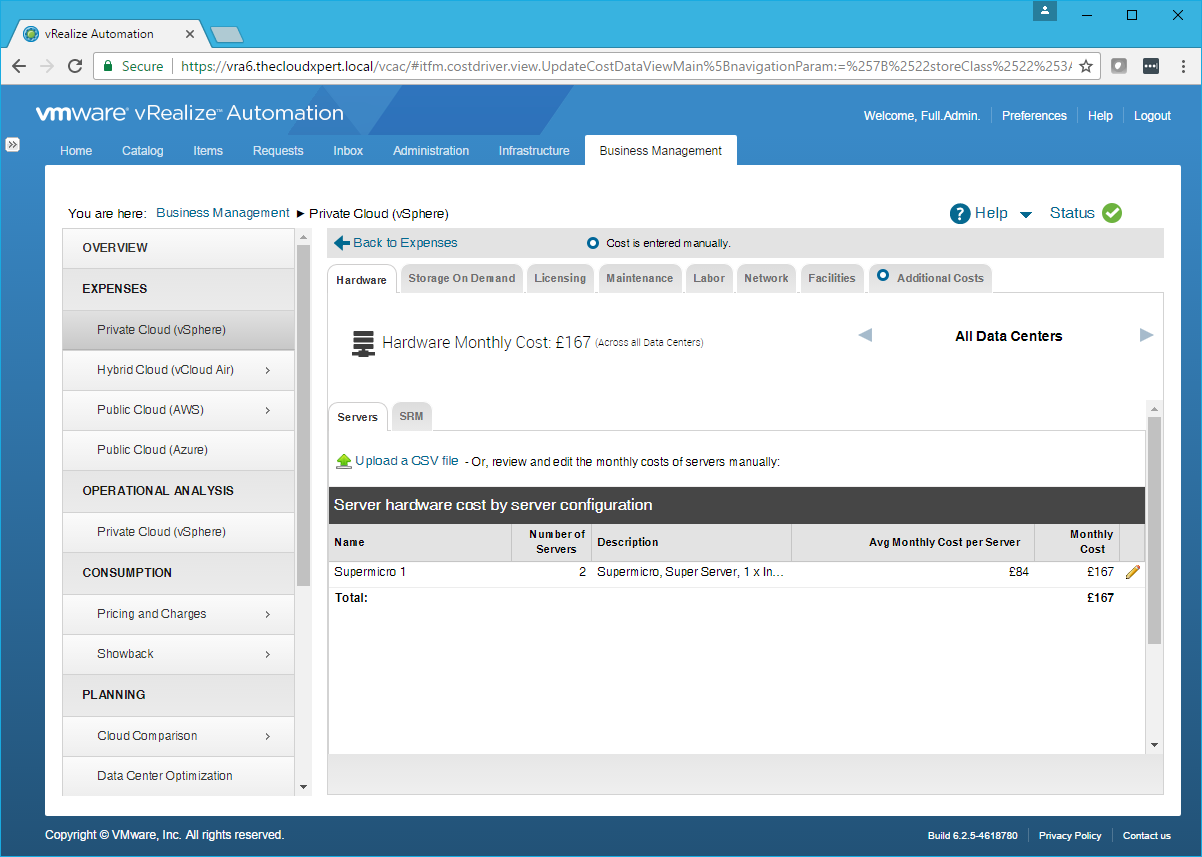
Assign cost for Operating System licensing
- Click the Licensing Tab.
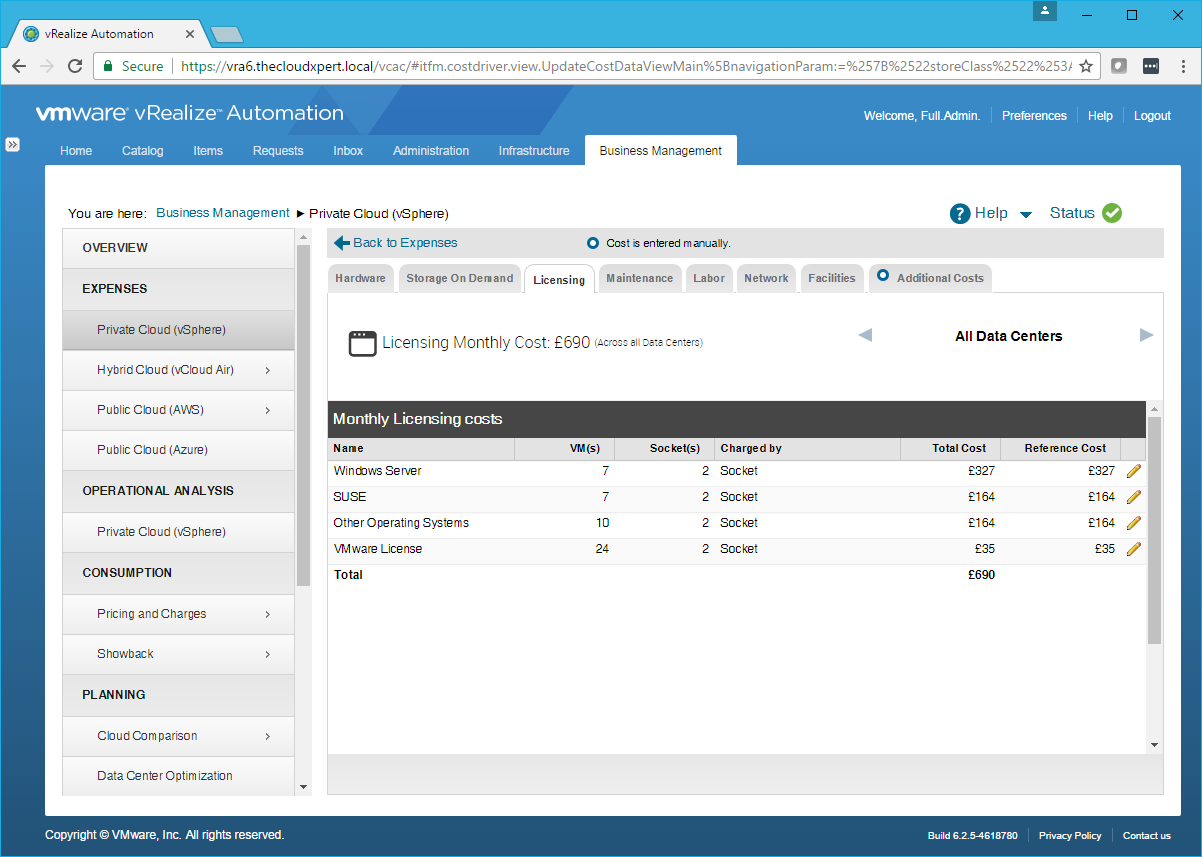
- Click Edit (pencil) next to the Licensing cost that needs changing.
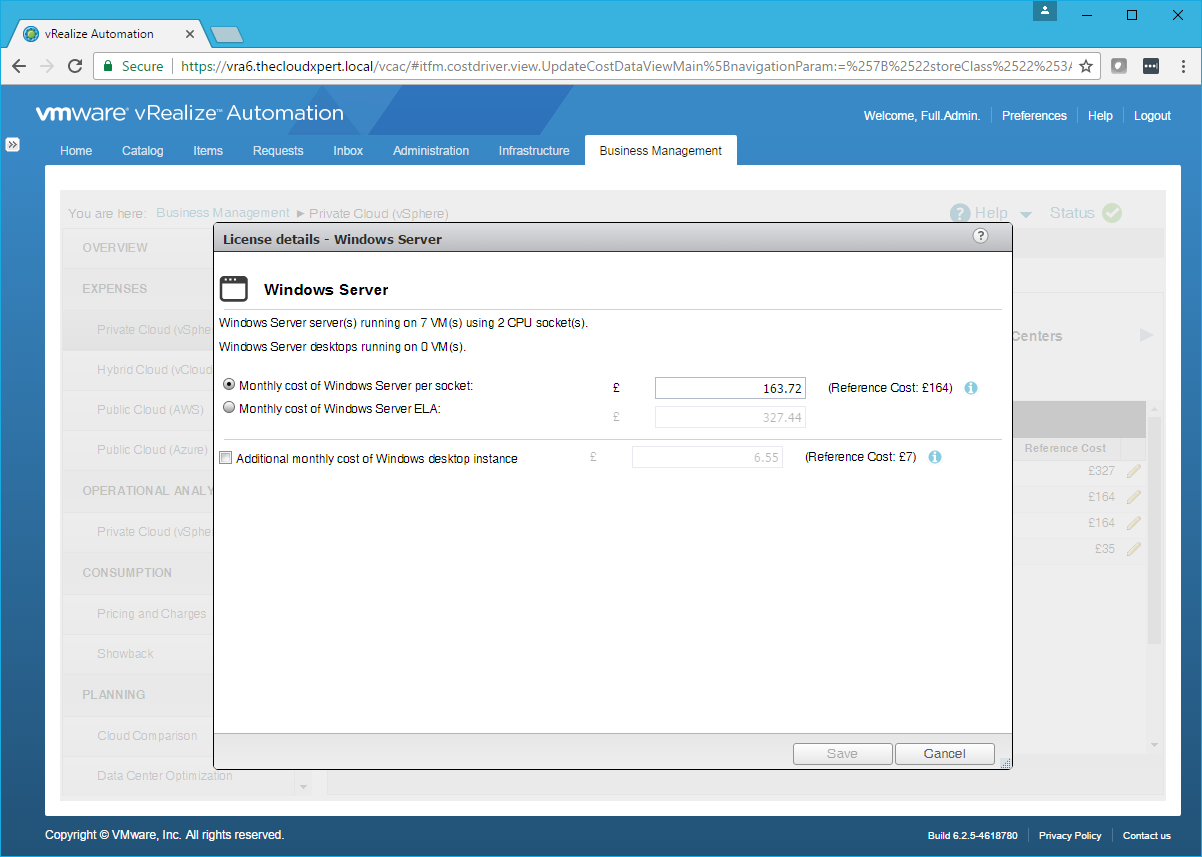
- Update the license cost as required, then click Save.
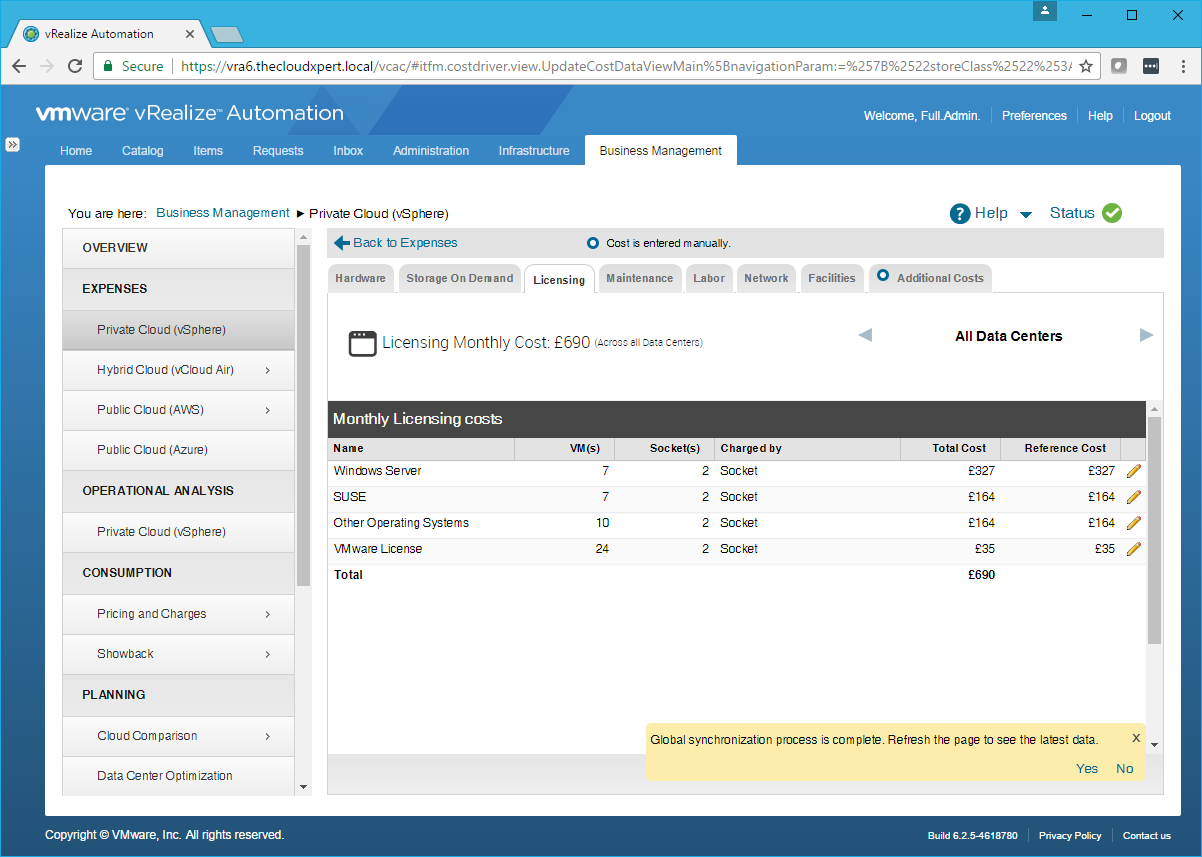
- (If prompted) Click Yes to refresh.
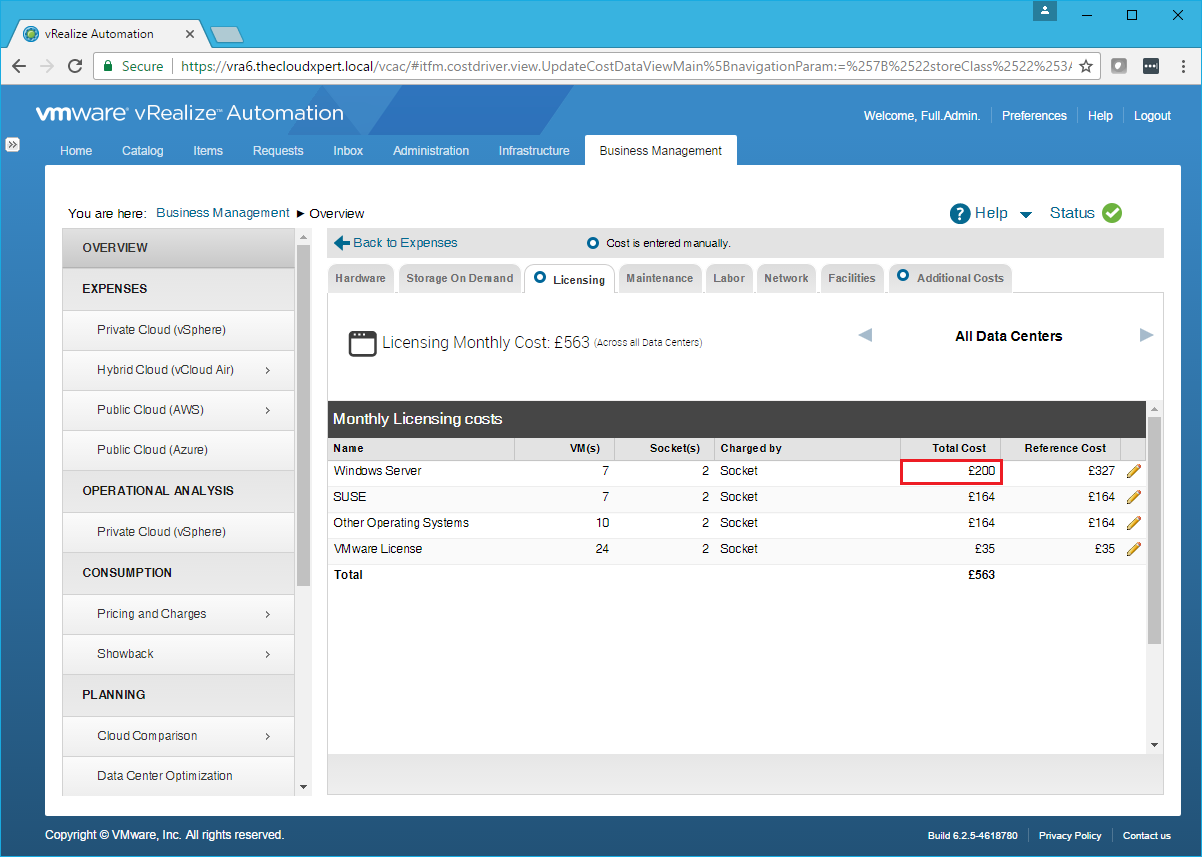
Note:
This changes the value for all Data Centres. If you wish to affect only one DC then you can choose the DC by clicking < or >.
Edit cost for server Hardware
- Click the Hardware Tab.
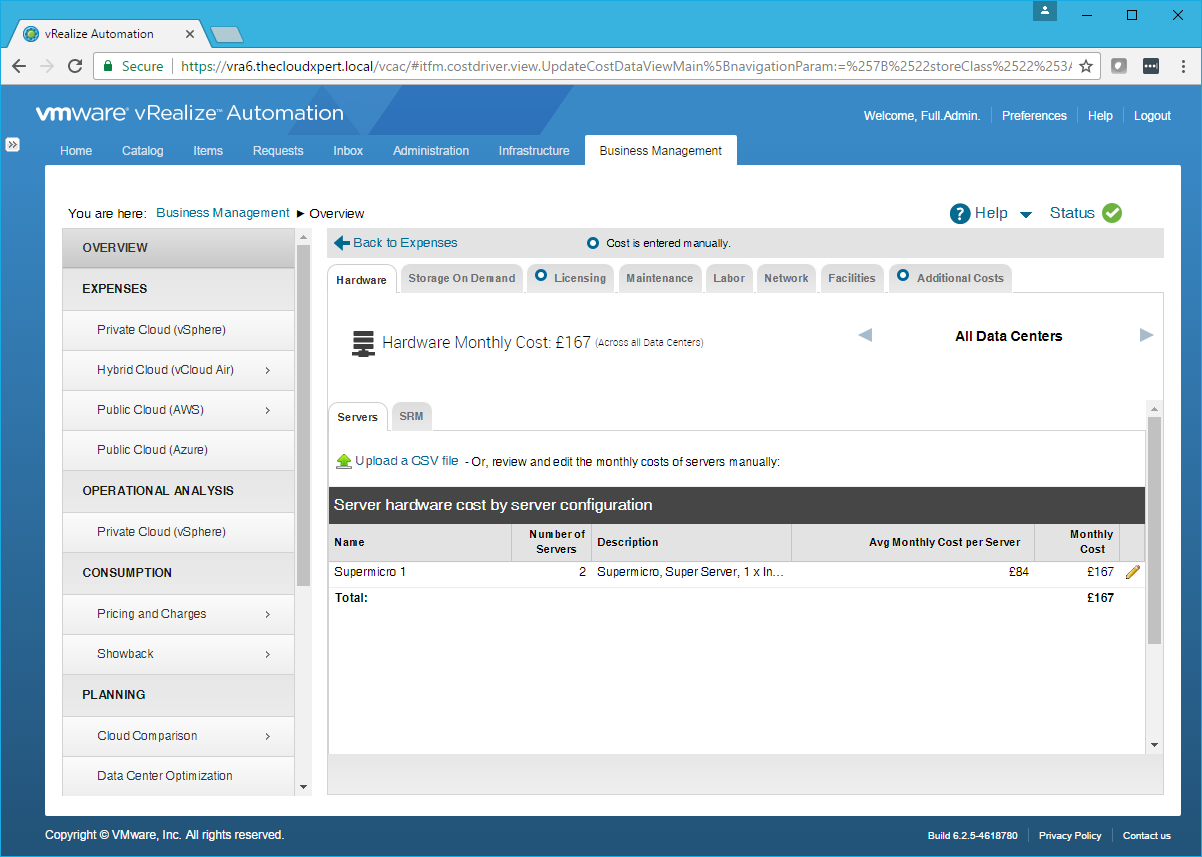
- Click Edit.
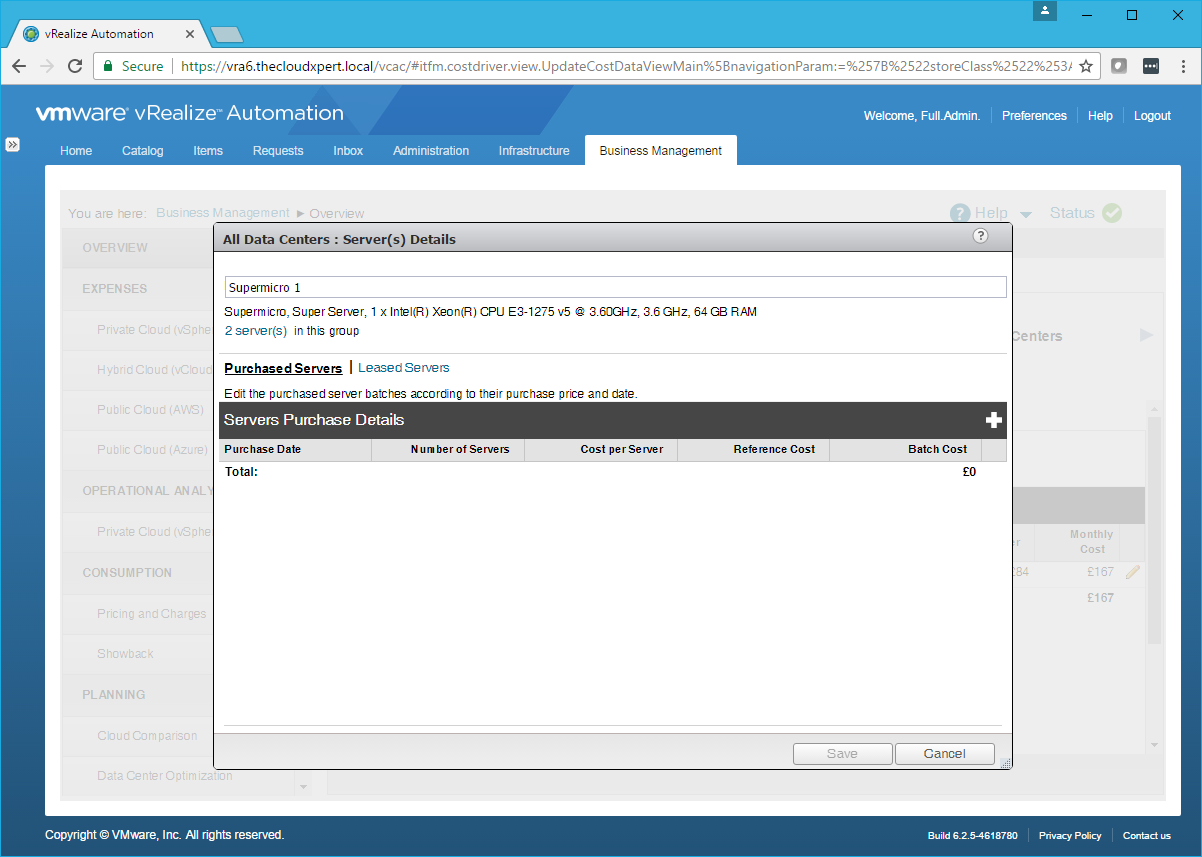
- To enter CAPEX cost of hardware, click Purchased Servers and then click Add(+).
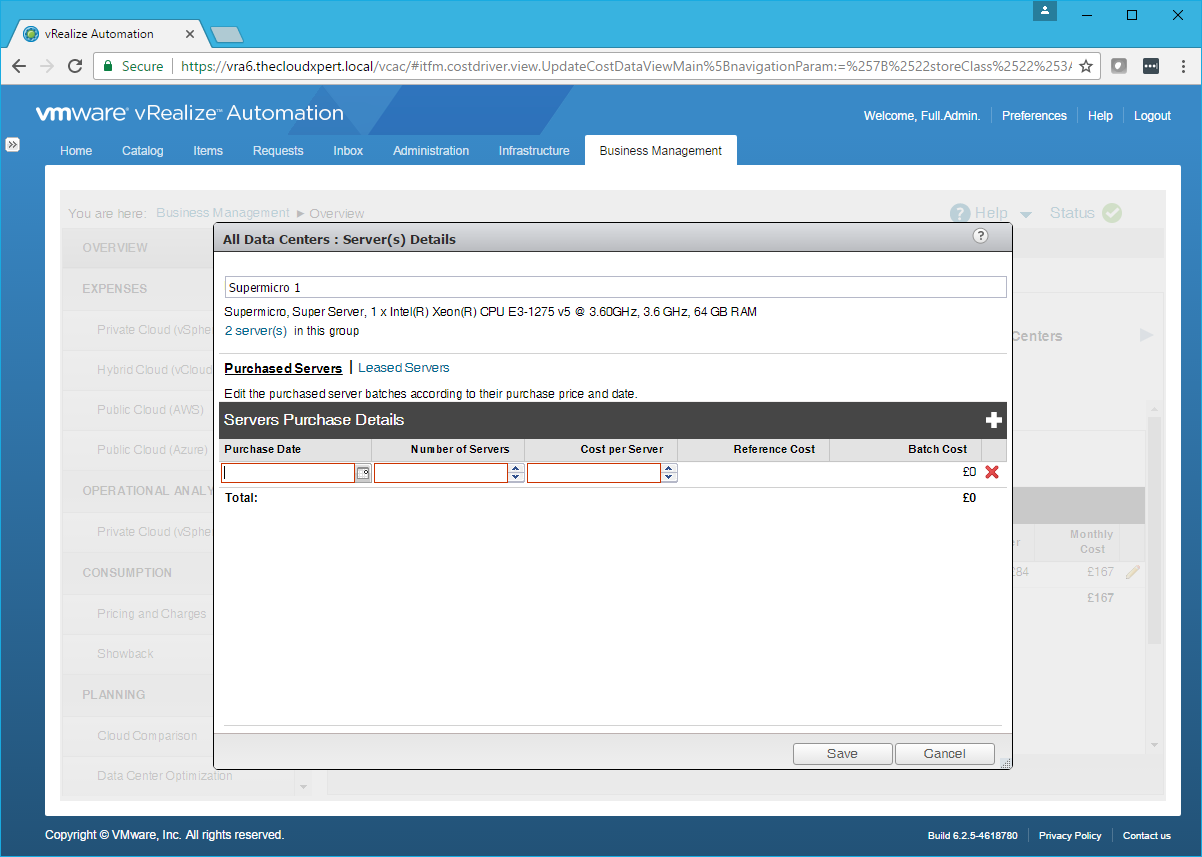
- Select the Purchase Date, type the Number of Servers and Cost Per Server.
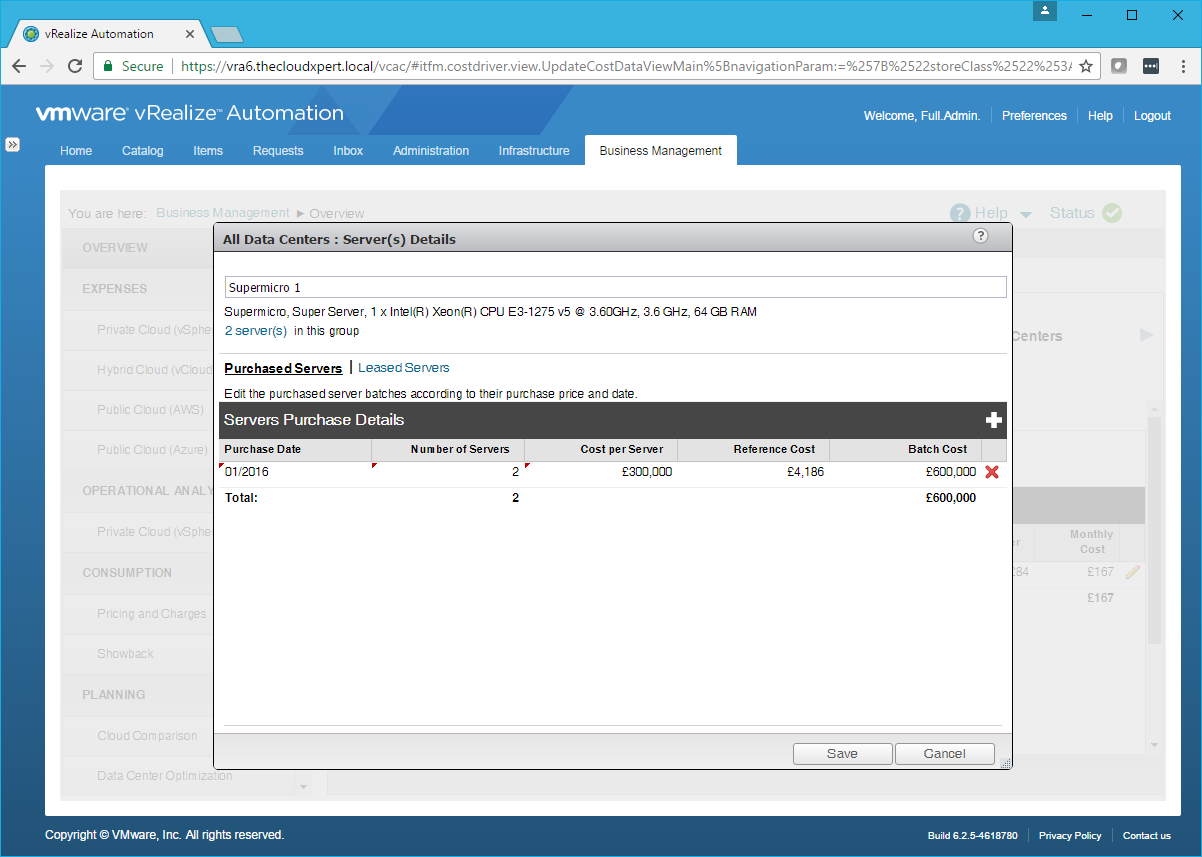
- Click Save.
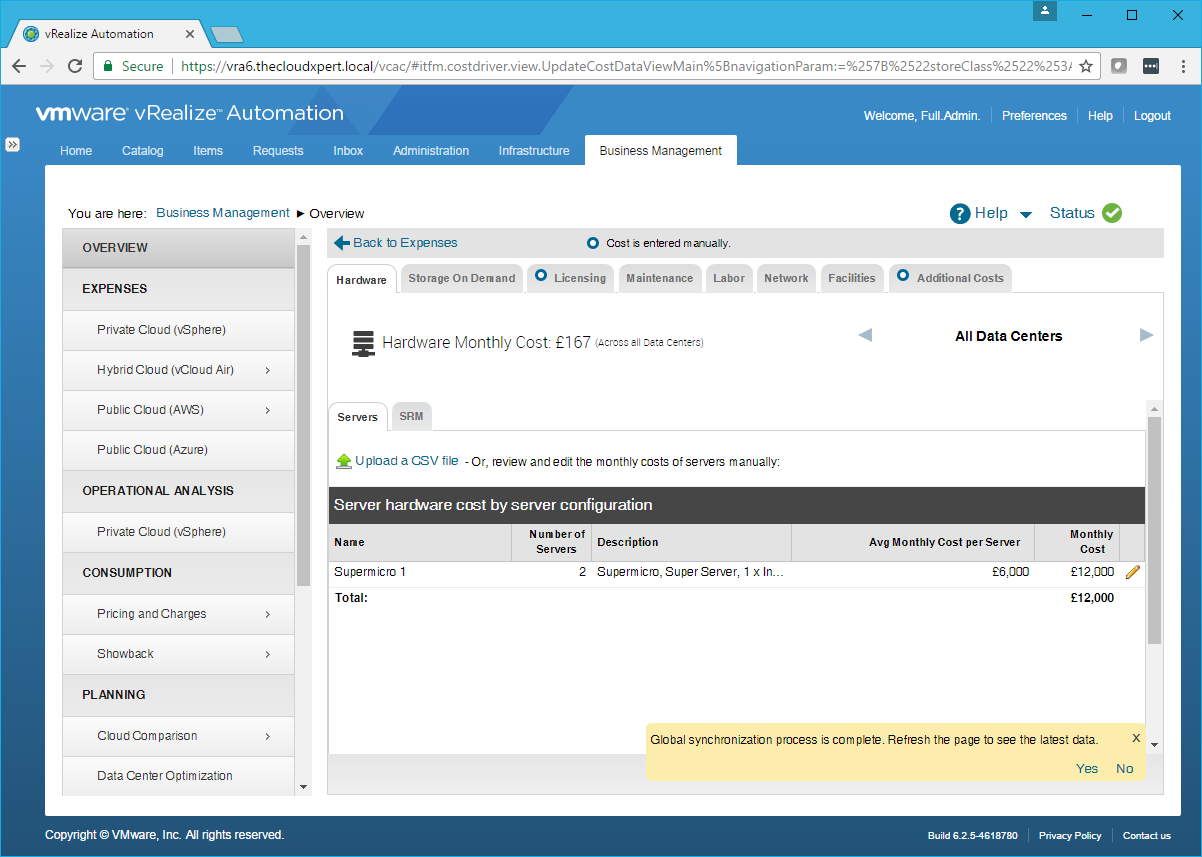
(If prompted) Click Yes to refresh.
To enter OPEX cost of hardware, click Leased Servers.
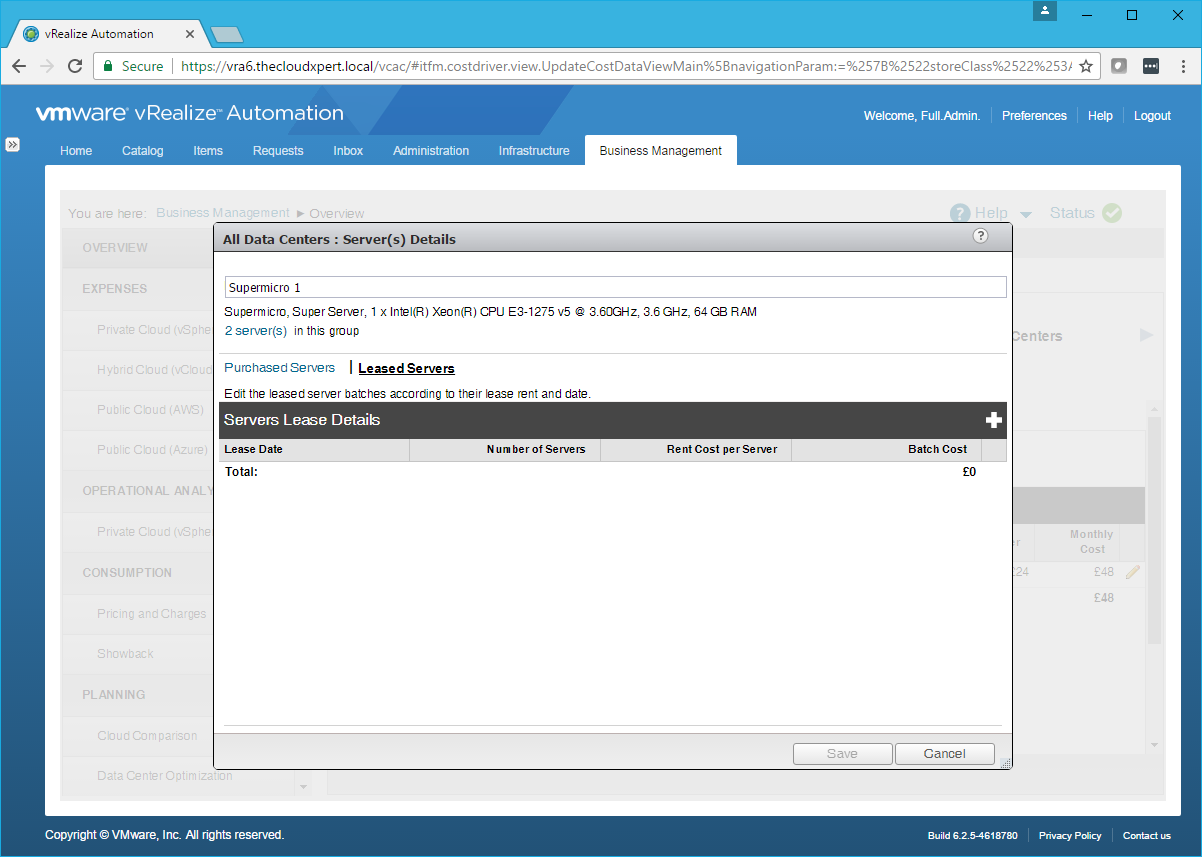
- Click Add (+).
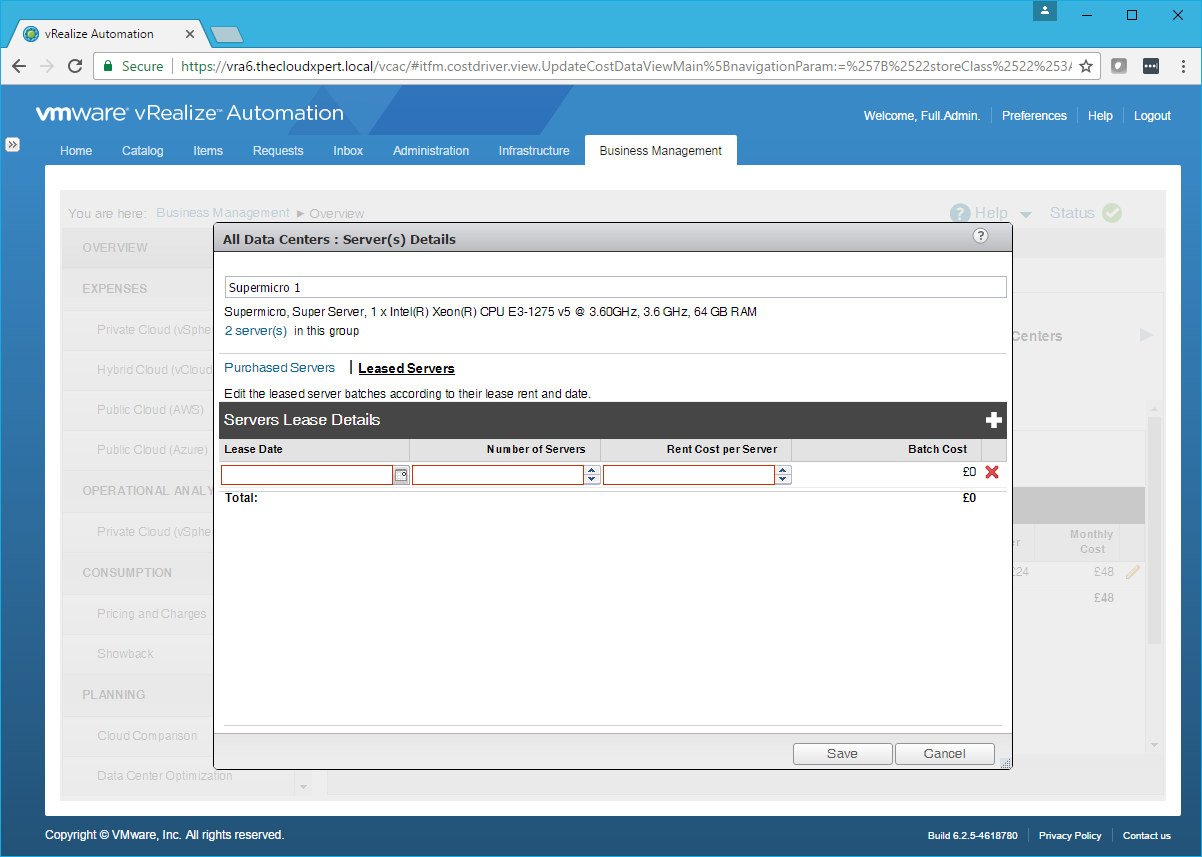
- Select the Lease Date and then type the Number of Servers and the Rent Cost per Server.
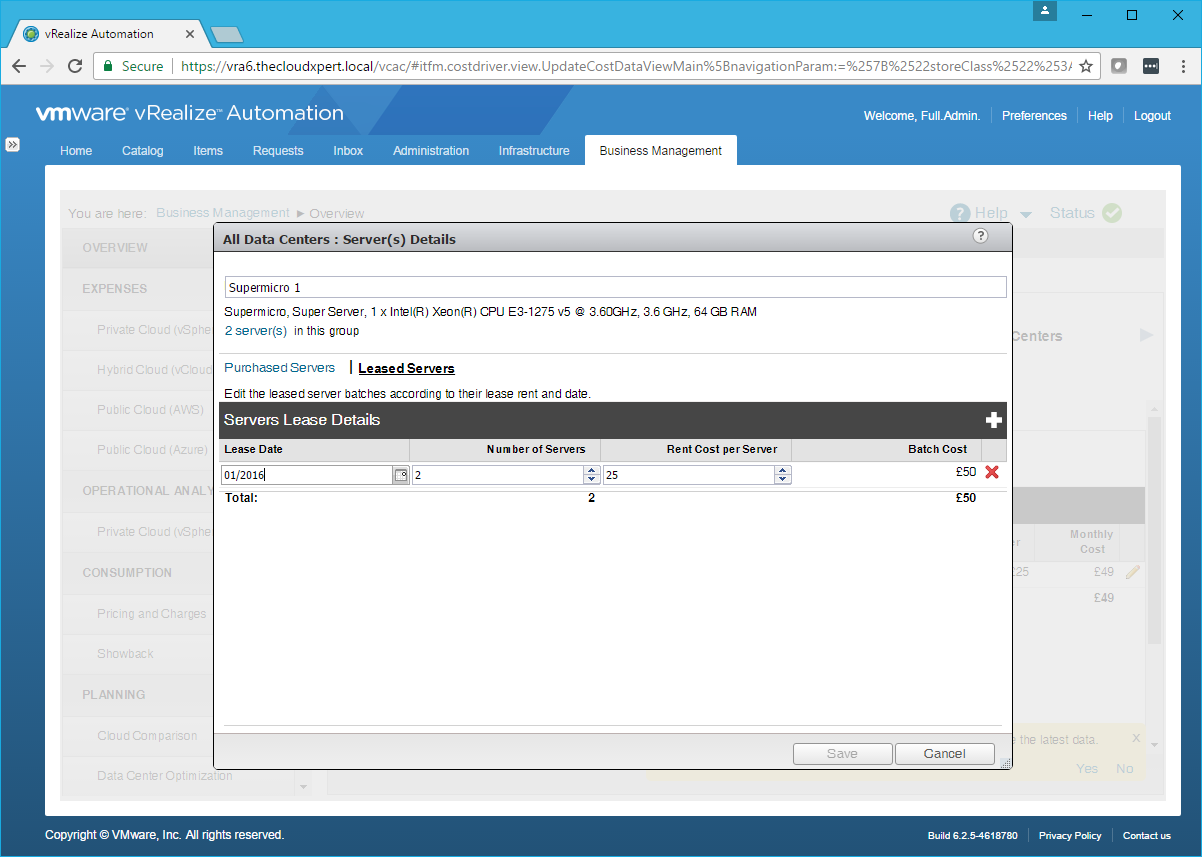
- Click Save.
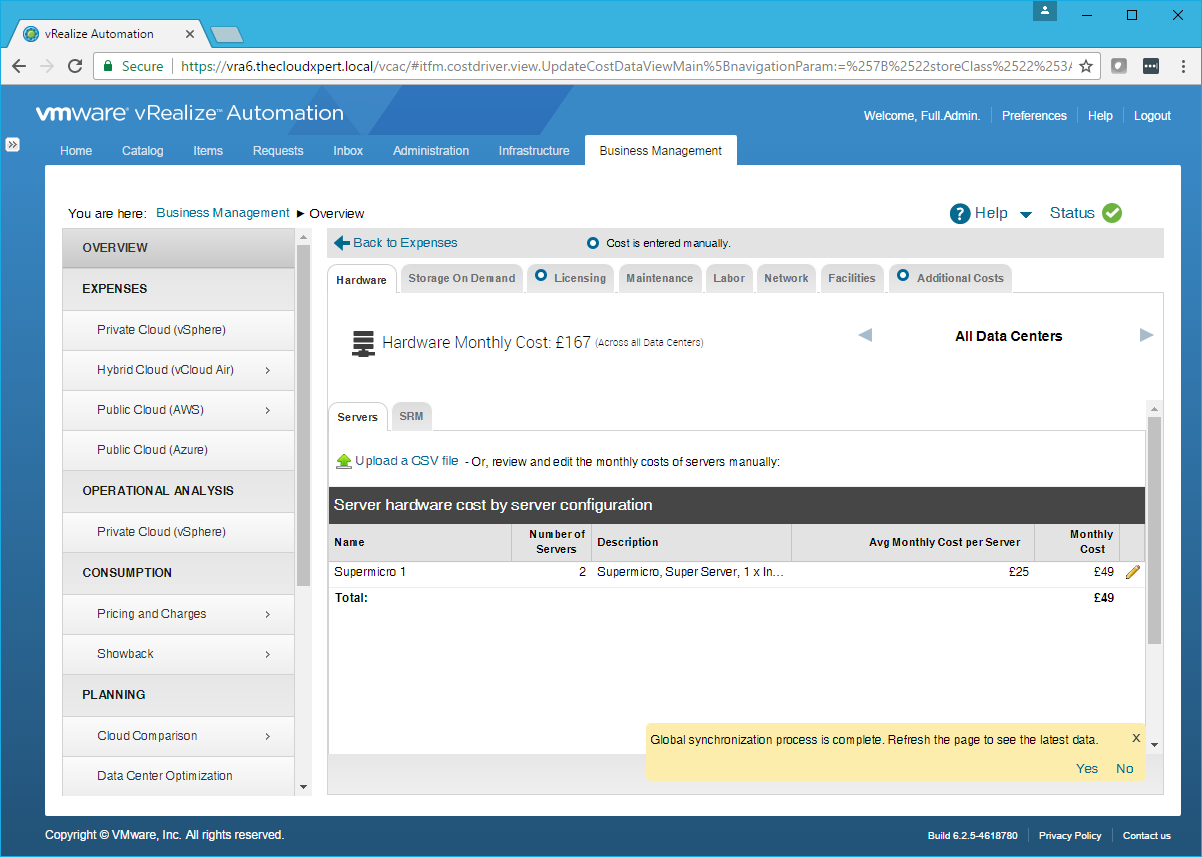
- (If prompted) Click Yes to refresh.
Edit cost for Storage
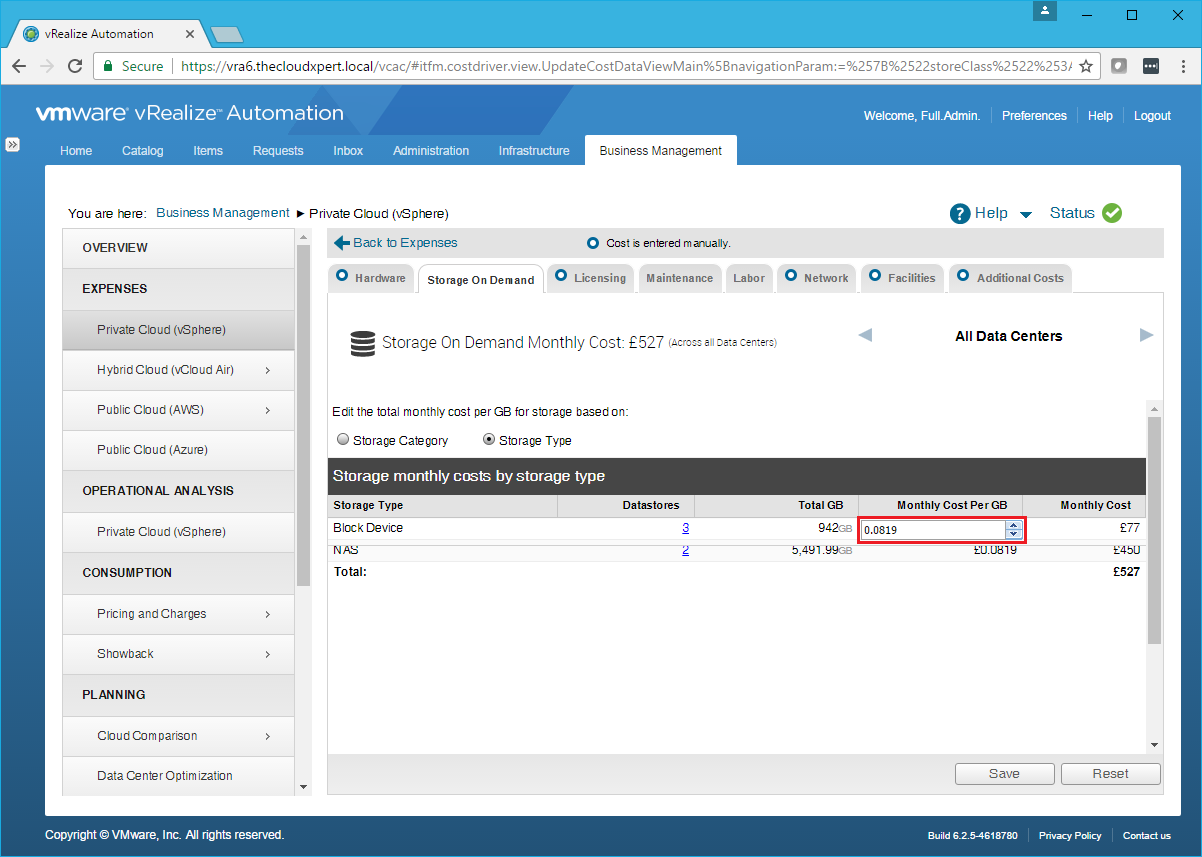
- Click the Storage On Demand tab.
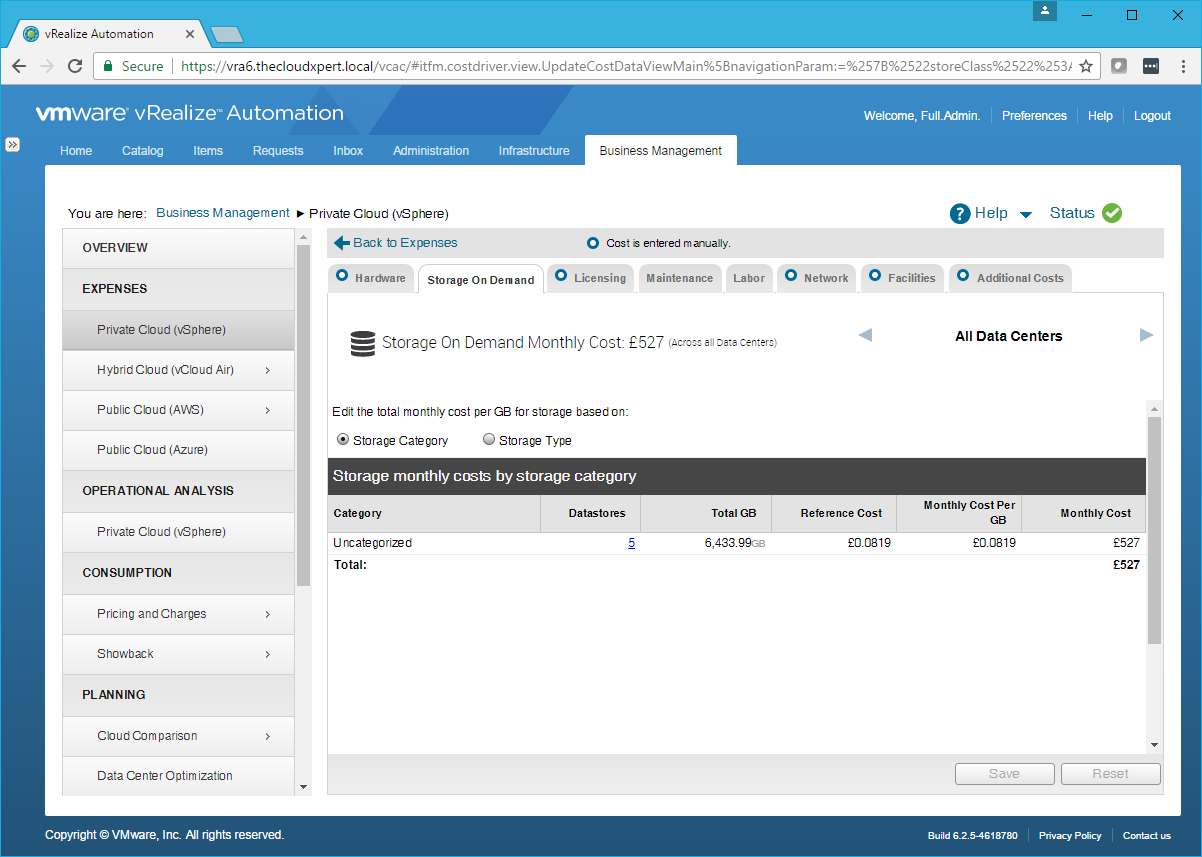
- For price per GB based on Storage Category, select the Storage Category option and update the Monthly Cost Per GB value.
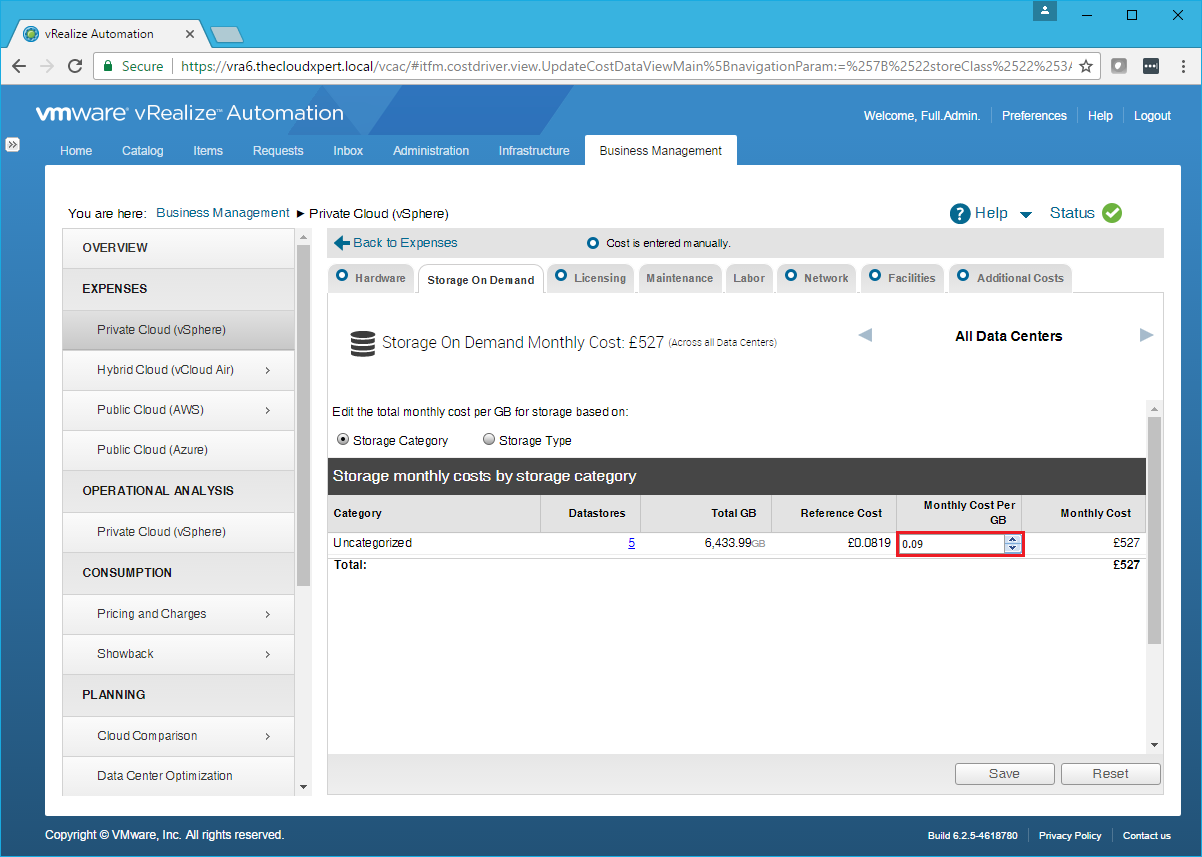
- For price per GB based on storage type, select the Storage Type option, update the Monthly Cost Per GB.
Edit cost for Network
- Click the Network Tab.
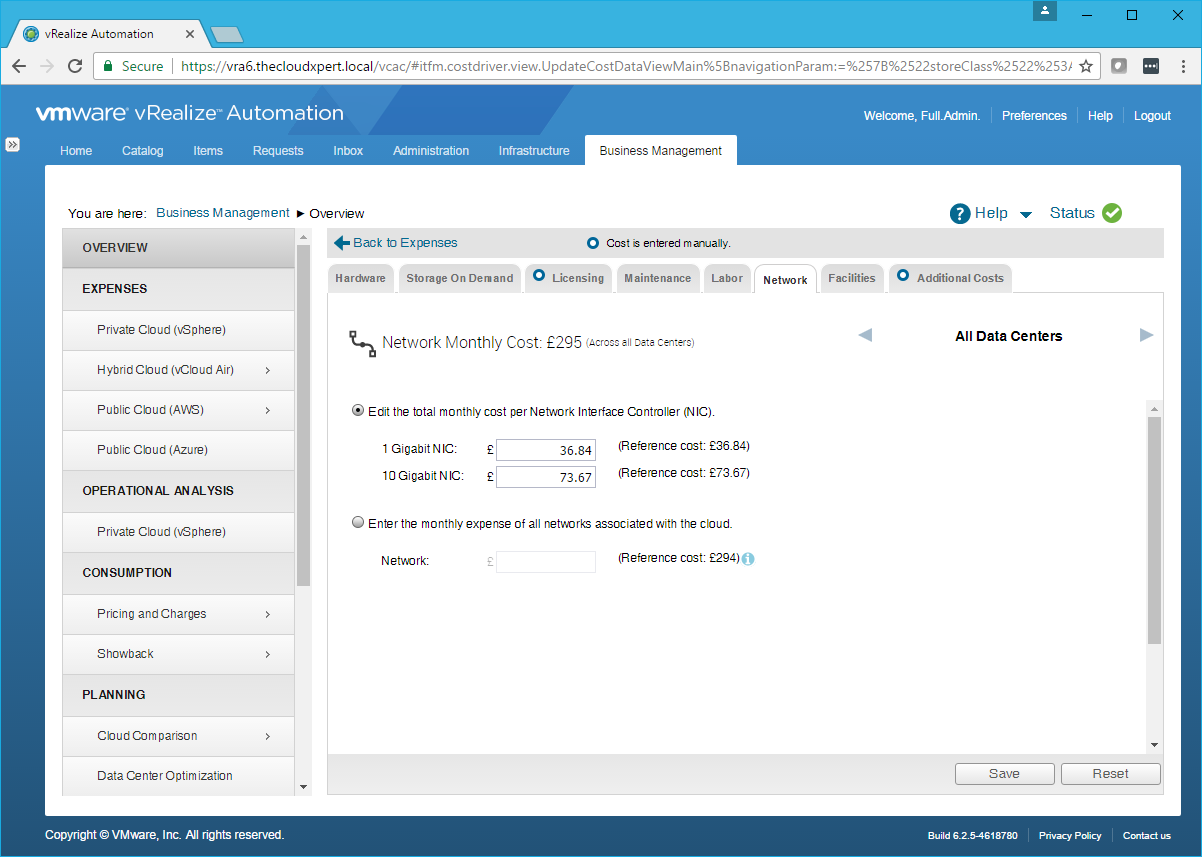
- For price per 1GbE/10GbE ensure that the Edit the total monthly cost per Network Interface Card (NIC) option is selected and then enter the new values for 1GbE and 10GbE.
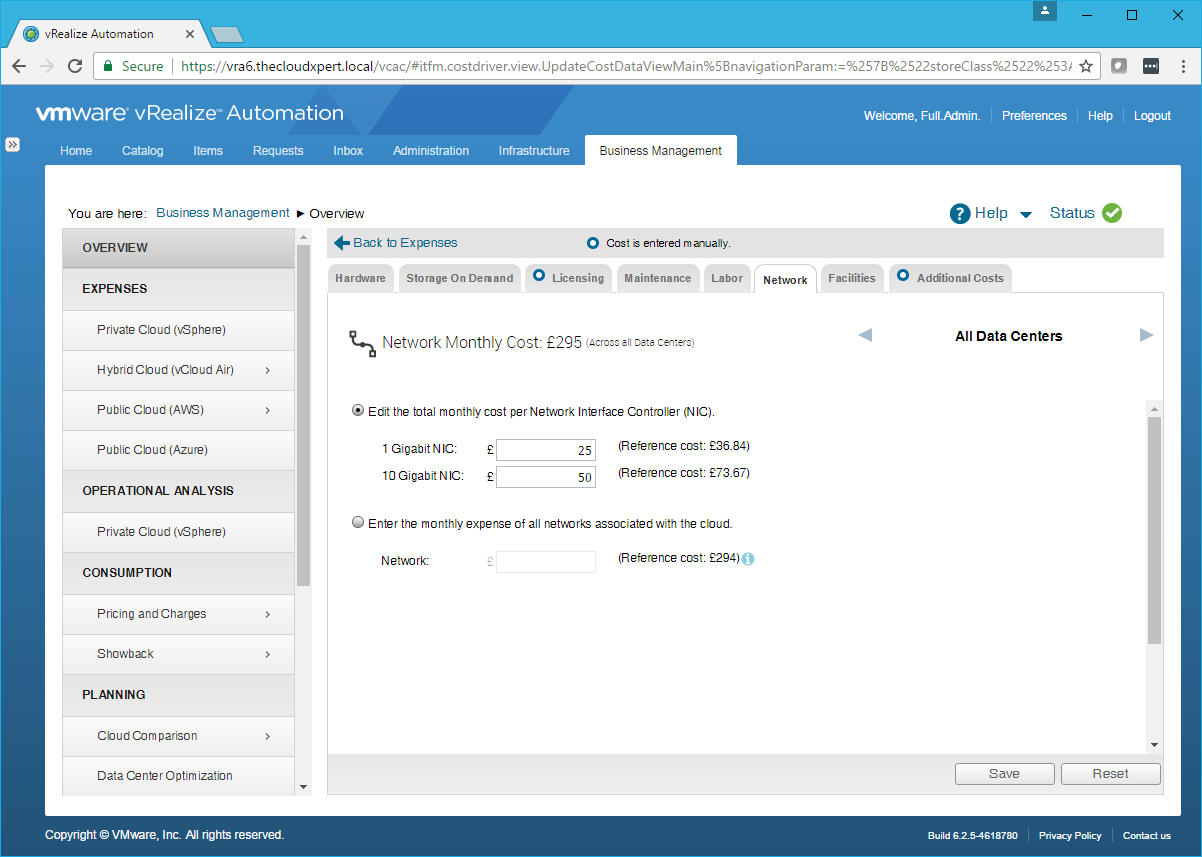
- Click Save.
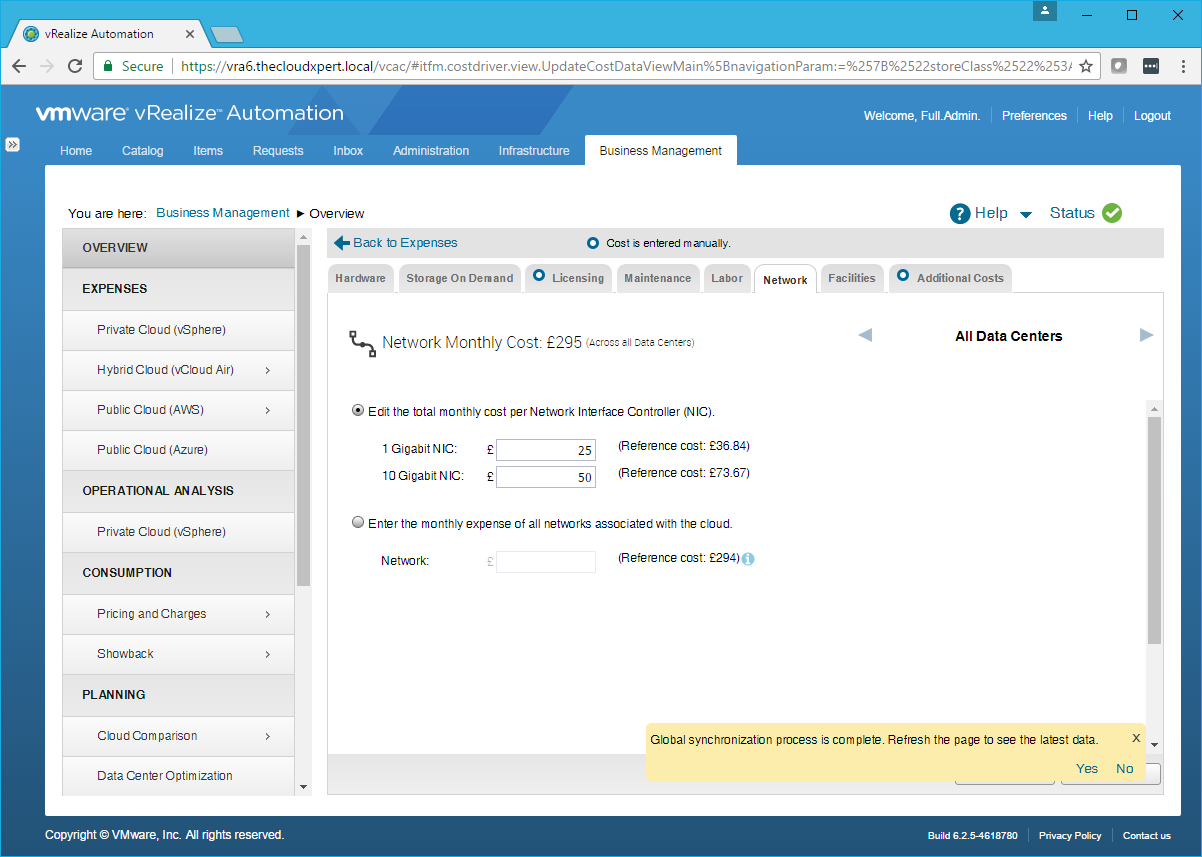
- (If prompted) Click Yes to refresh.
- To provide a Network cost, select the Enter the monthly expense of all networks associated with the cloud option.
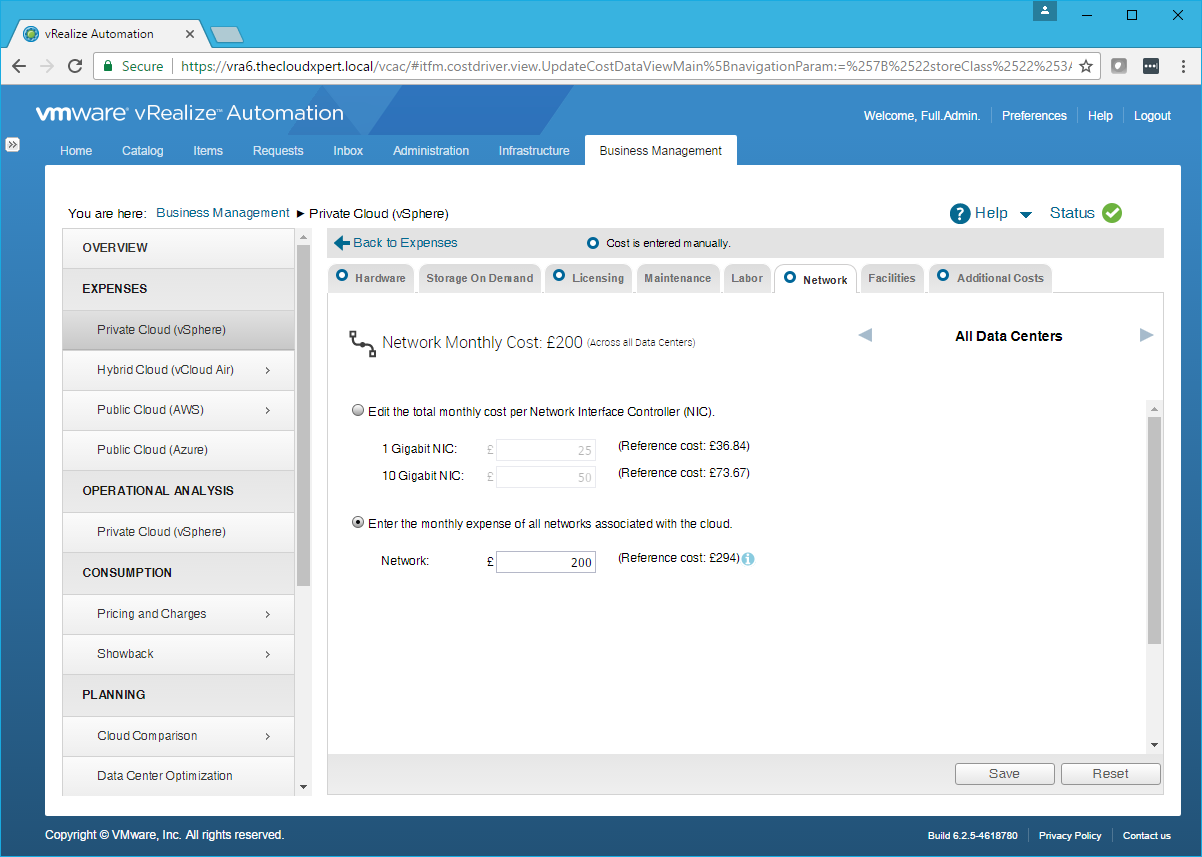
- Update the value within the Network textbox and click Save.
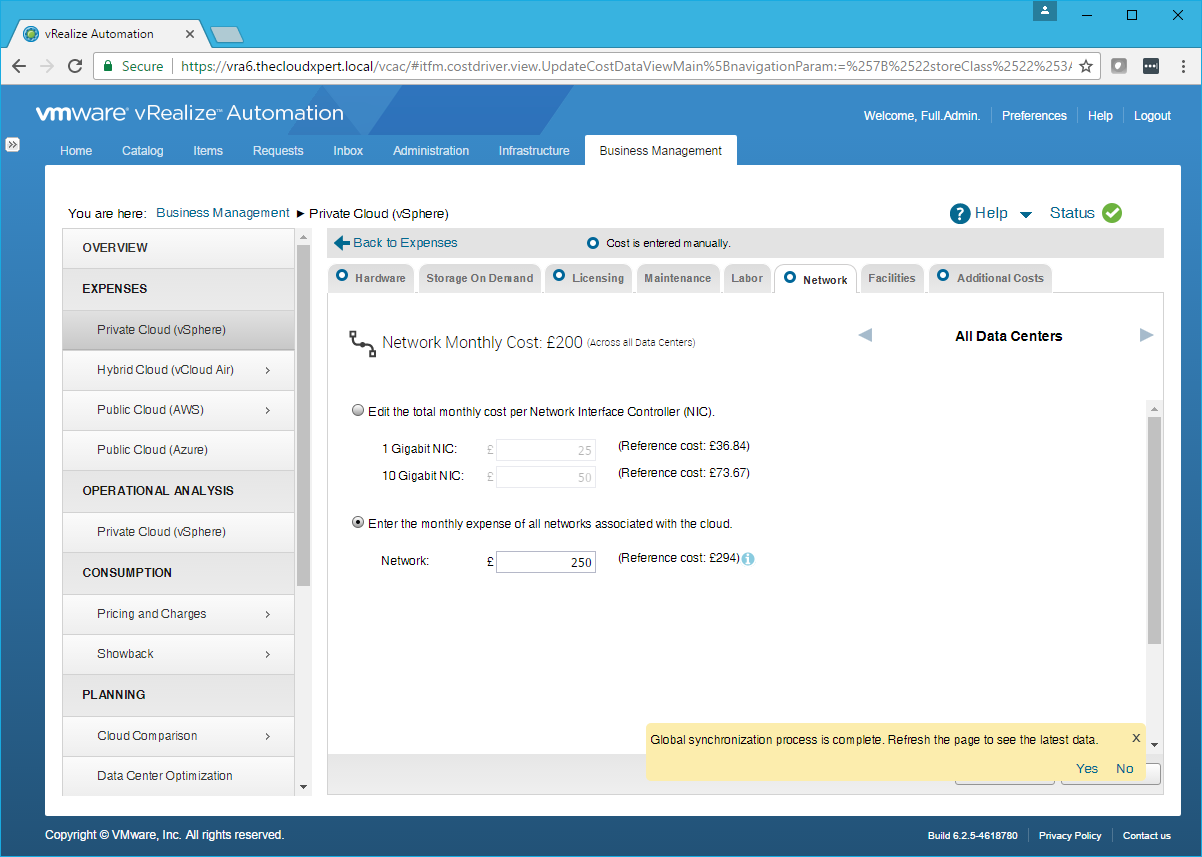
- (If prompted) Click Yes to refresh.
Create a monthly cost for Facilities and Maintenance
- Click the Facilities Tab.
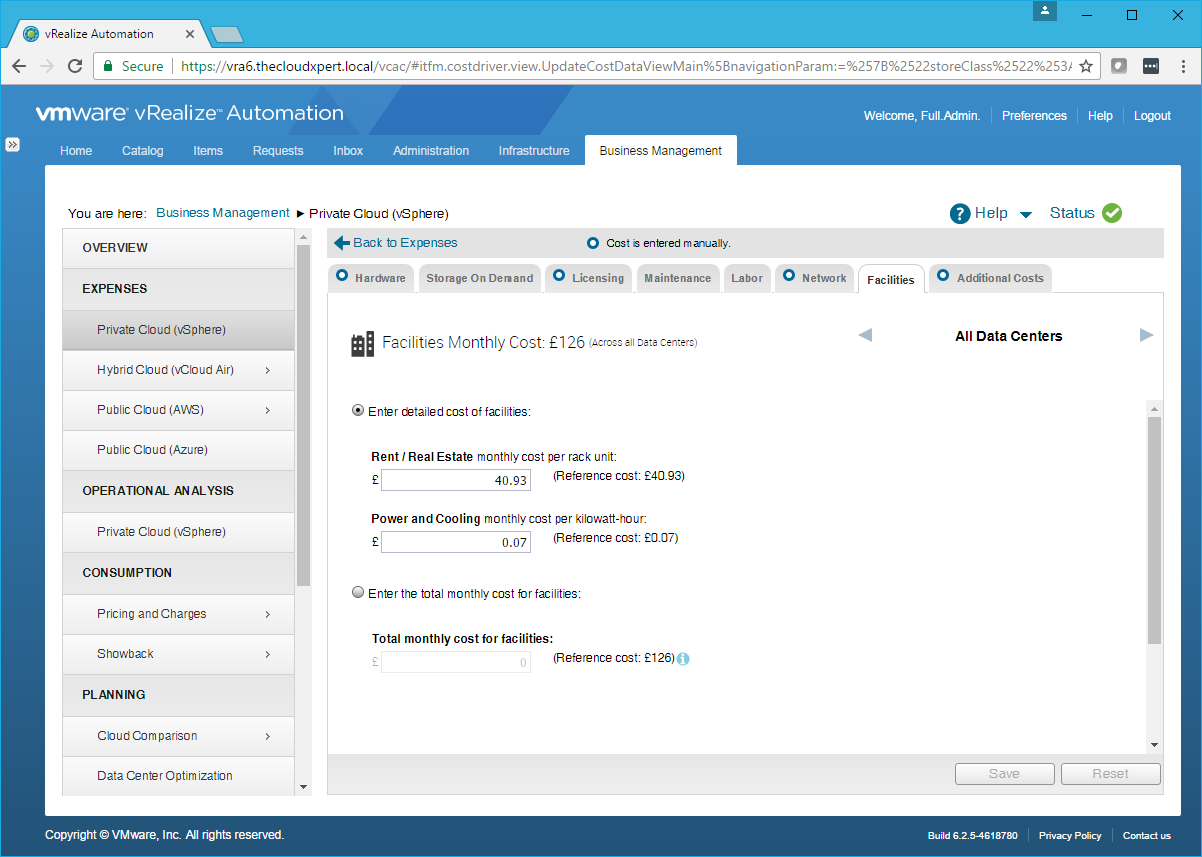
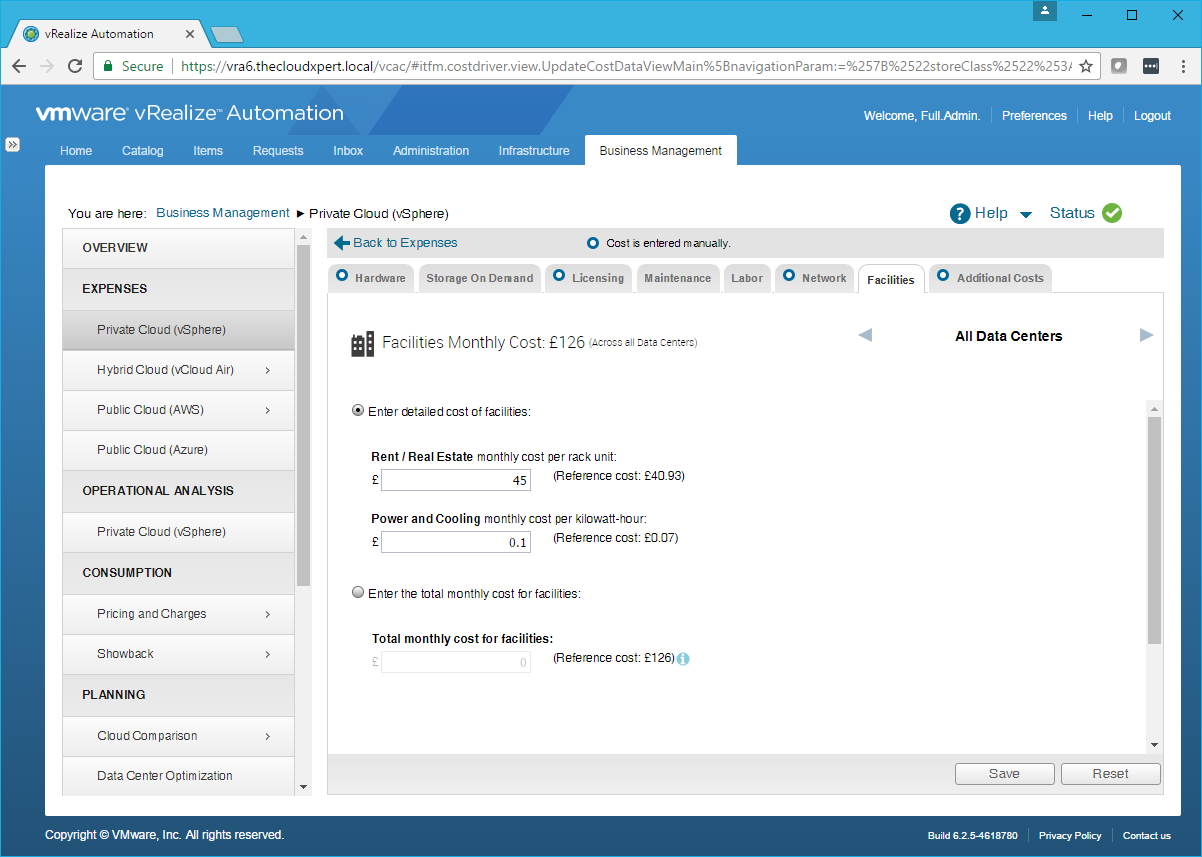
- Select the Enter detailed cost of facilities option and then update the Rent/Real Estate and Power and Cooling text boxes.
Note:
You can also select the Enter the total monthly cost for facilities option, enter a cost into the Total monthly cost for facilities textbox.
- Click Save.
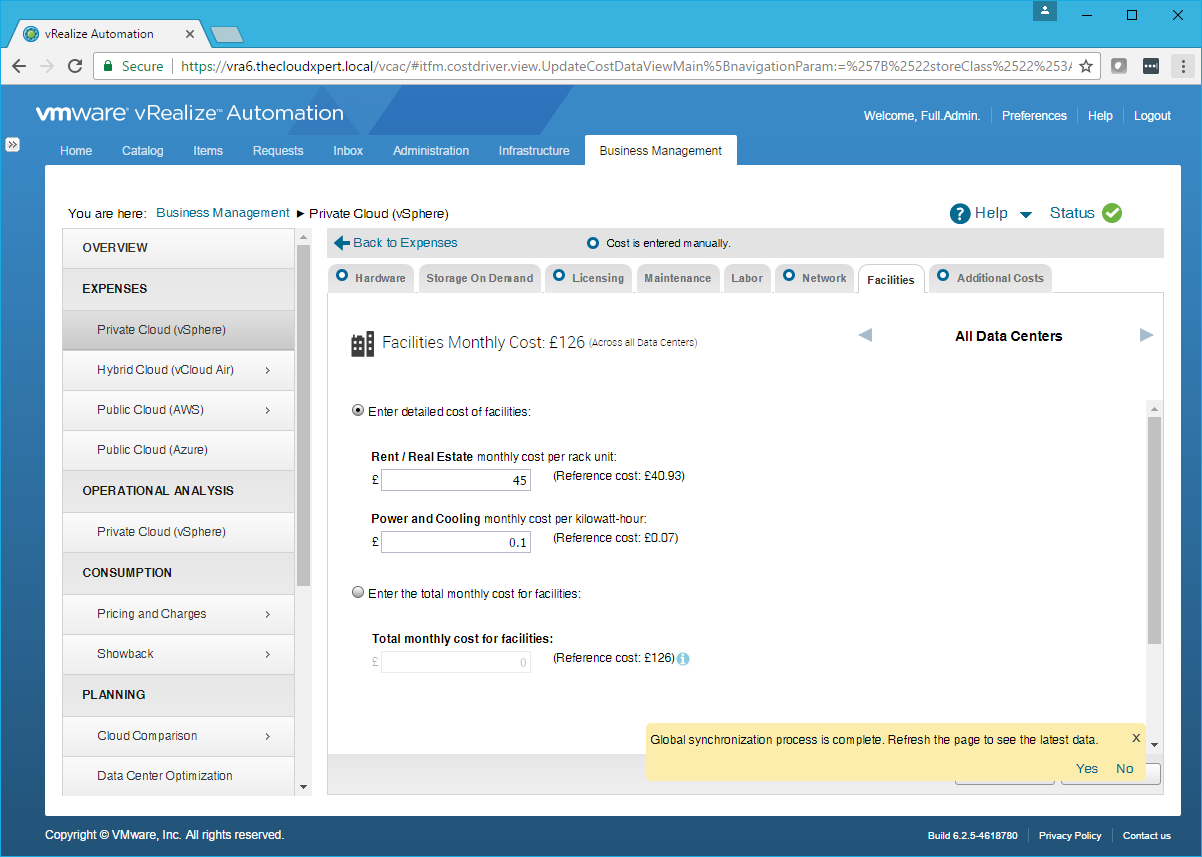
(If prompted) Click Yes to Refresh.
Click the Maintenance Tab.
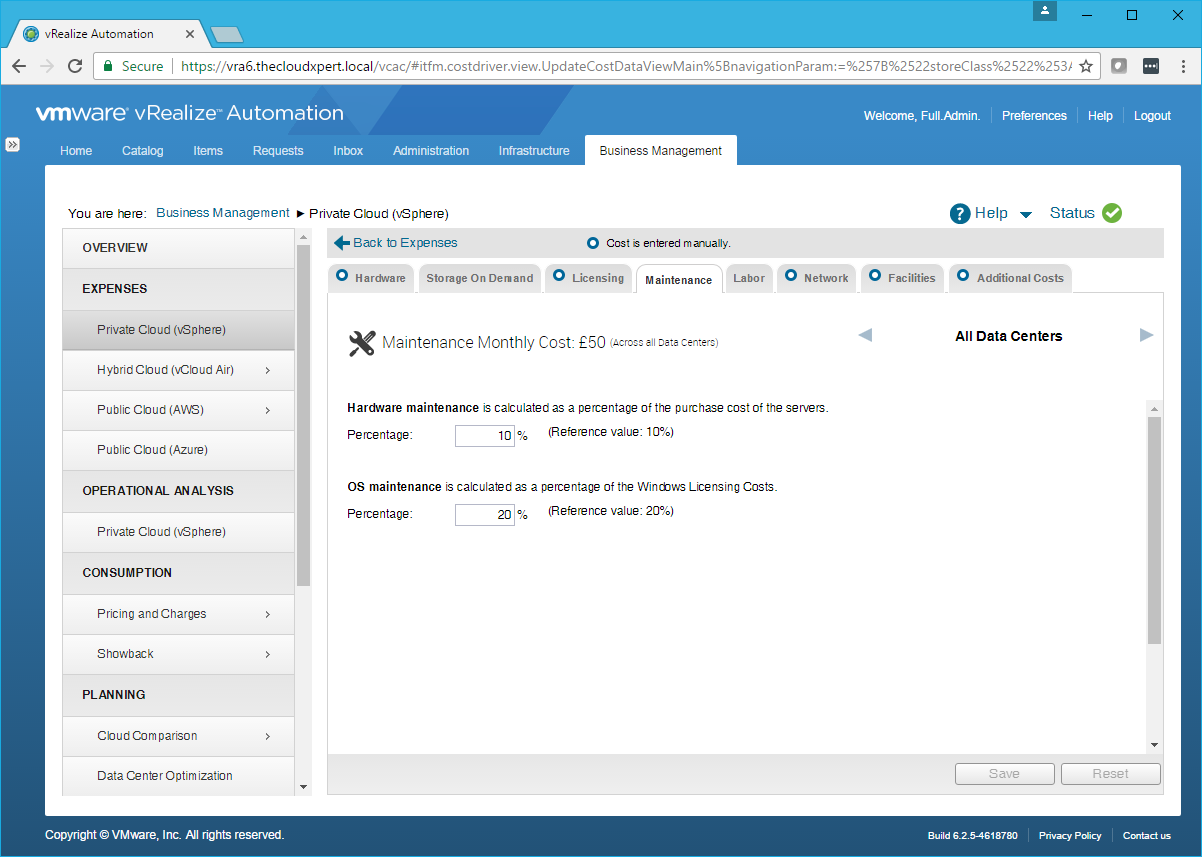
- (if required) Update the Hardware Maintenance and **OS Maintenance **percentages.
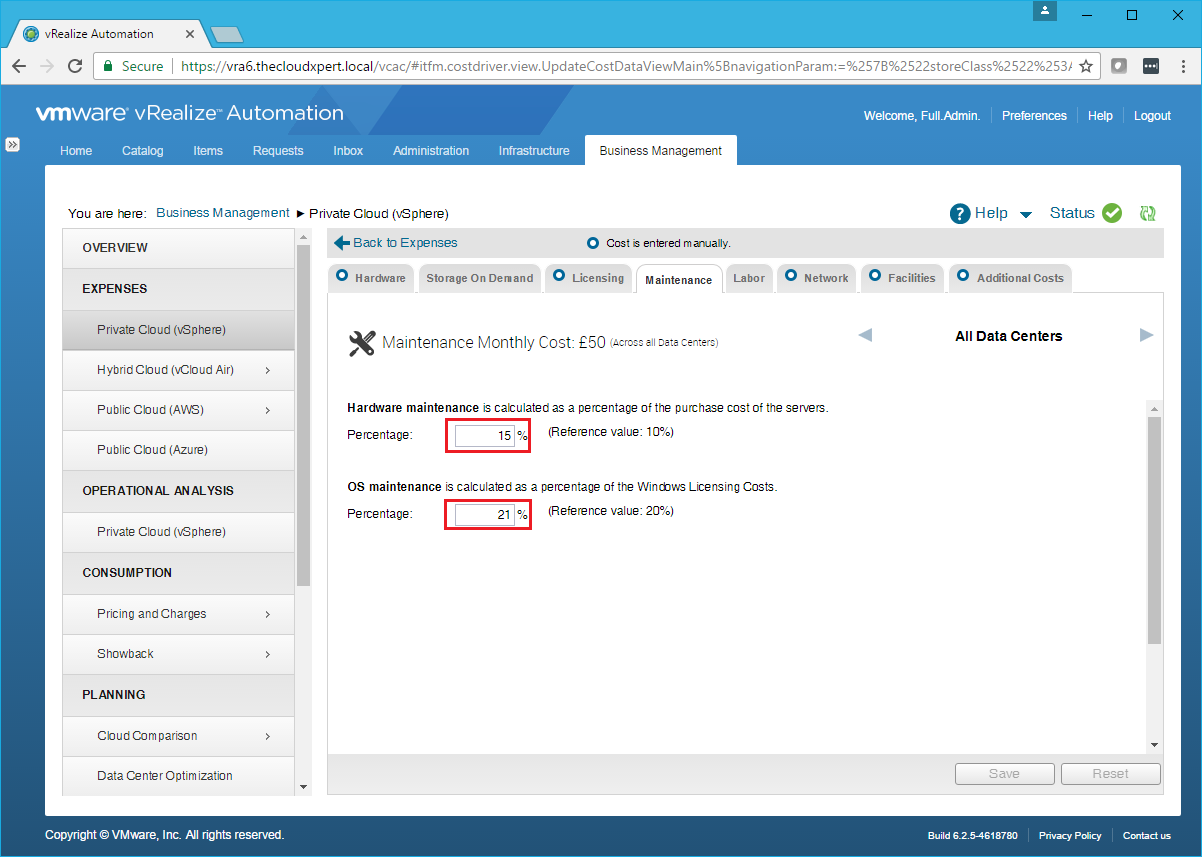
- Click Save and click Back to Expenses.
- If no other changes are required, click Logout.
Configure CPU and Memory utilization costs
- Navigate to the vRealize Tenant Automation Portal (
https://vra.fqdn/vcac)
- Login with a User with the Business Management Administrator role assigned.
- Click Business Management.
- Under Operational Analysis, click Private Cloud (vSphere)
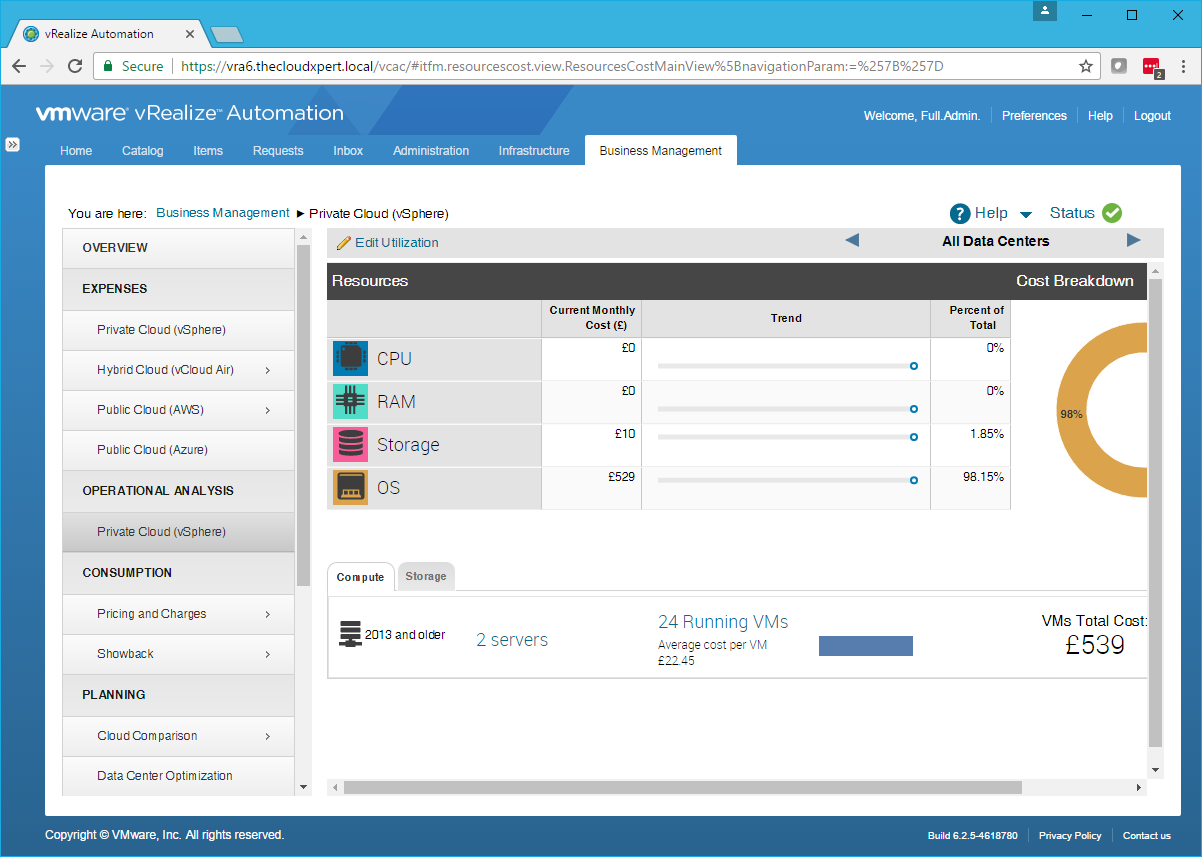
- Click Edit Utilization.
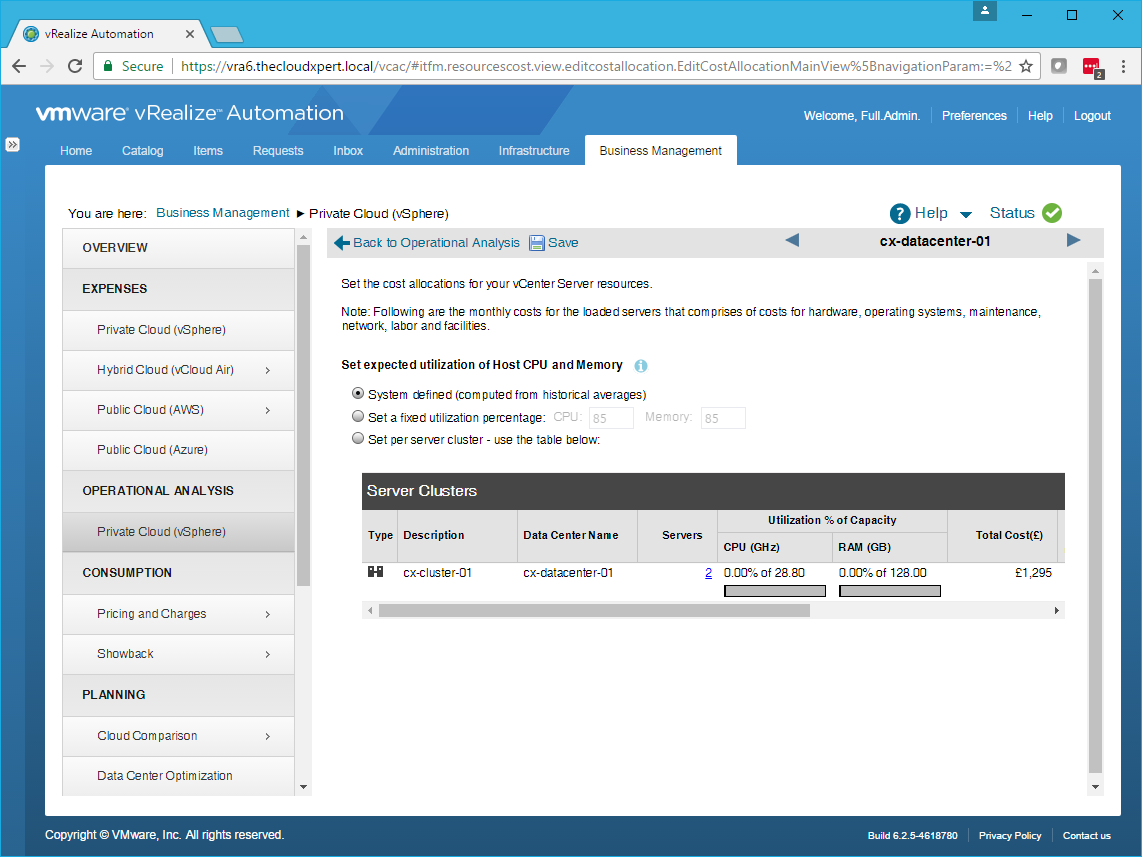
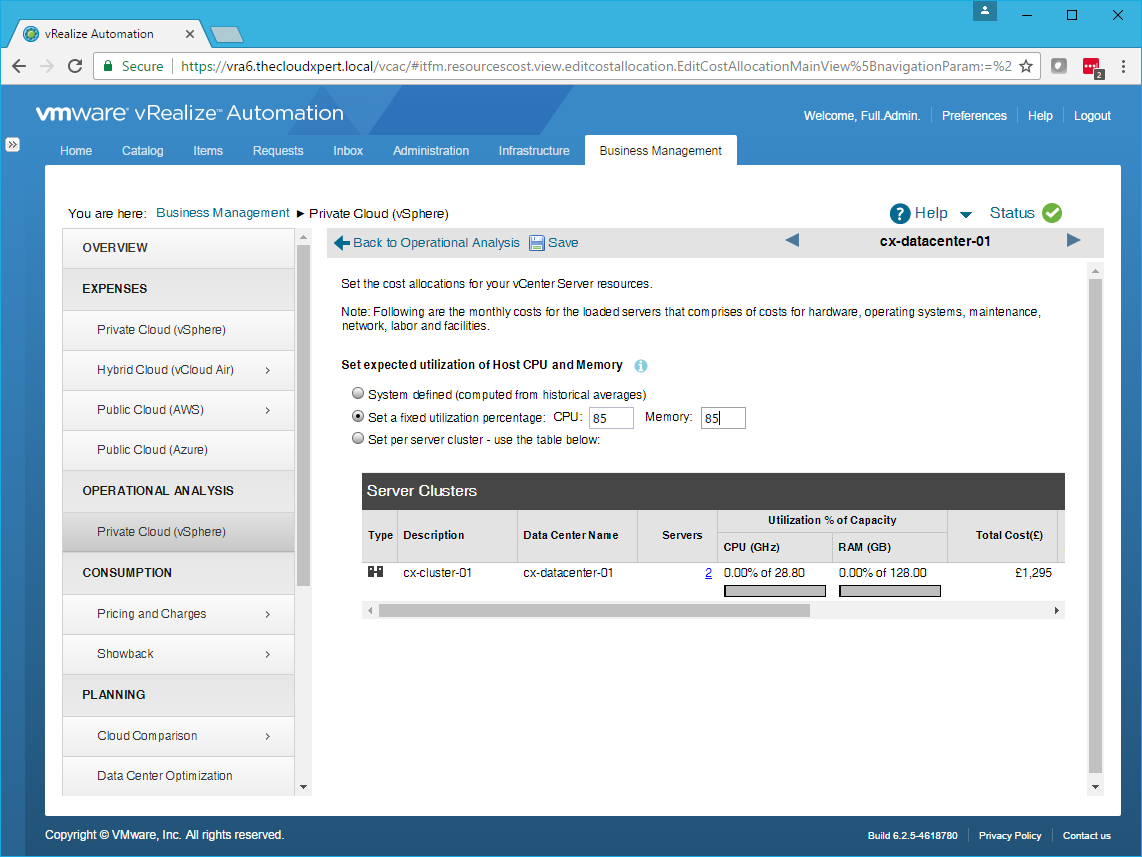
- Select the Set a fixed utilization percentage option and enter the values for CPU and Memory.
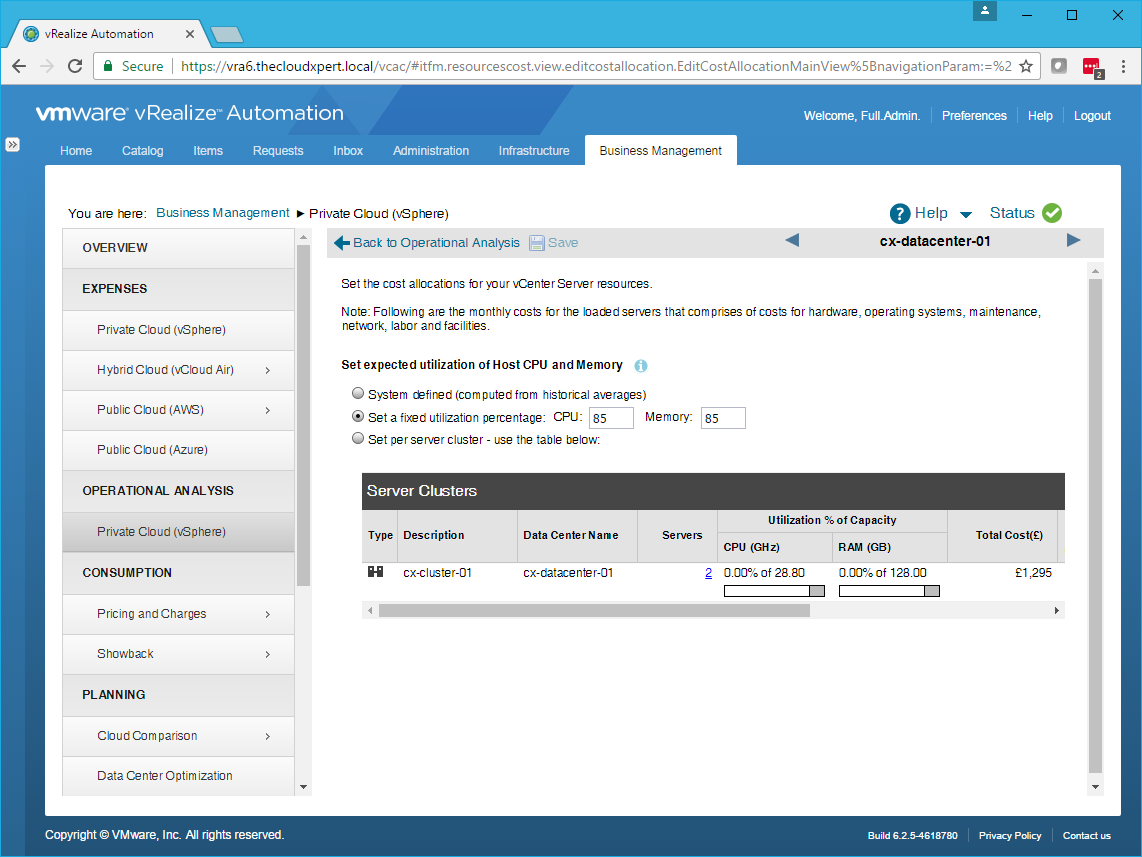
- Click Save.
- Click Back to Operation Analysis.
Note:
There is no visible change as I’m obviously not over utilizing my platform!
- If finished making changes, click Logout.
Configure Consumption Analysis
- Navigate to the vRealize Tenant Automation Portal (
https://vra.fqdn/vcac)
- Login with a User with the Business Management Administrator role assigned.
- Click Business Management.
- Under Consumption, click Business Unit List.
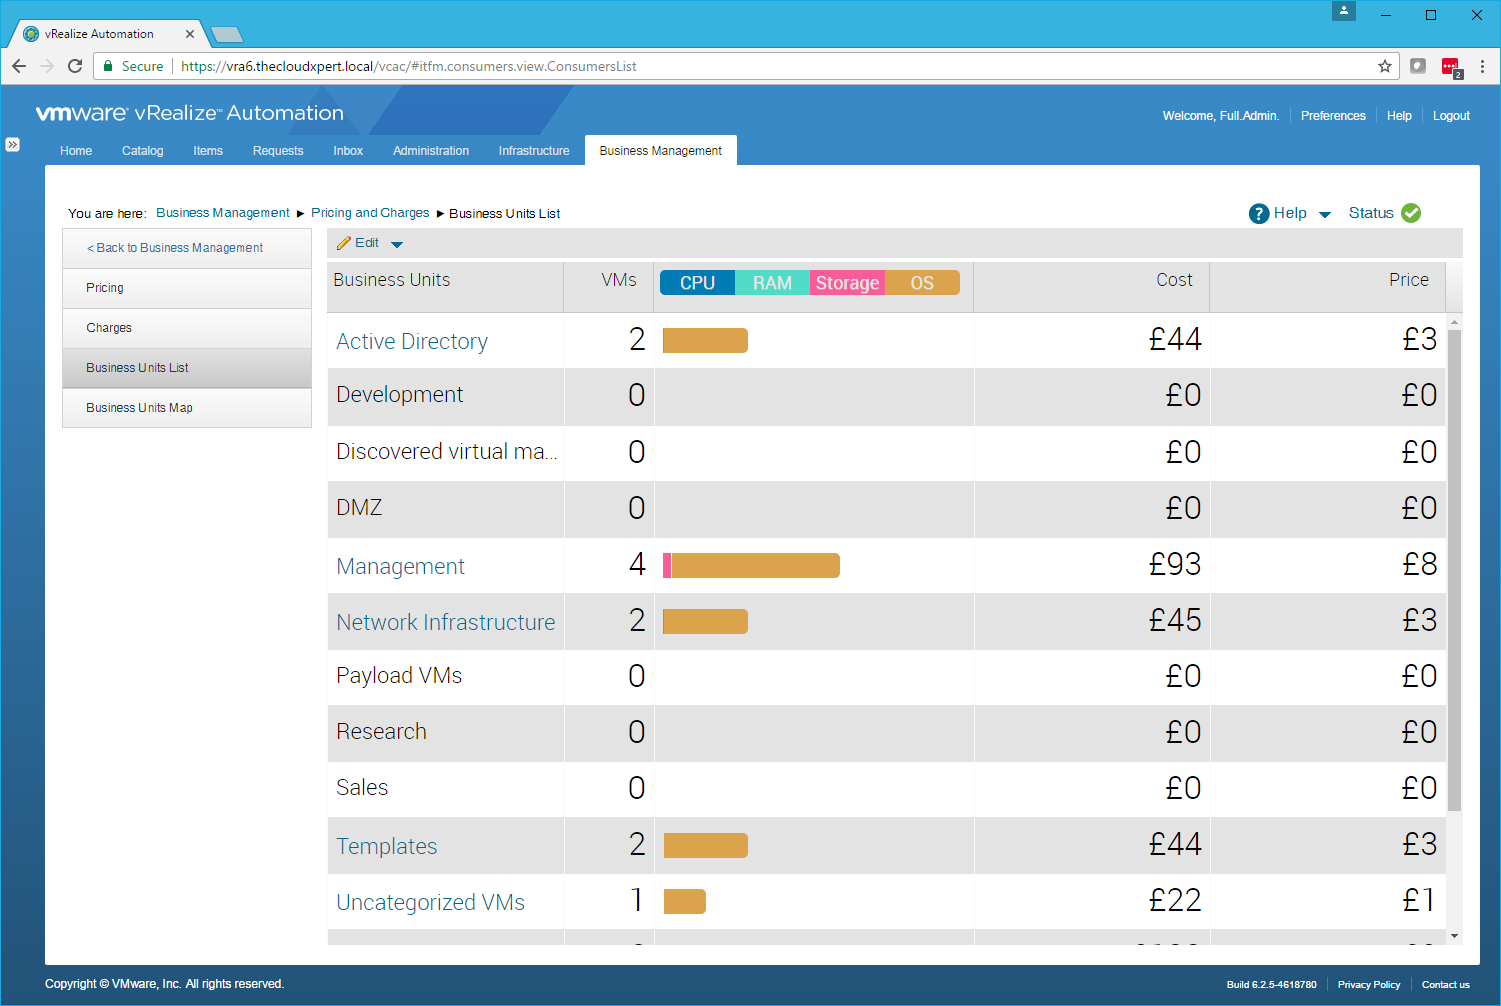
Edit Consumer Hierarchy
- Click Edit > Business Hierarchy.
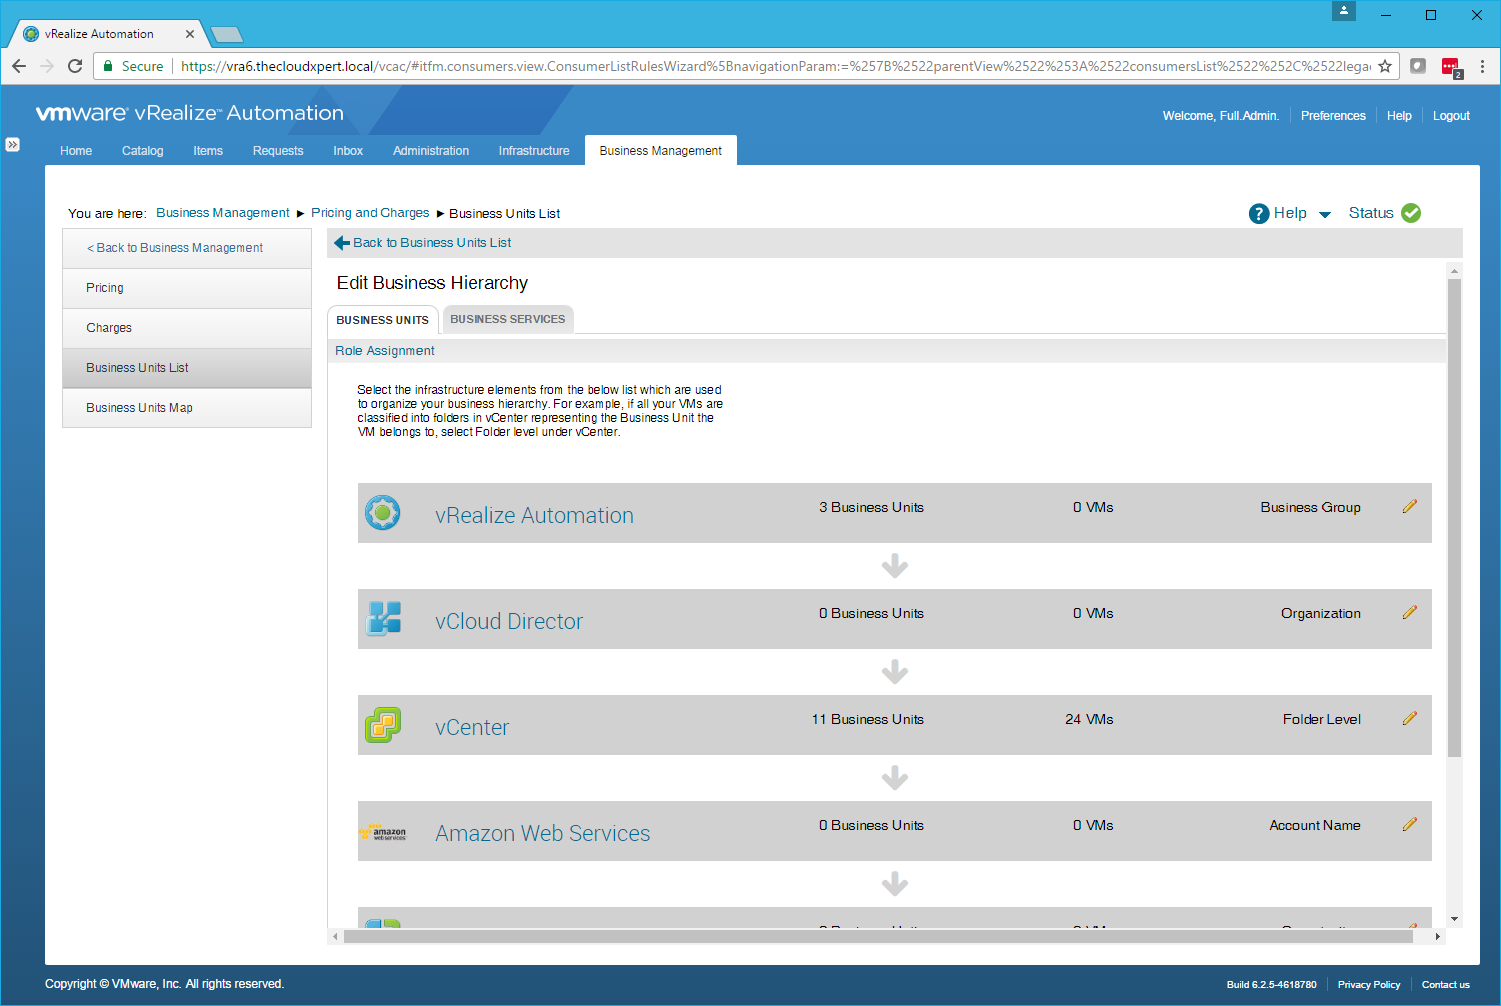
- Under vRealize Automation, click on Edit (pencil).
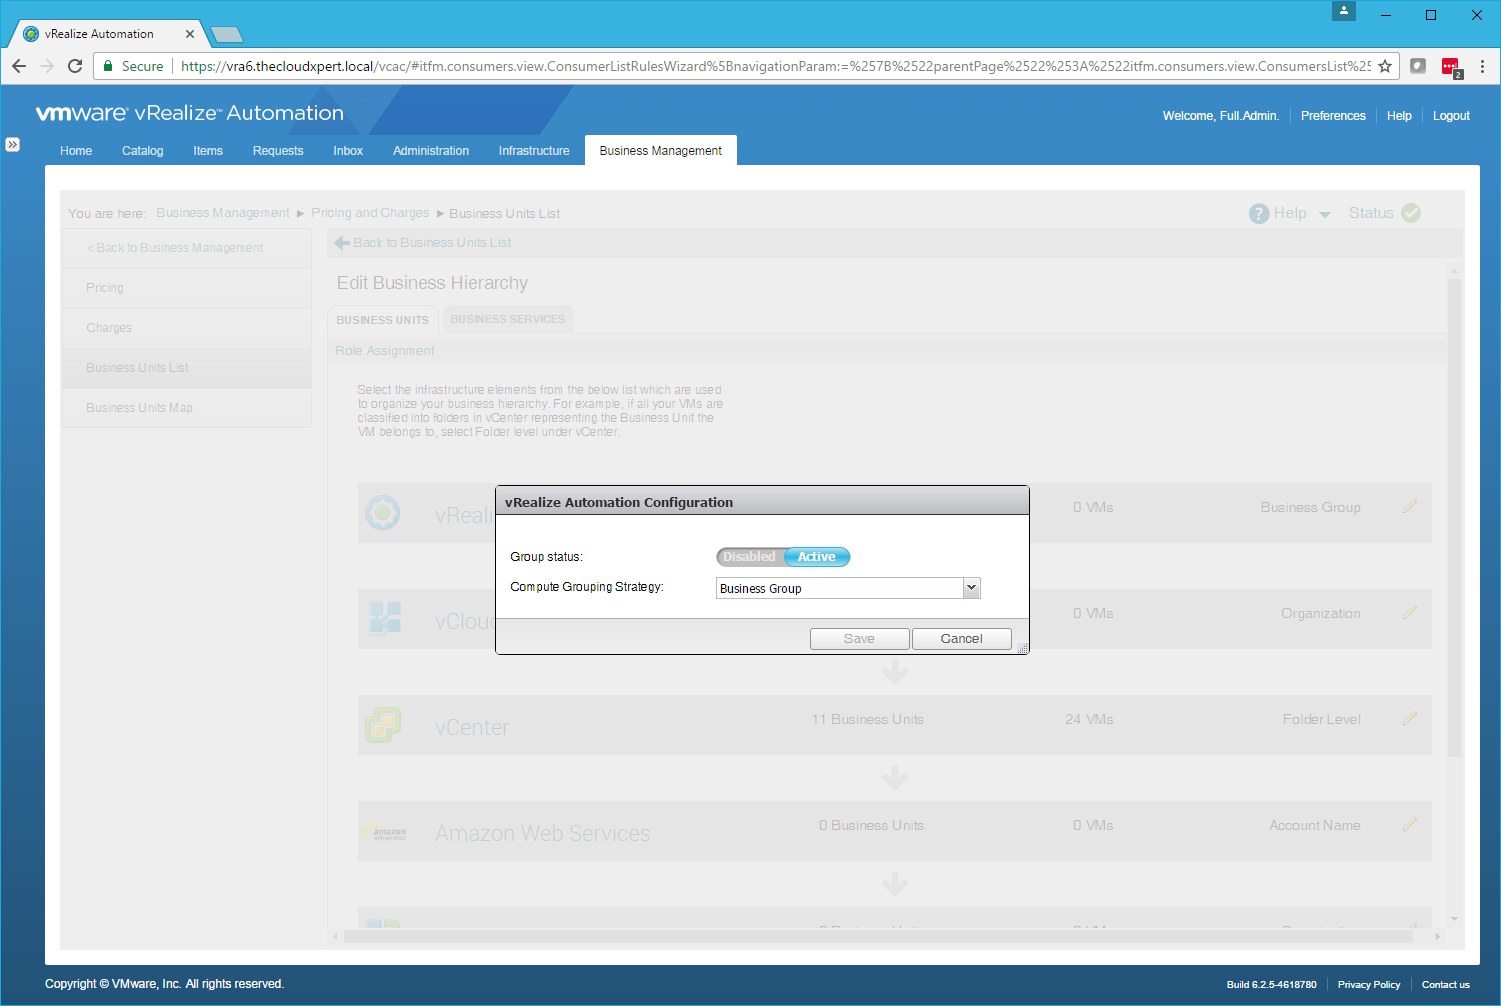
Note:
We can enable or disable the configuration of the Business Hierarchy for vRealize Automation. There is no other option other than Business Group for the Compute Grouping Strategy.
- Click Cancel.
- Click on vRealize Automation to expand the information available.
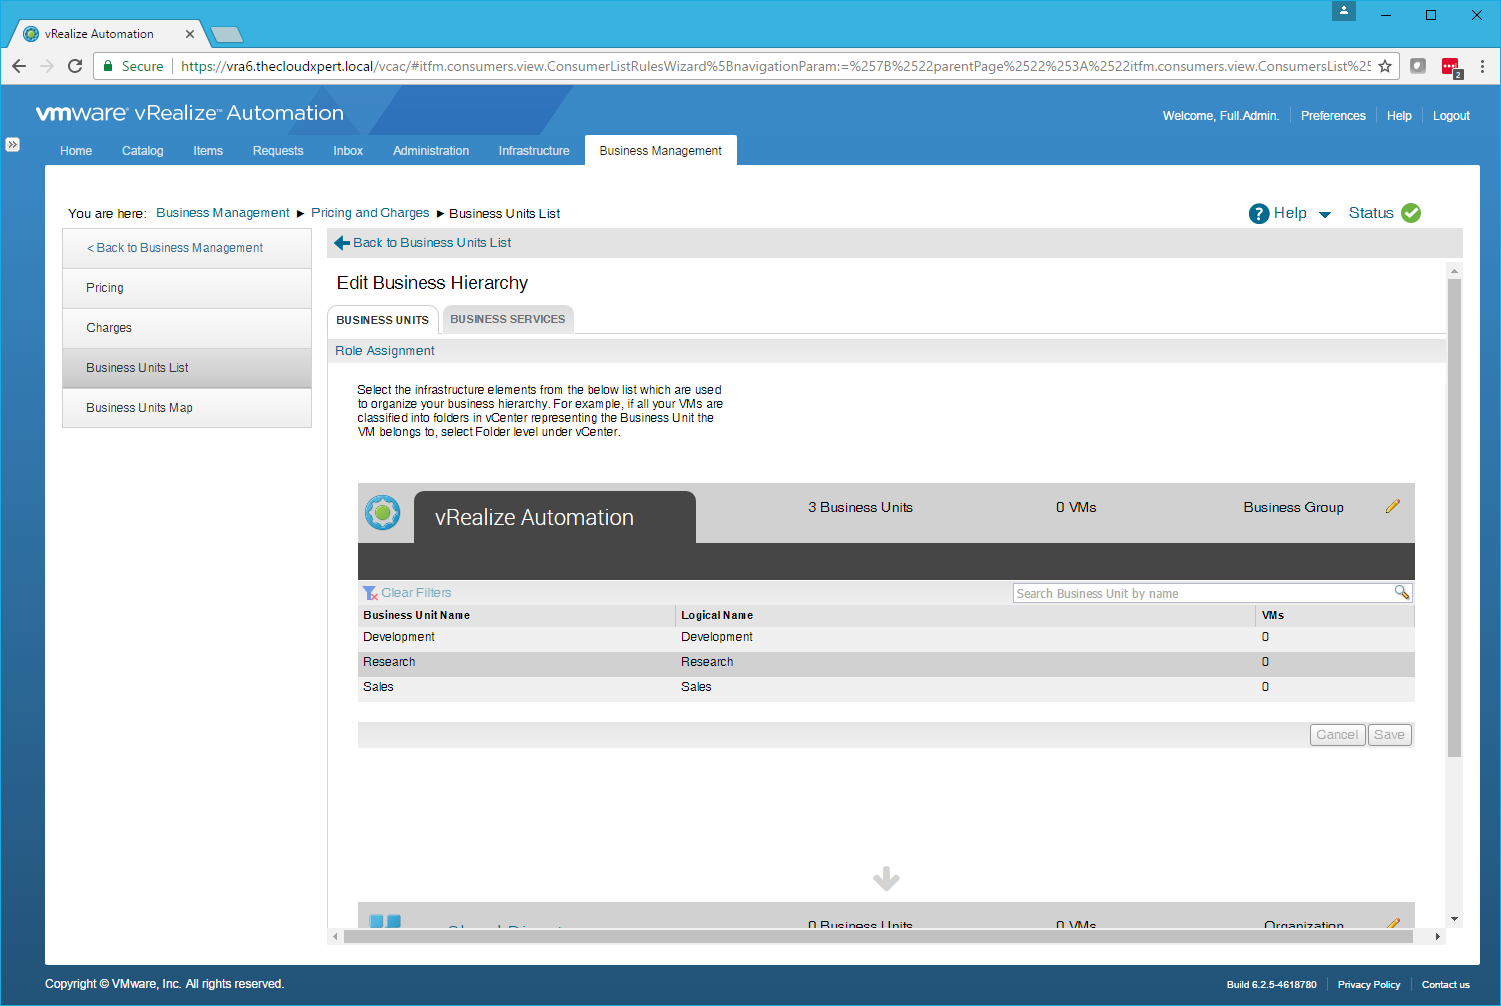
Note:
Here we can change the Logical (Display) Name for each Business Unit Name.
- Click on vRealize Automation to minimize this and expand vCenter.
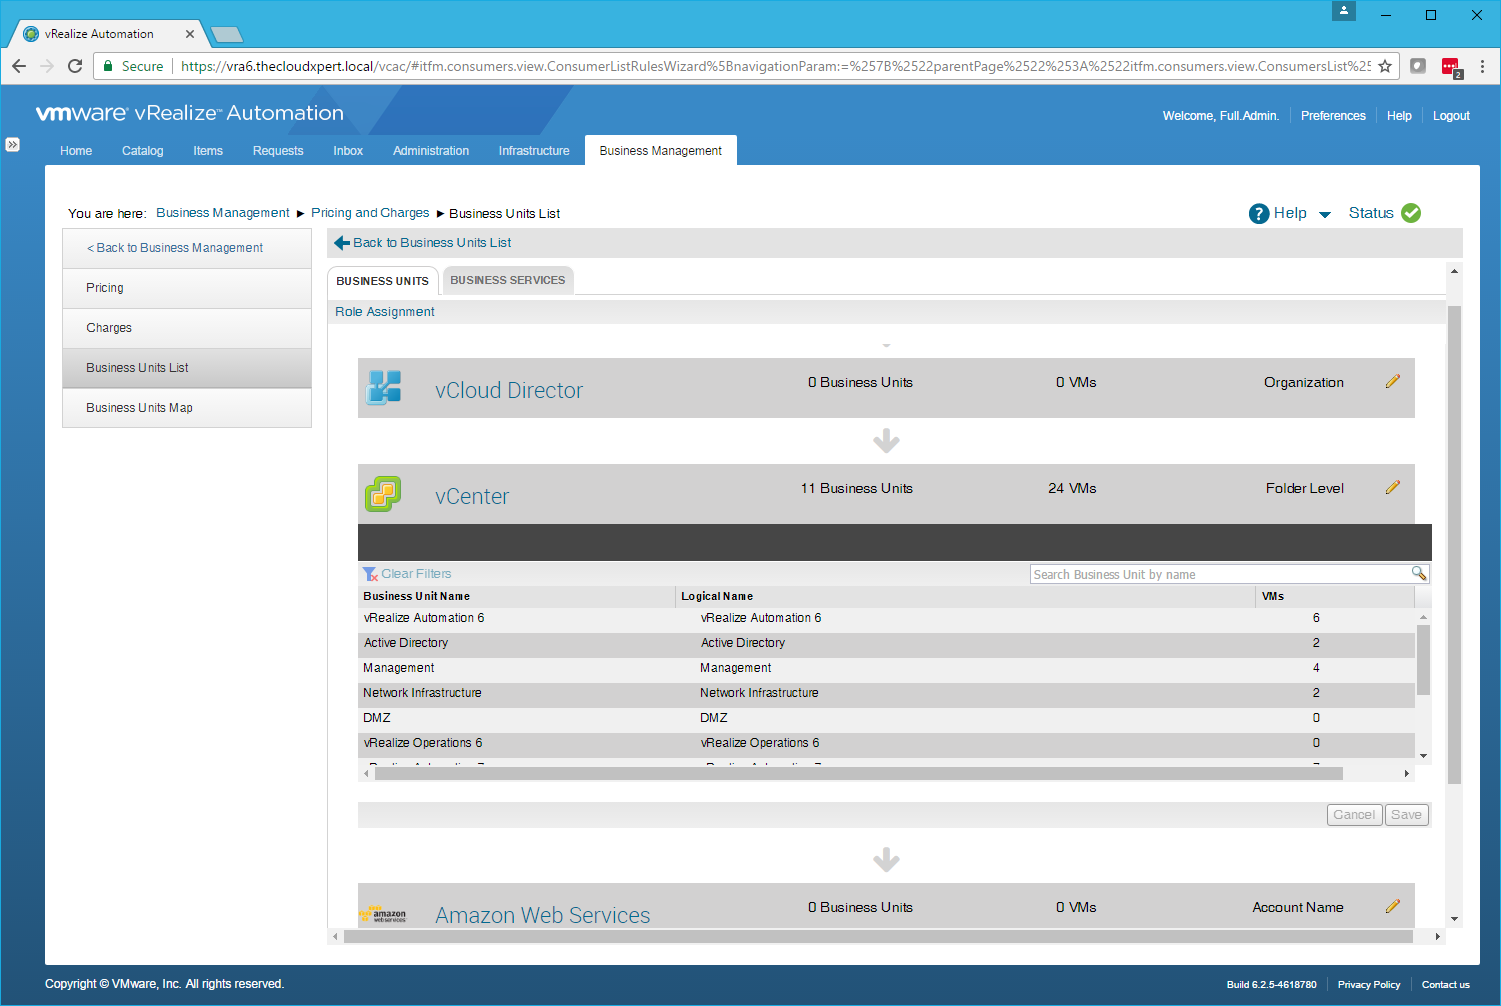
Note:
We will see the Business Unit name is currently using the vCenter Folder to group the VMs.
- Under vCenter, click Edit (pencil).
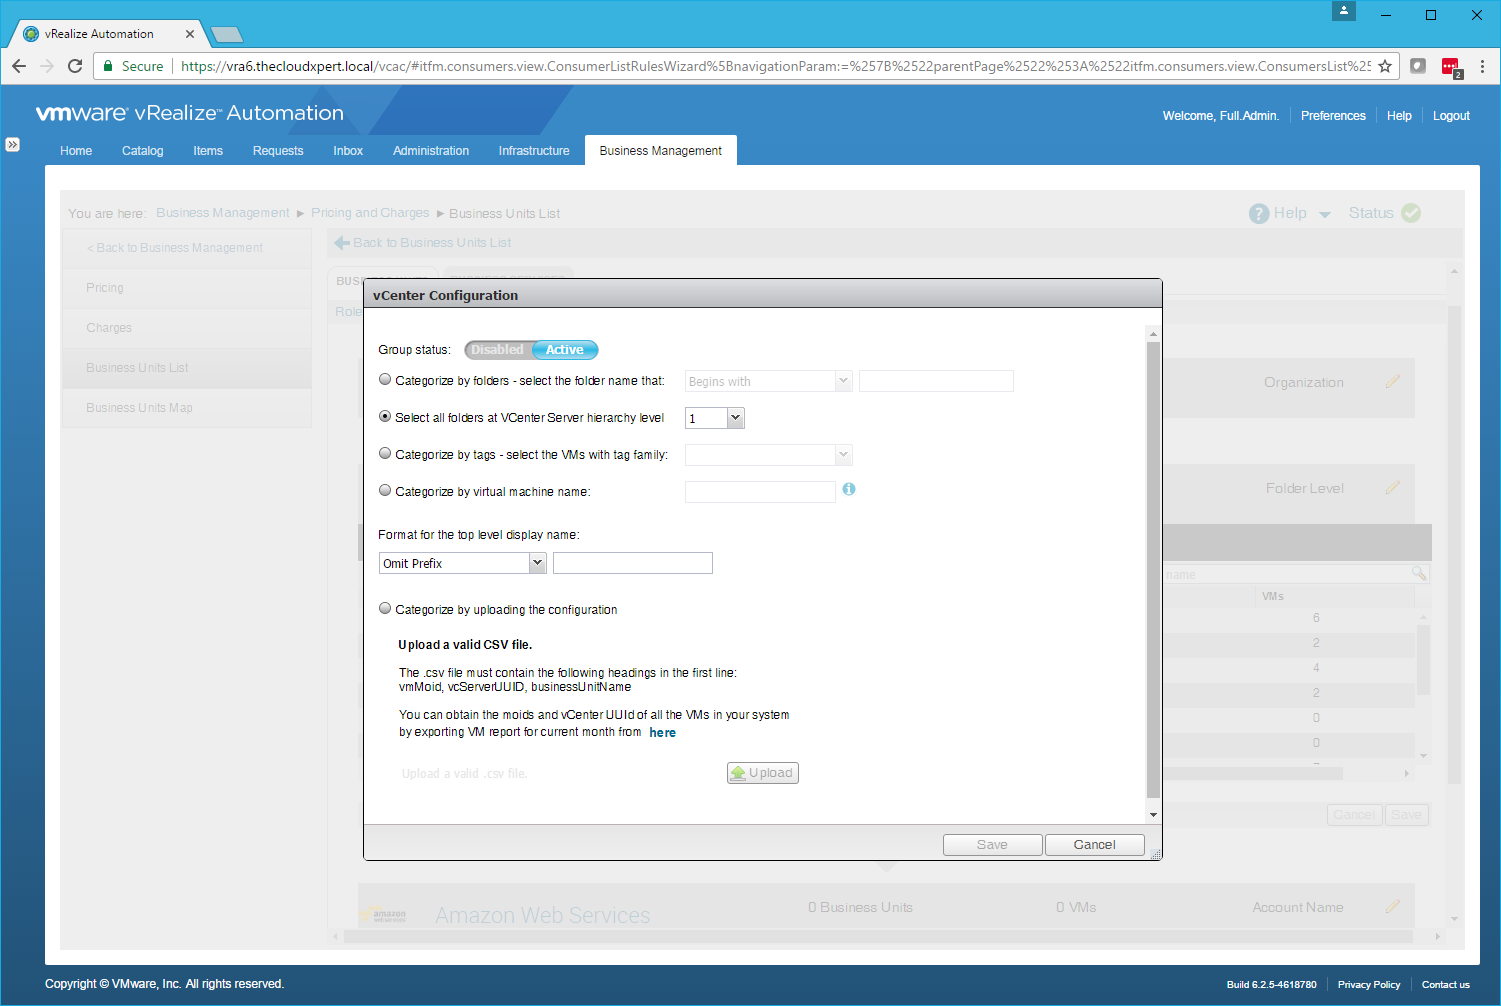
Note:
Here we can change enable/disable the groups and also change the way in which vRB groups the VM based on things like Tags, Machine name, folder name or folder hierarchy.
- Click Cancel.
- Click the Business Services tab.
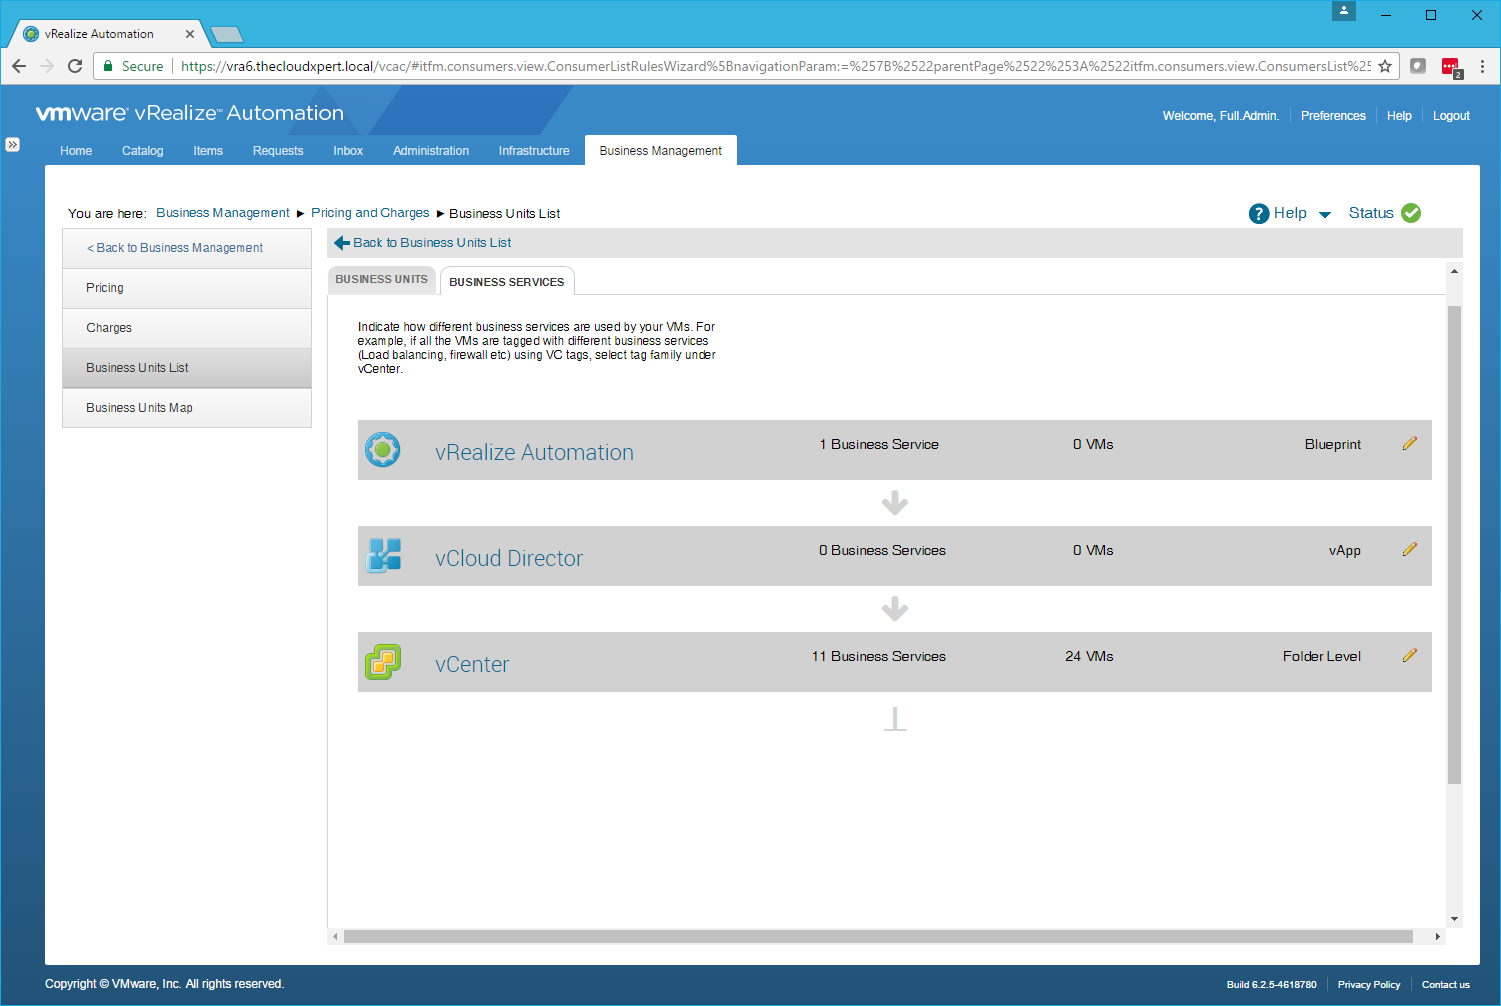
- Click vRealize Automation to expand.
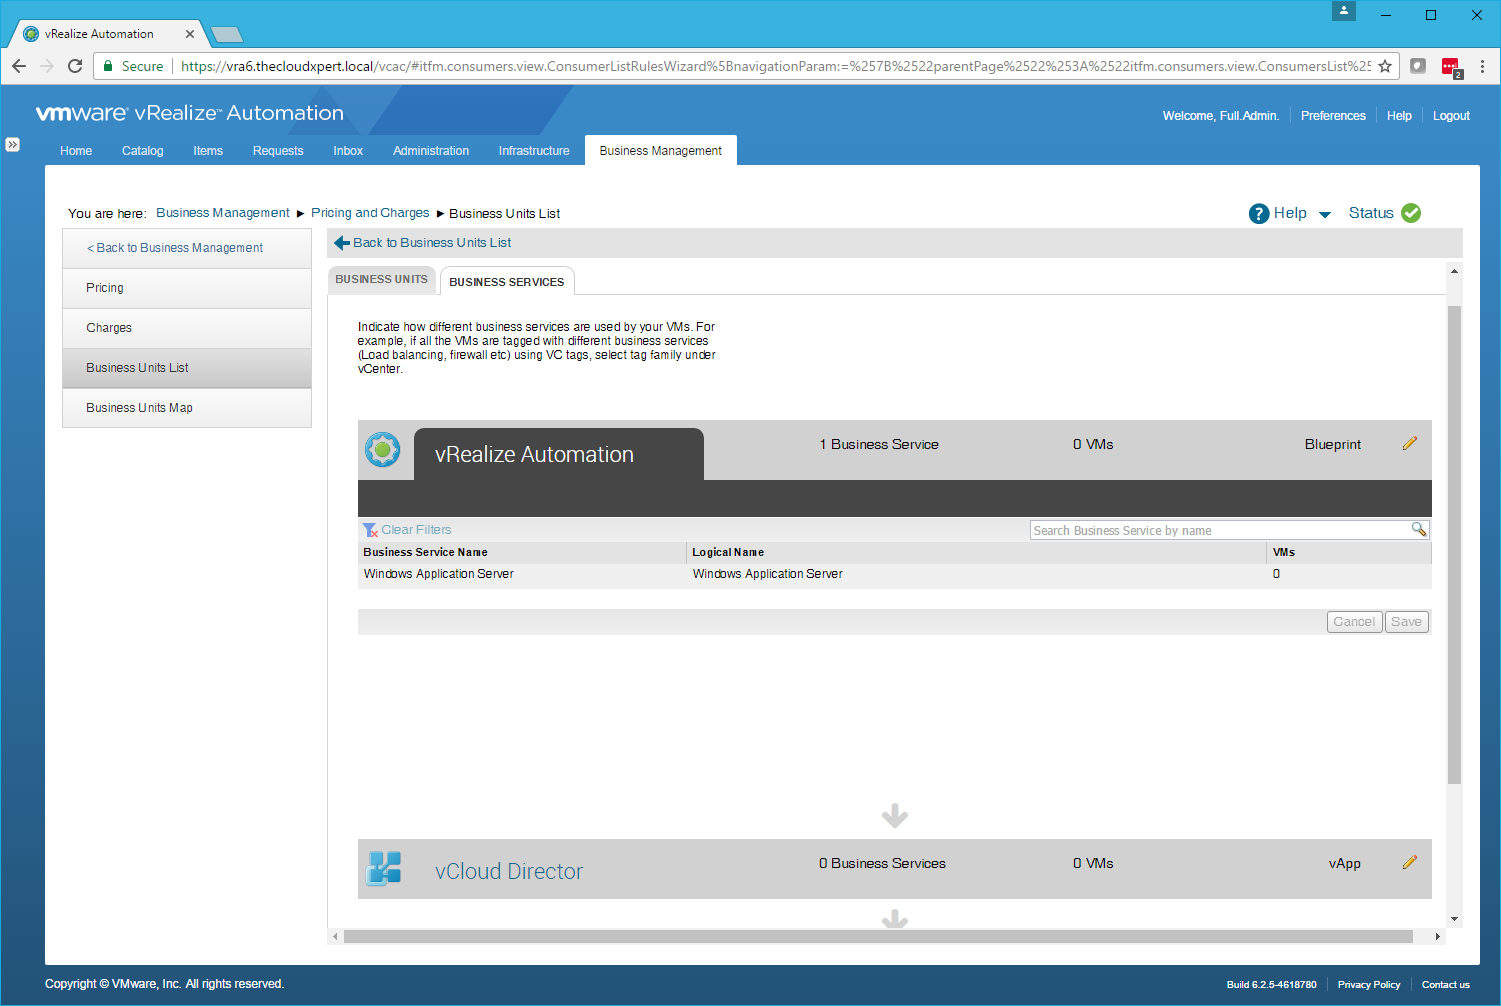
Note:
Here we will see that the Business Services are group by Blueprint.
- Click Back to Business Unit List.
Edit price value according to a deployment plan
- Click Pricing.
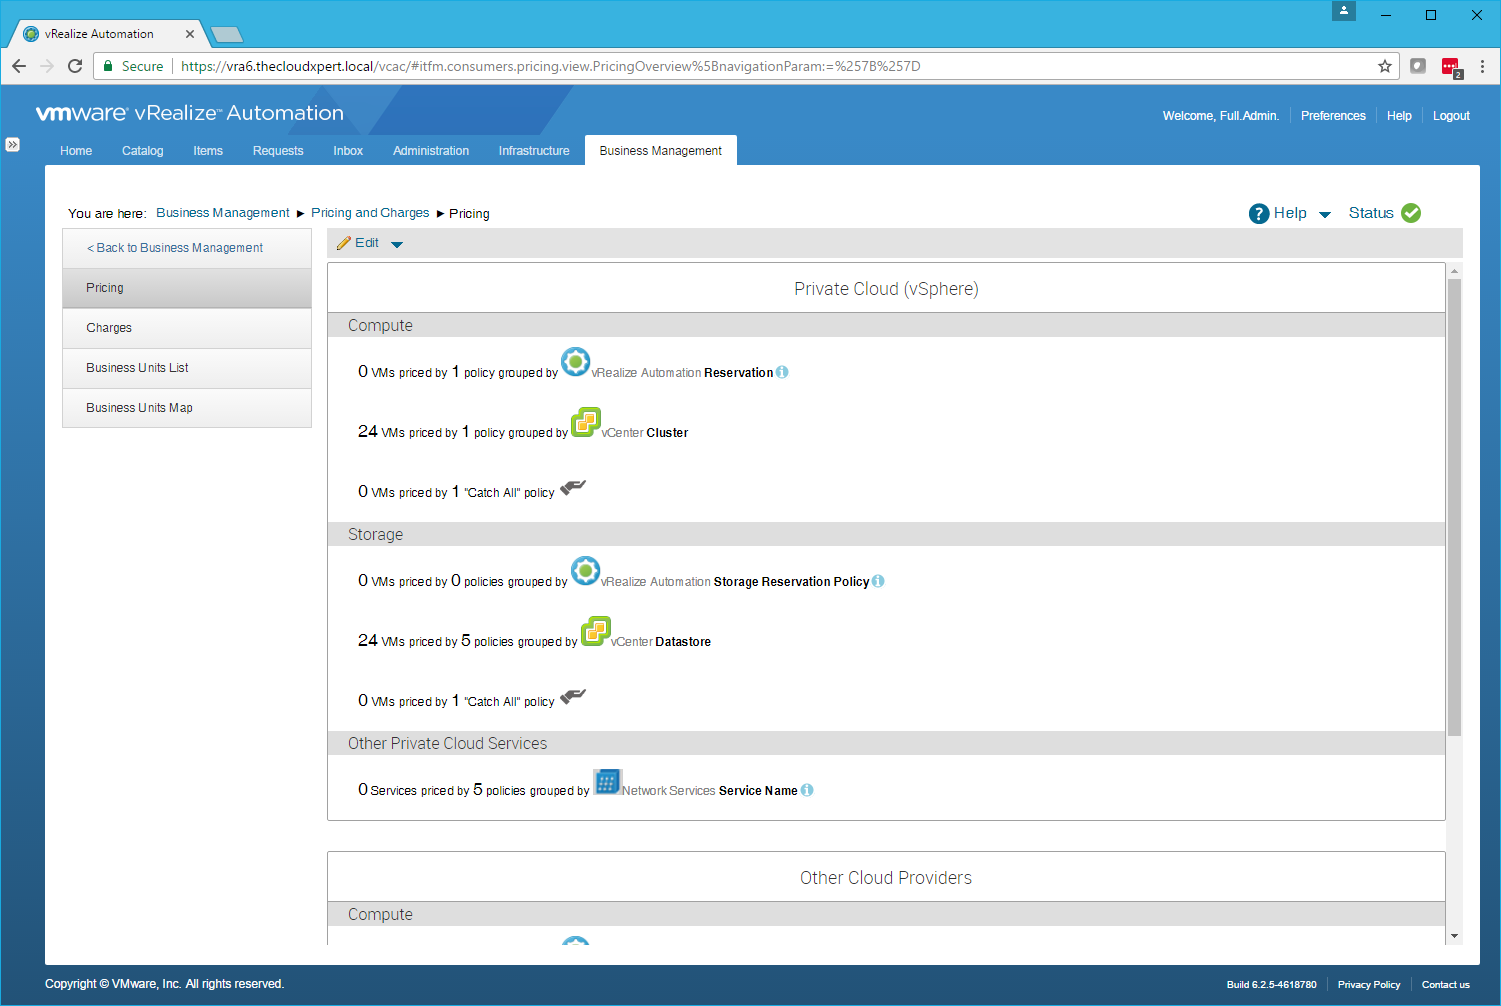
- Click Edit > Edit Pricing.
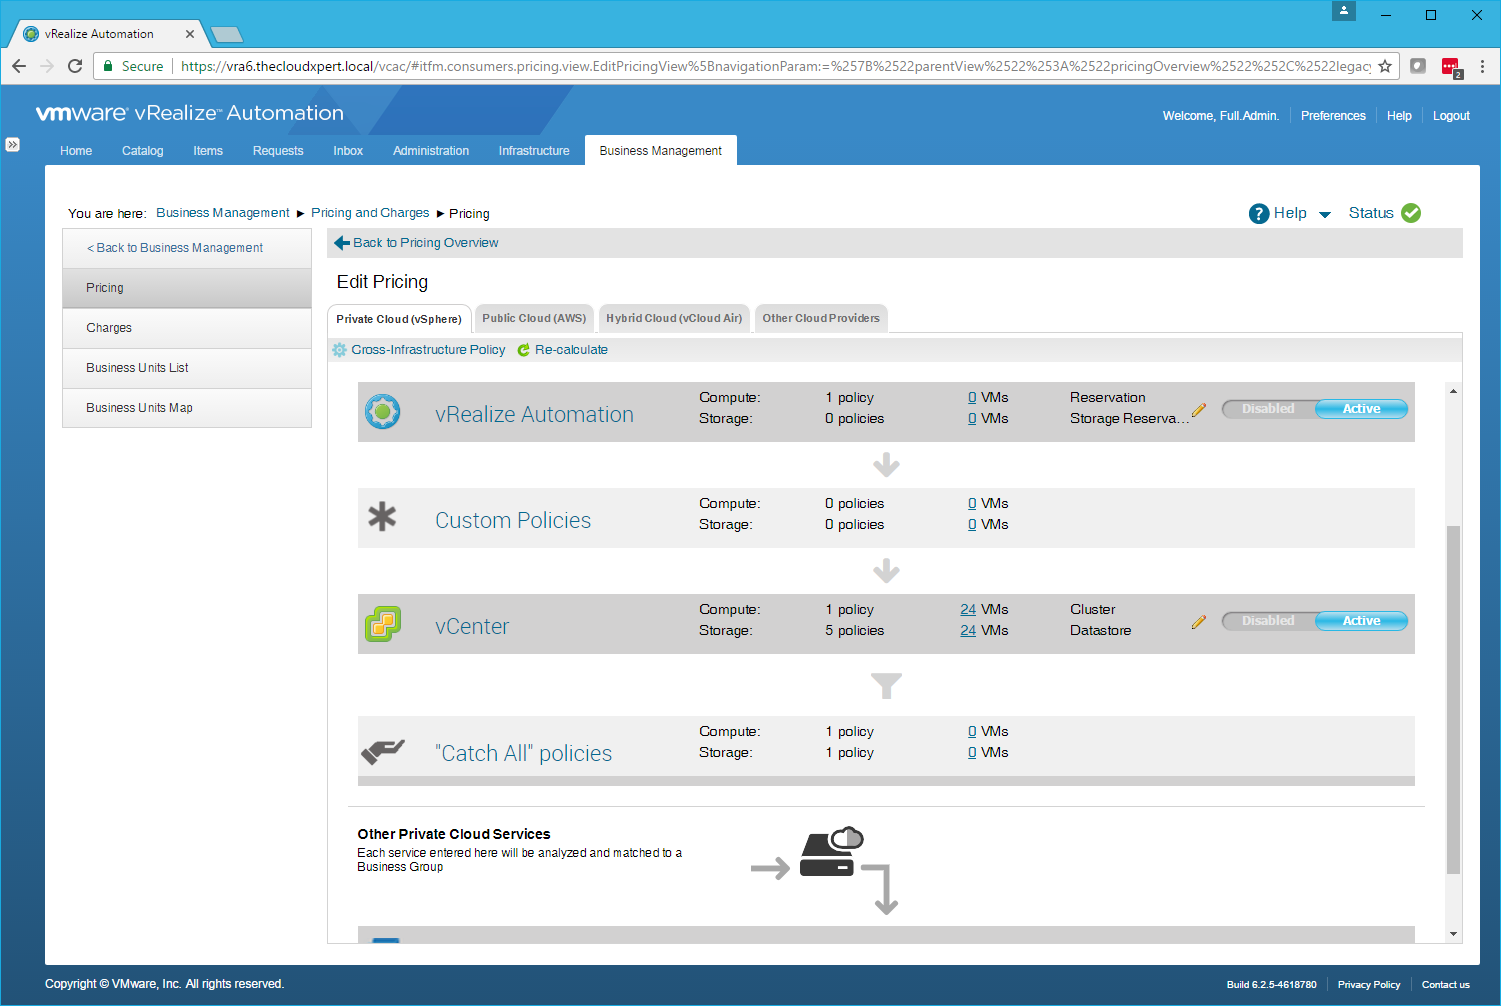
- Click vRealize Automation to expand.
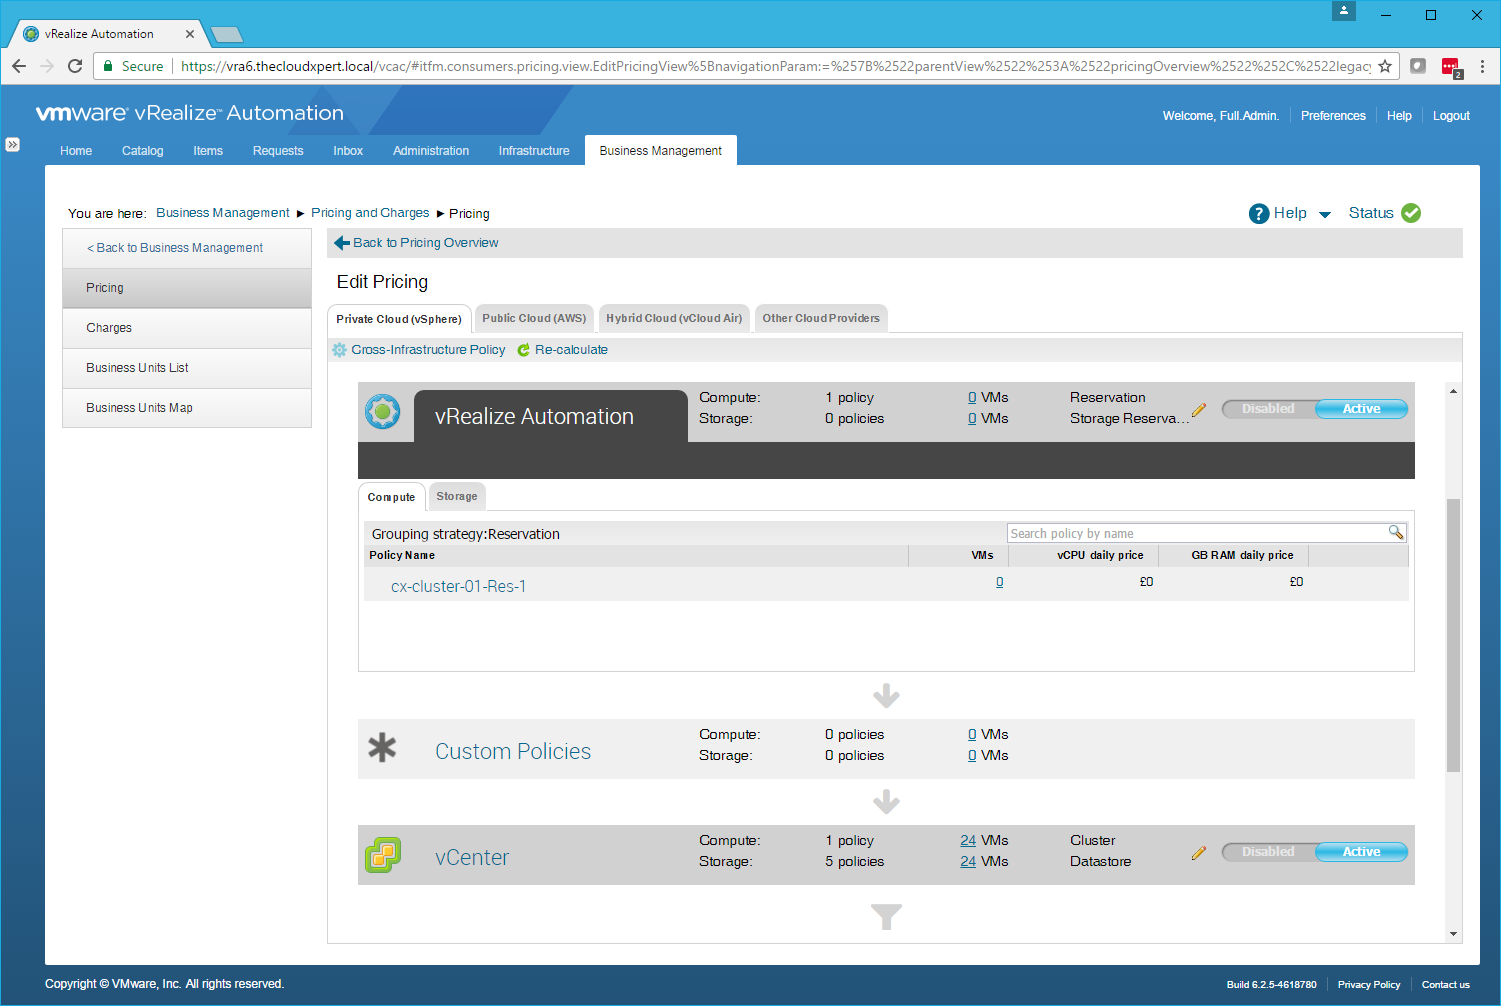
- Add / Update the values for vCPU daily price and GB RAM daily price.
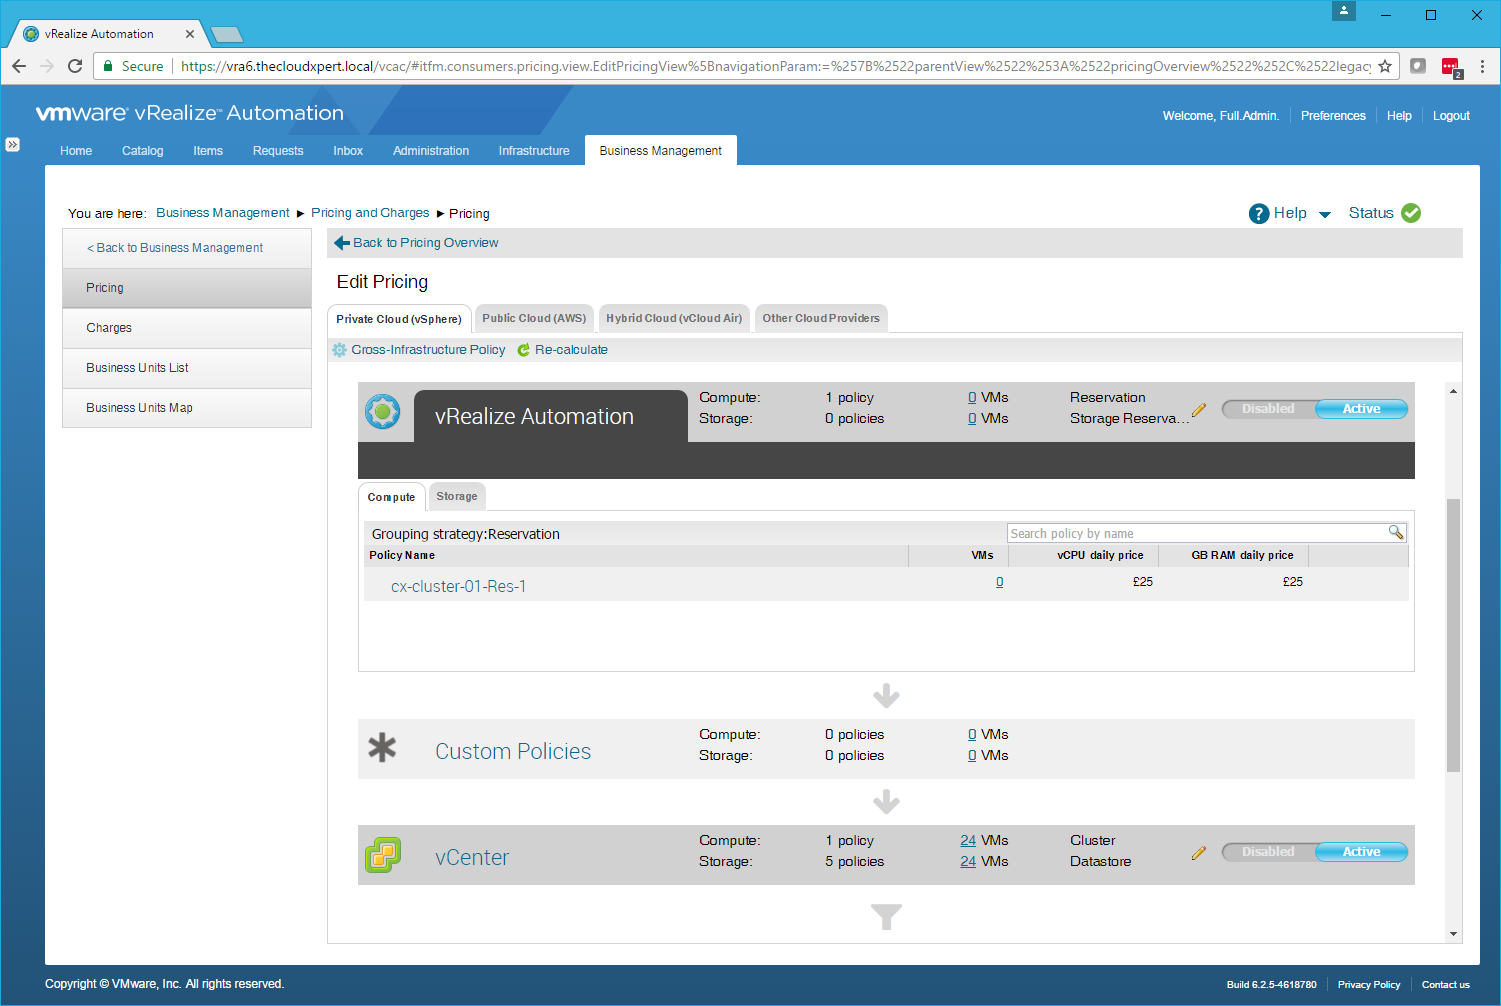
- Click Back to Pricing Overview.
Edit/Import budget to estimate your cost
- Click Edit > Edit Budget.
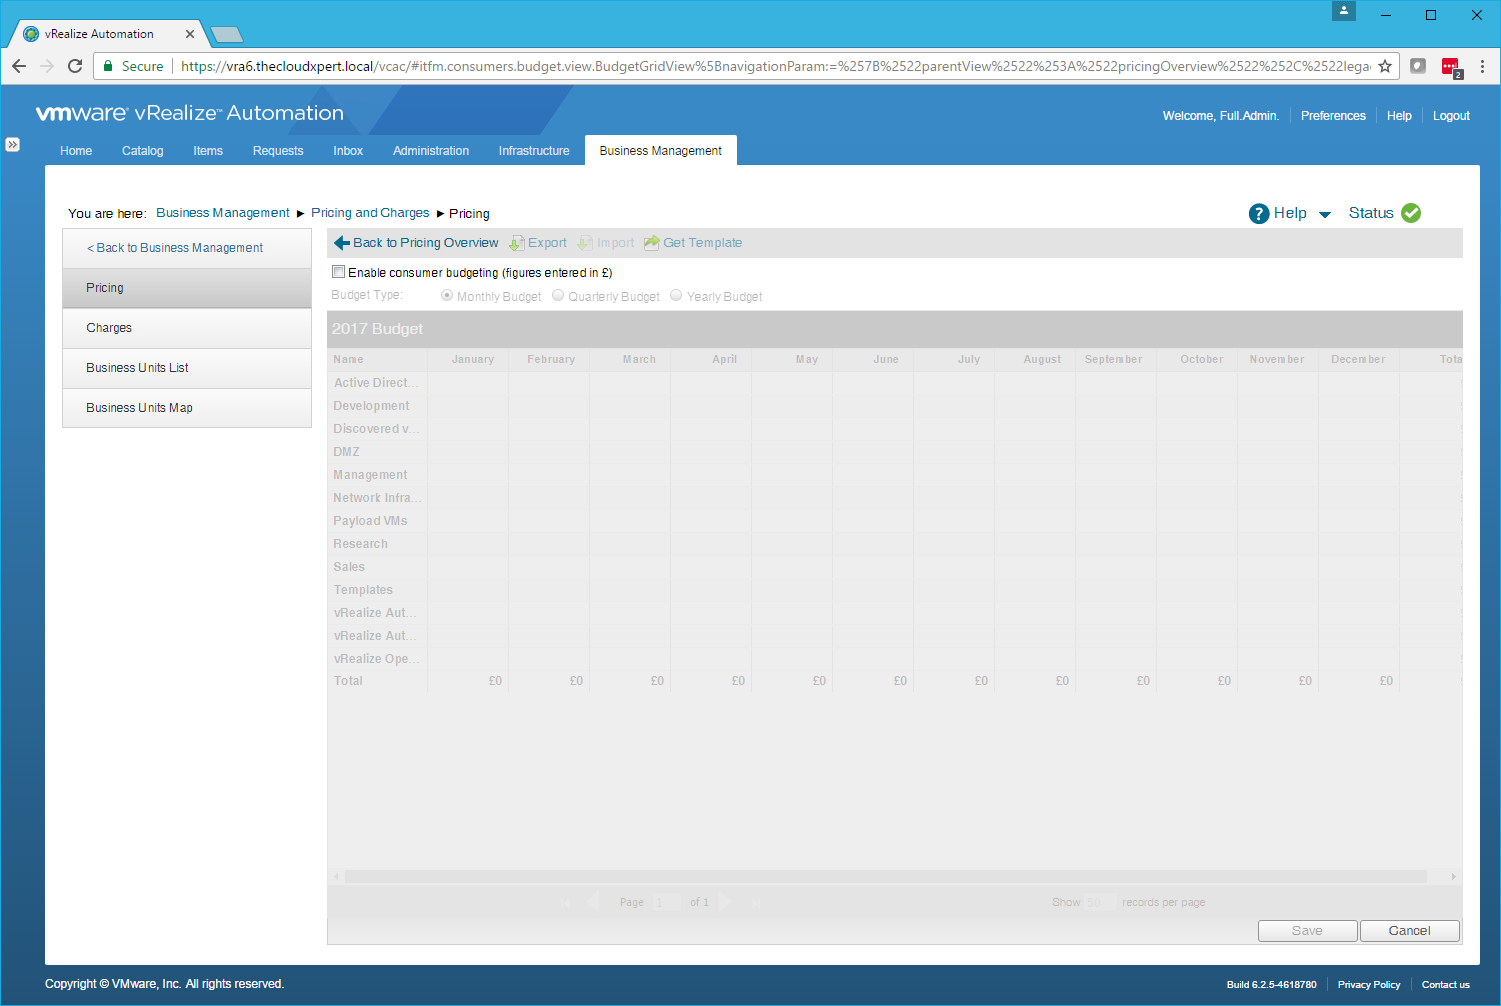
- Check the Enable consumer budgeting (figures entered in £) checkbox.
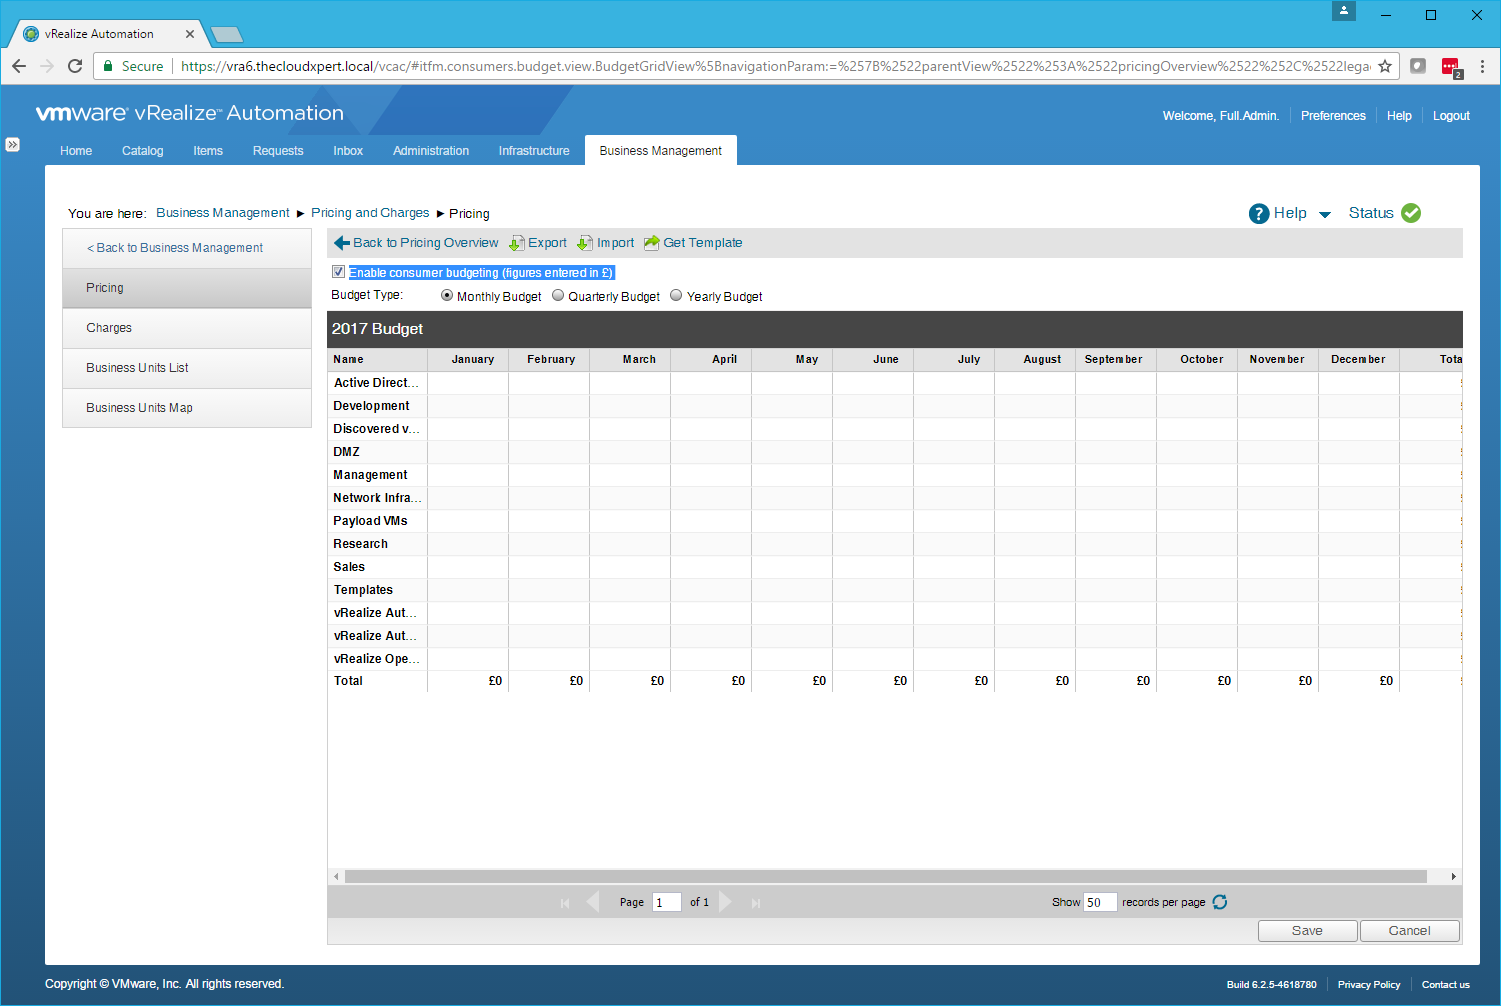
- You can now select Monthly, Quarterly or Yearly budget options and edit the values in each field by clicking on the cell.
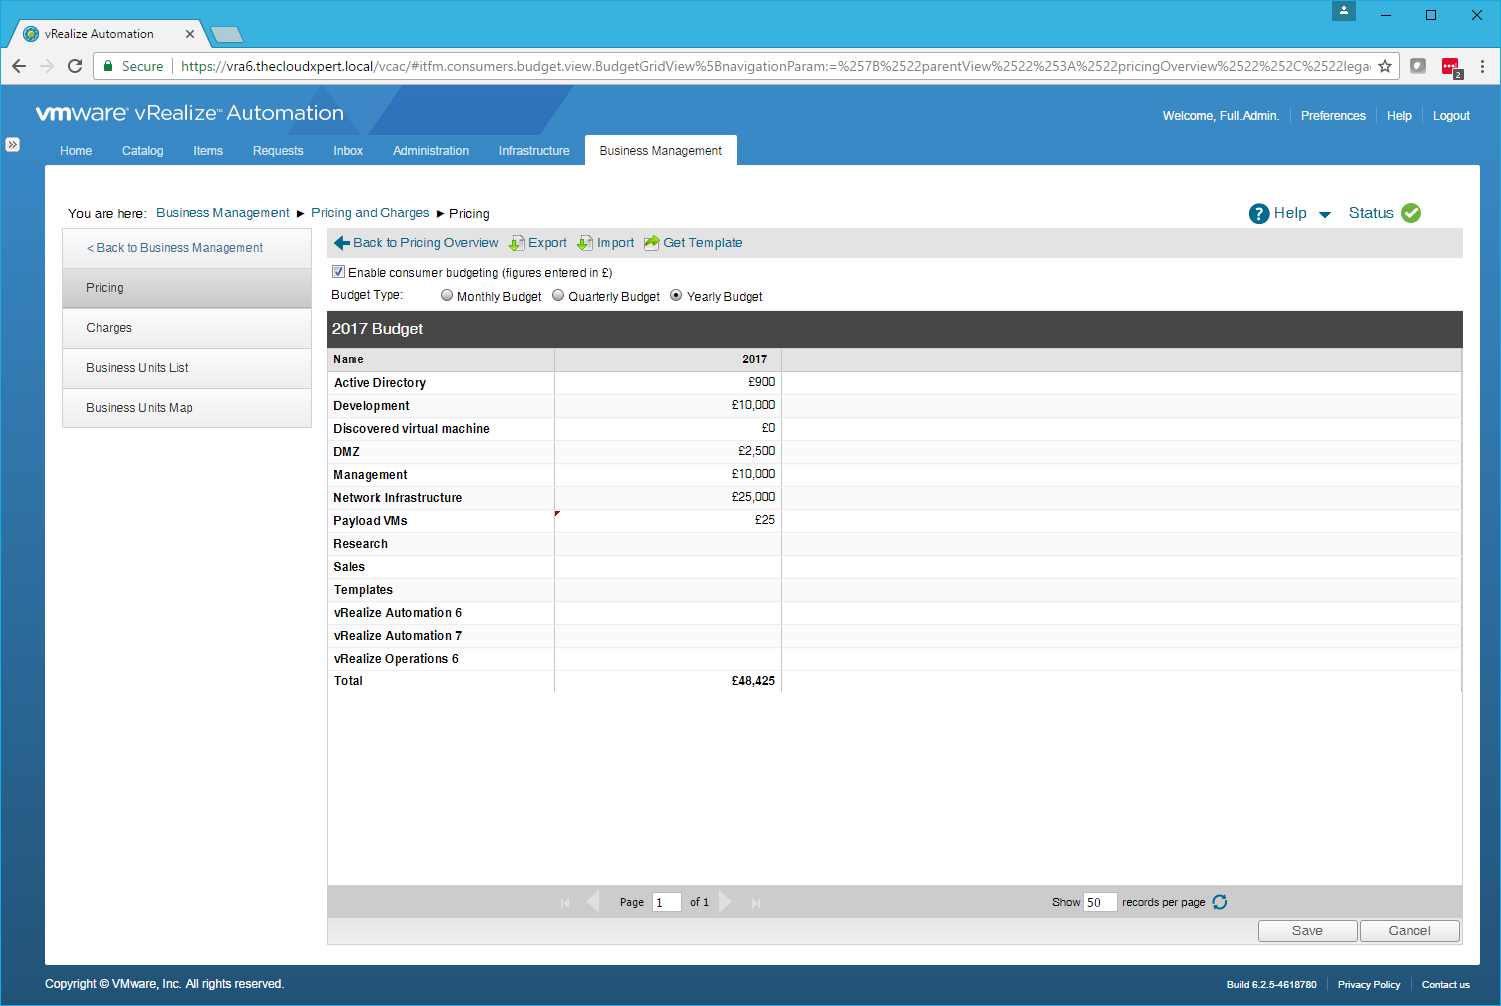
- Finally, from this screen you can also:
- Click Get Template to save a XLS document that can be updated offline.
- Click Export to export the current budget to a XLS document which can be edited offline and re-imported.
- Click Import and then select a XLS file to import a budget that has been updated/created offline.
- Click Save to save any changes.
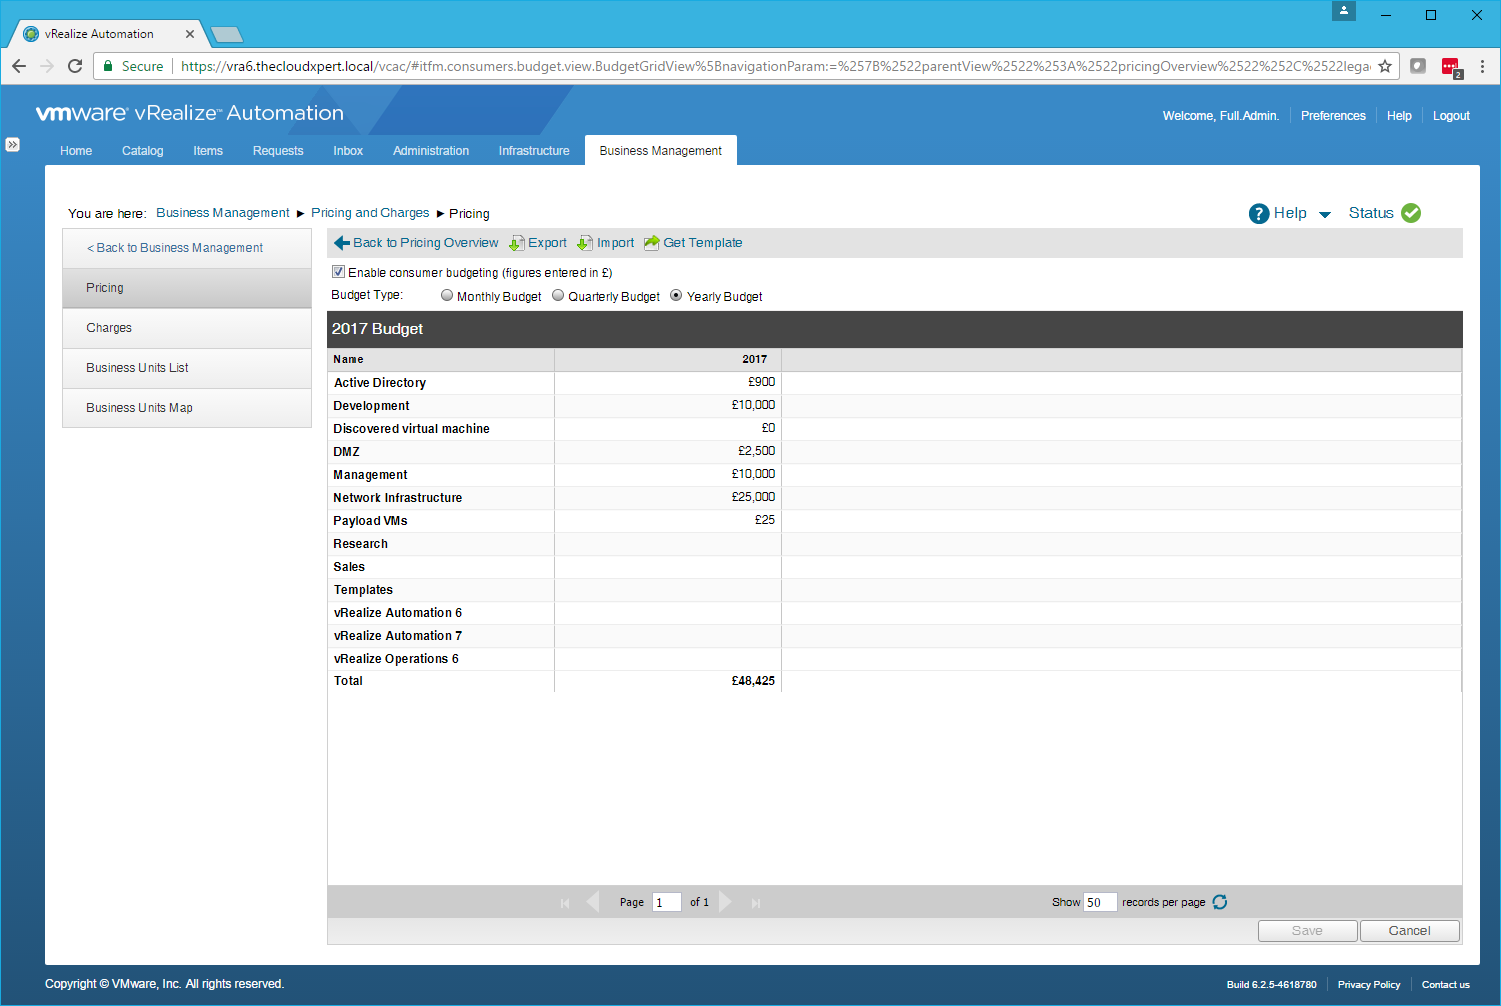
- Click Back to Pricing Overview to make further changes or Business Management to return to the home page.
Generate vRealize Business vCenter Server report
- Navigate to the vRealize Tenant Automation Portal (
https://vra.fqdn/vcac)
- Login with a User with the Business Management Administrator role assigned.
- Click Business Management.
- Under Reports, click vCenter Server > Virtual Machines.
Note:
You can also choose: Servers, Datastores, vSAN Datastores and Clusters.
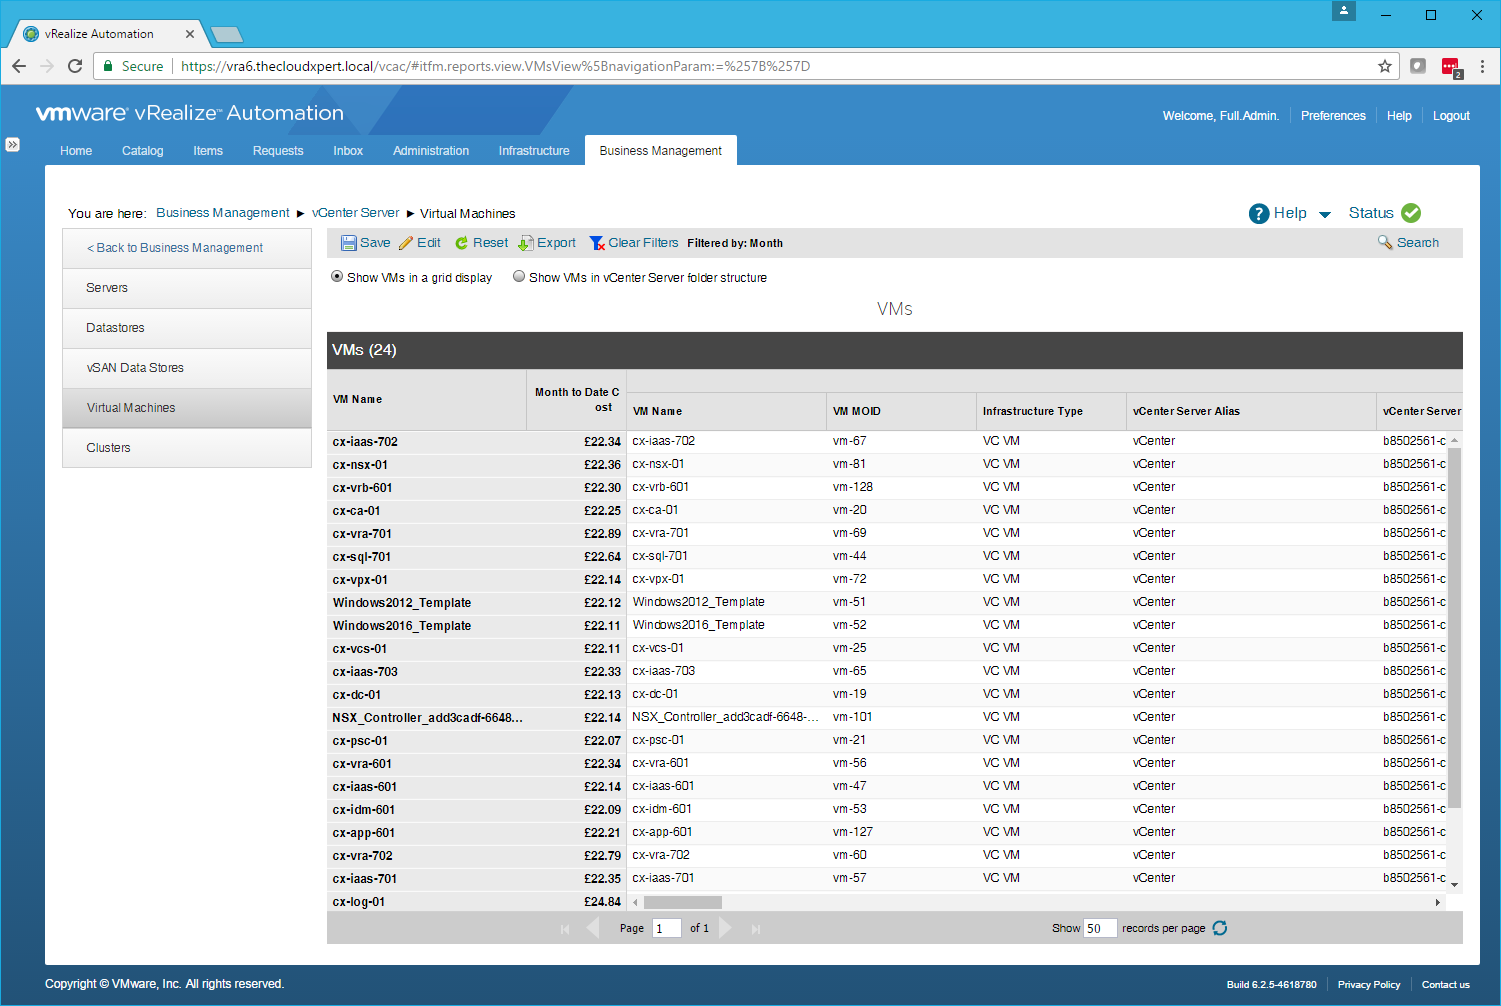
- Click Edit to make changes to the report.
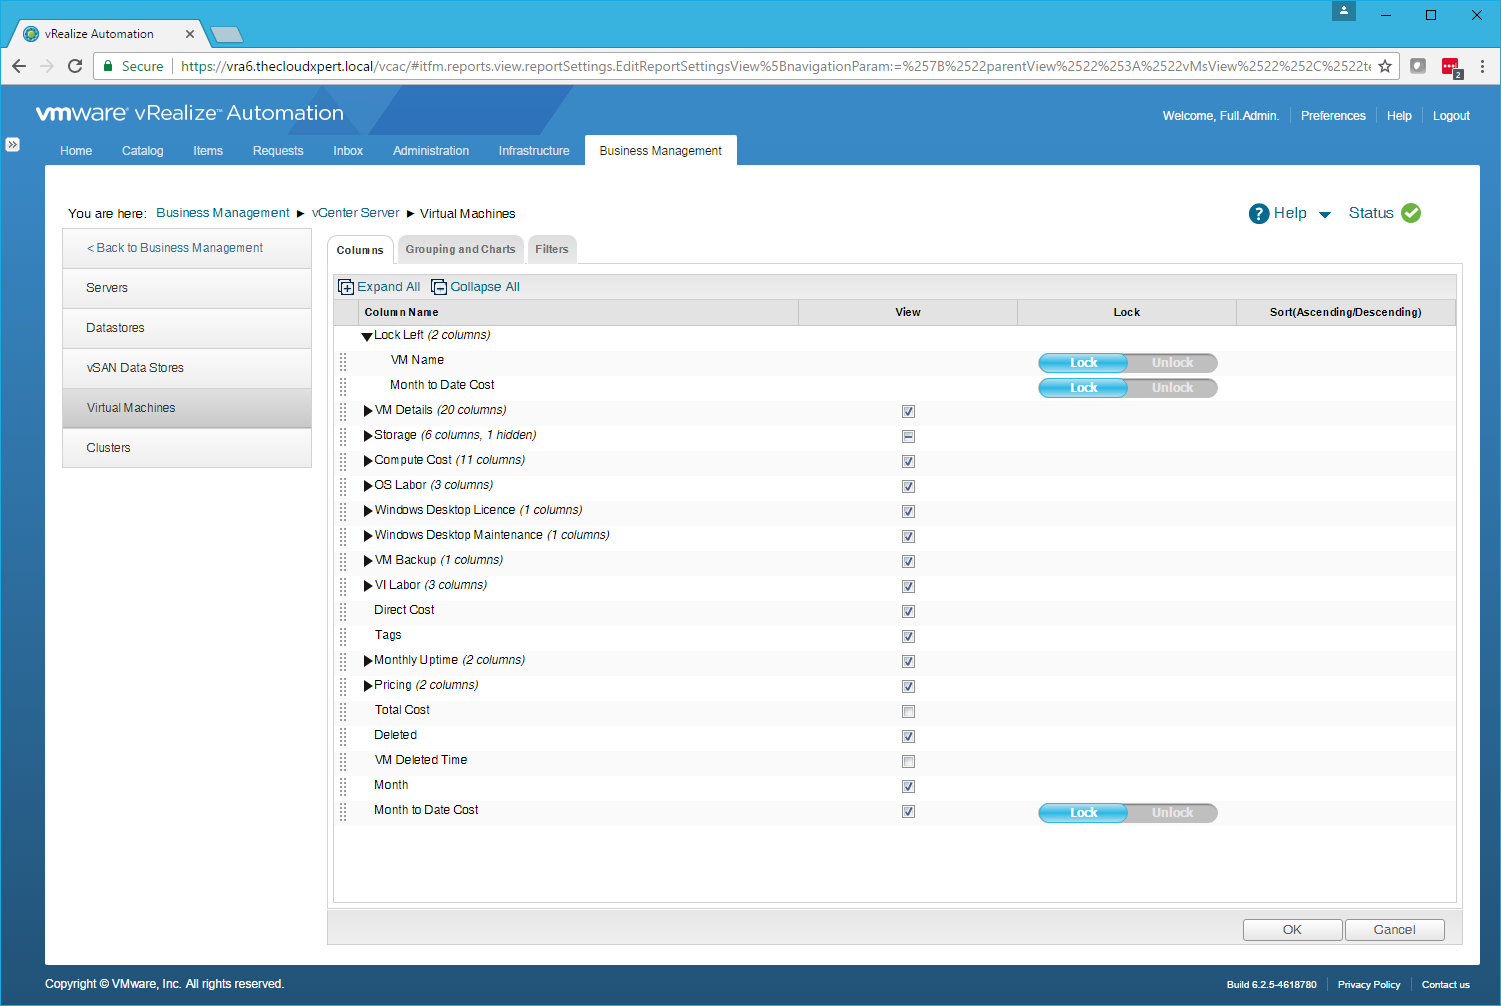
- Check or uncheck the columns/values to include.
- Click the Grouping and Charts tab.
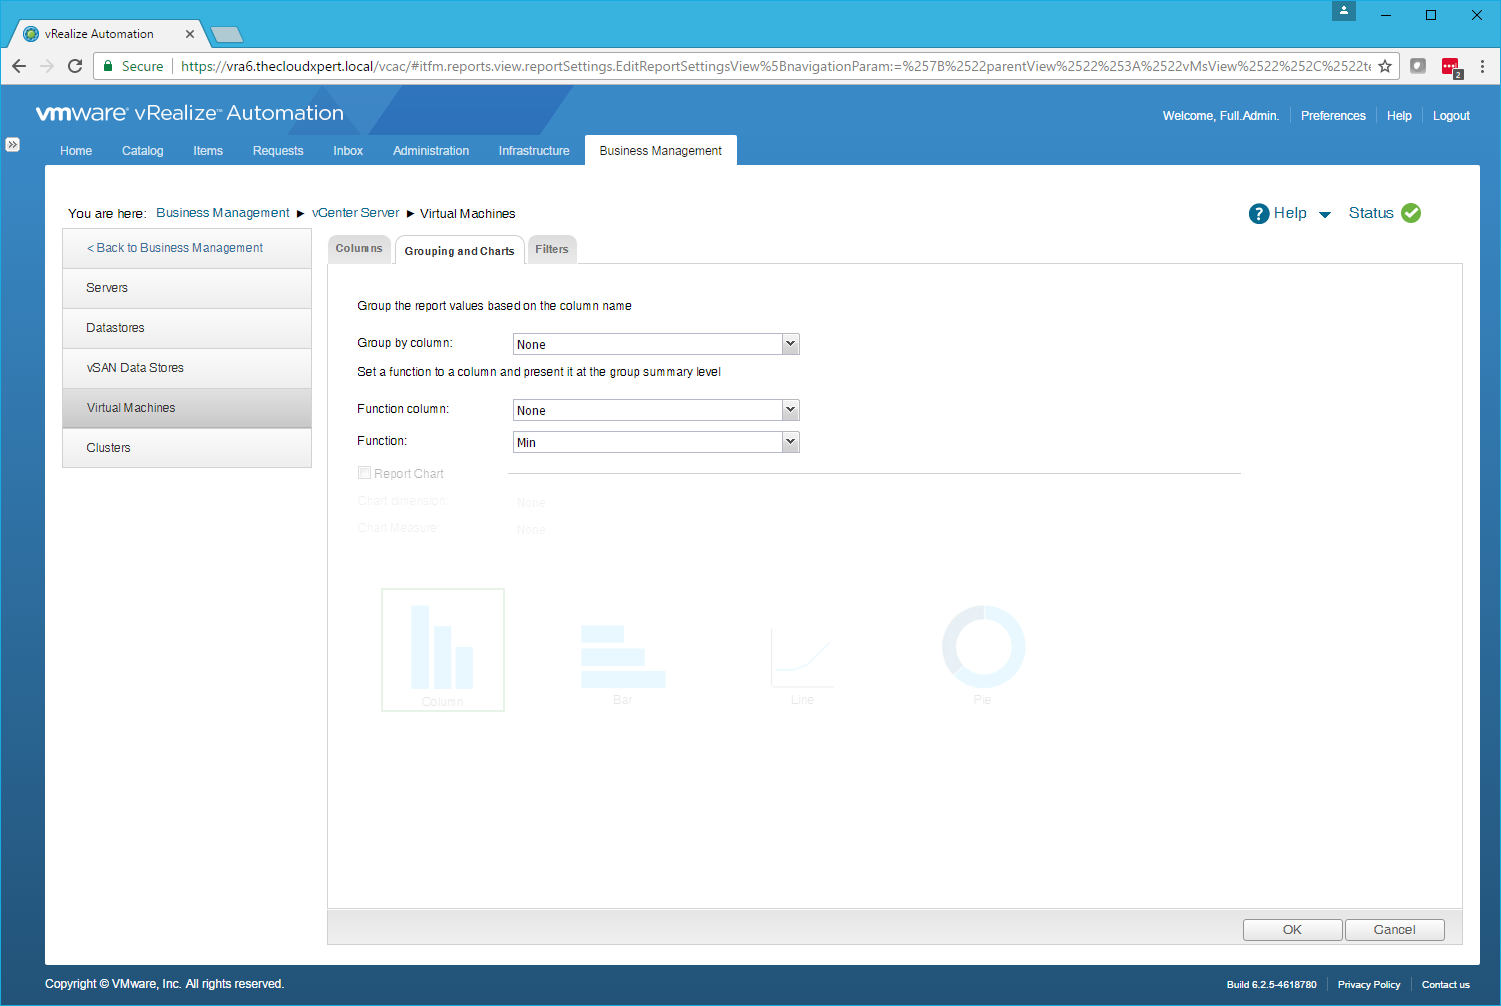
- (optional) You can choose to group the results by a Column or create a chart to be provided with the report.
- Click the Filters tab.
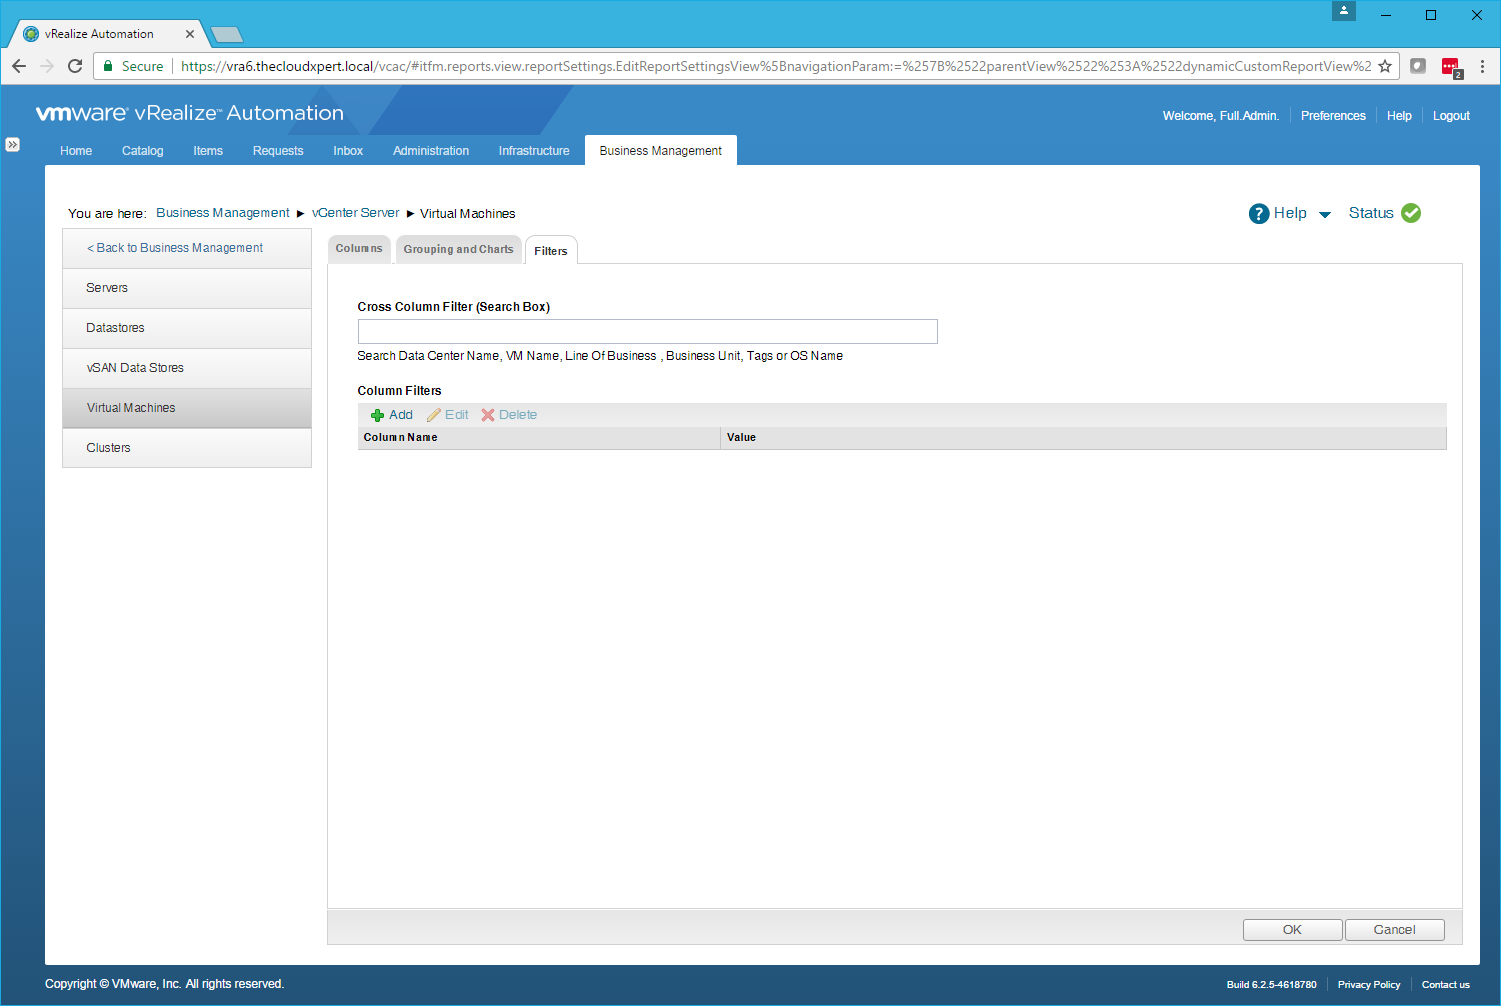
- (optional) You can filter the results by adding a filter.
- Click OK.
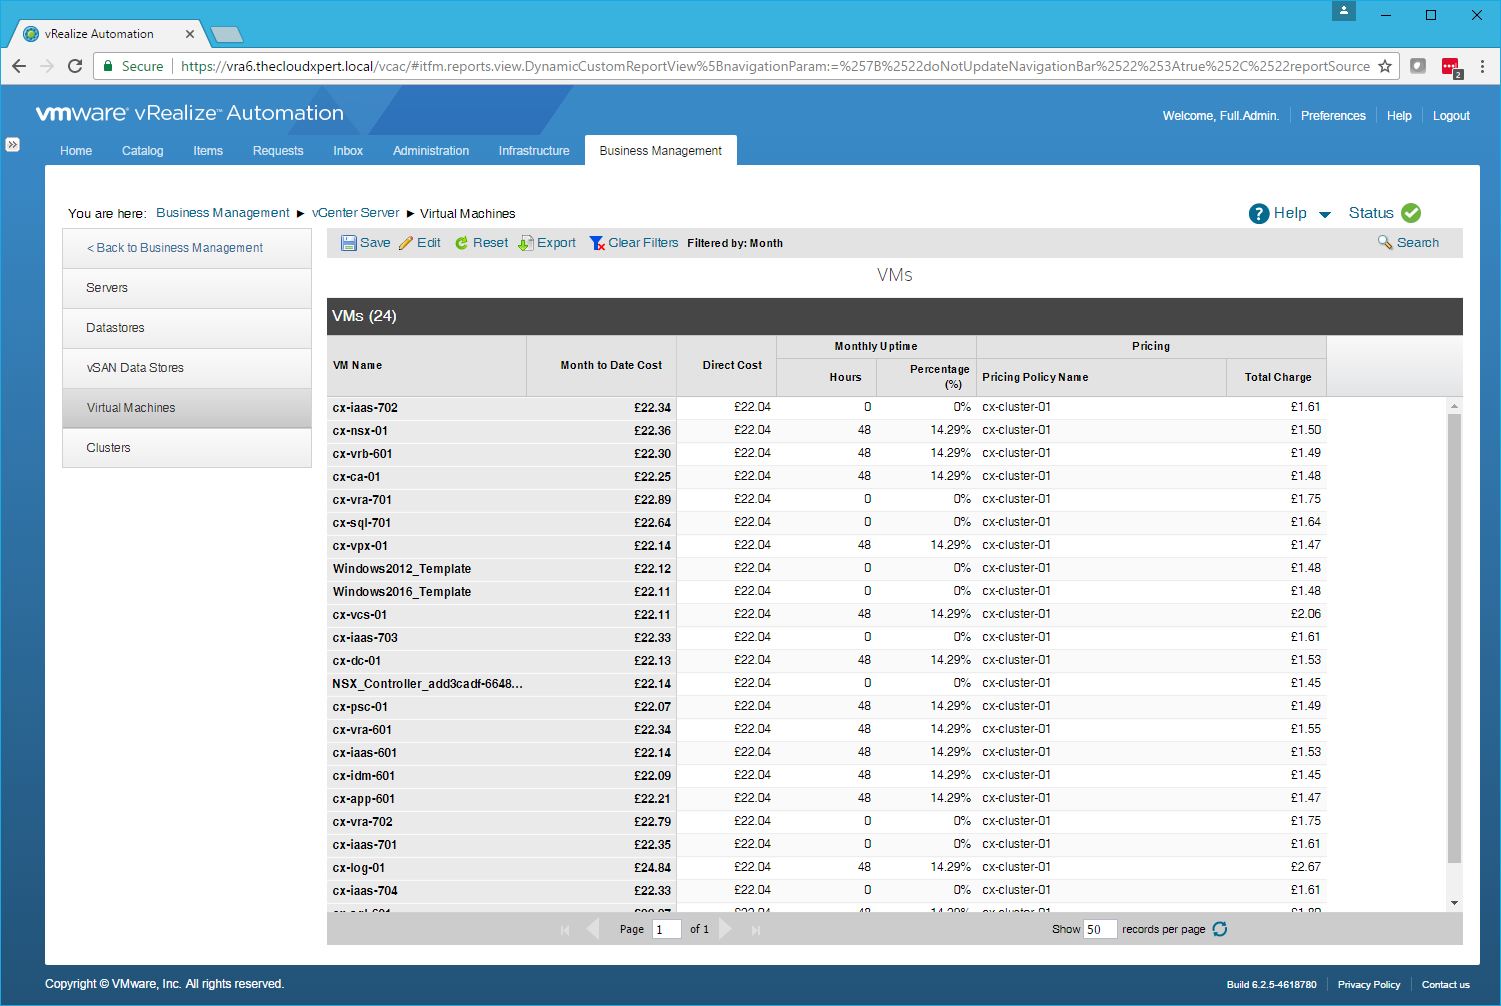
- Click Save.
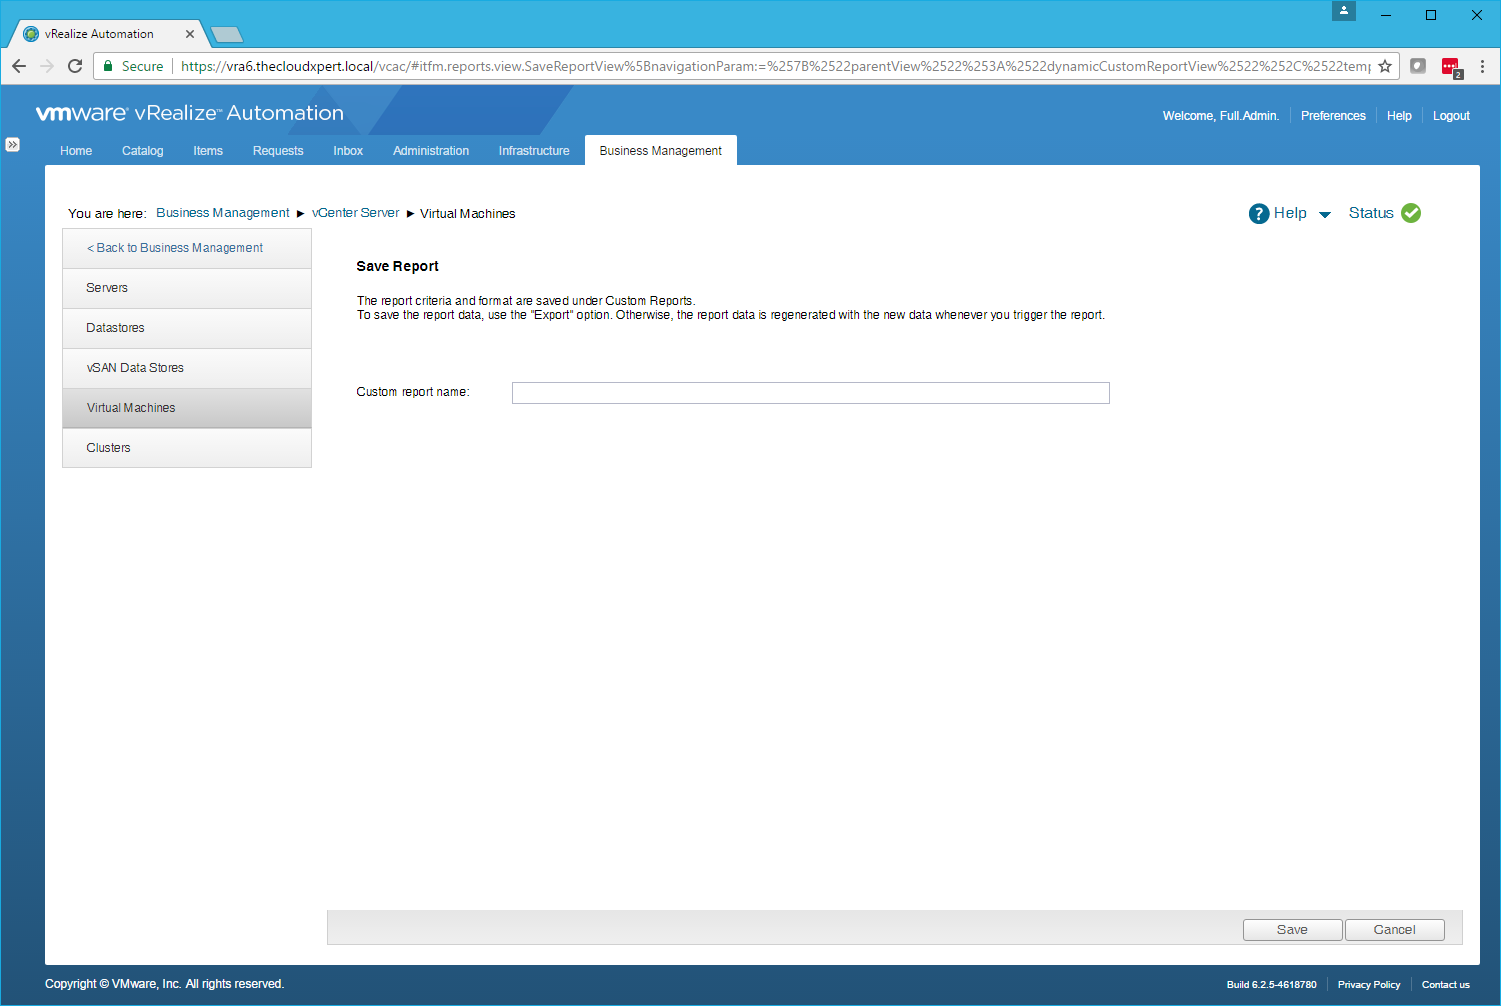
- Type a Custom Report Name into the text box and then click Save.
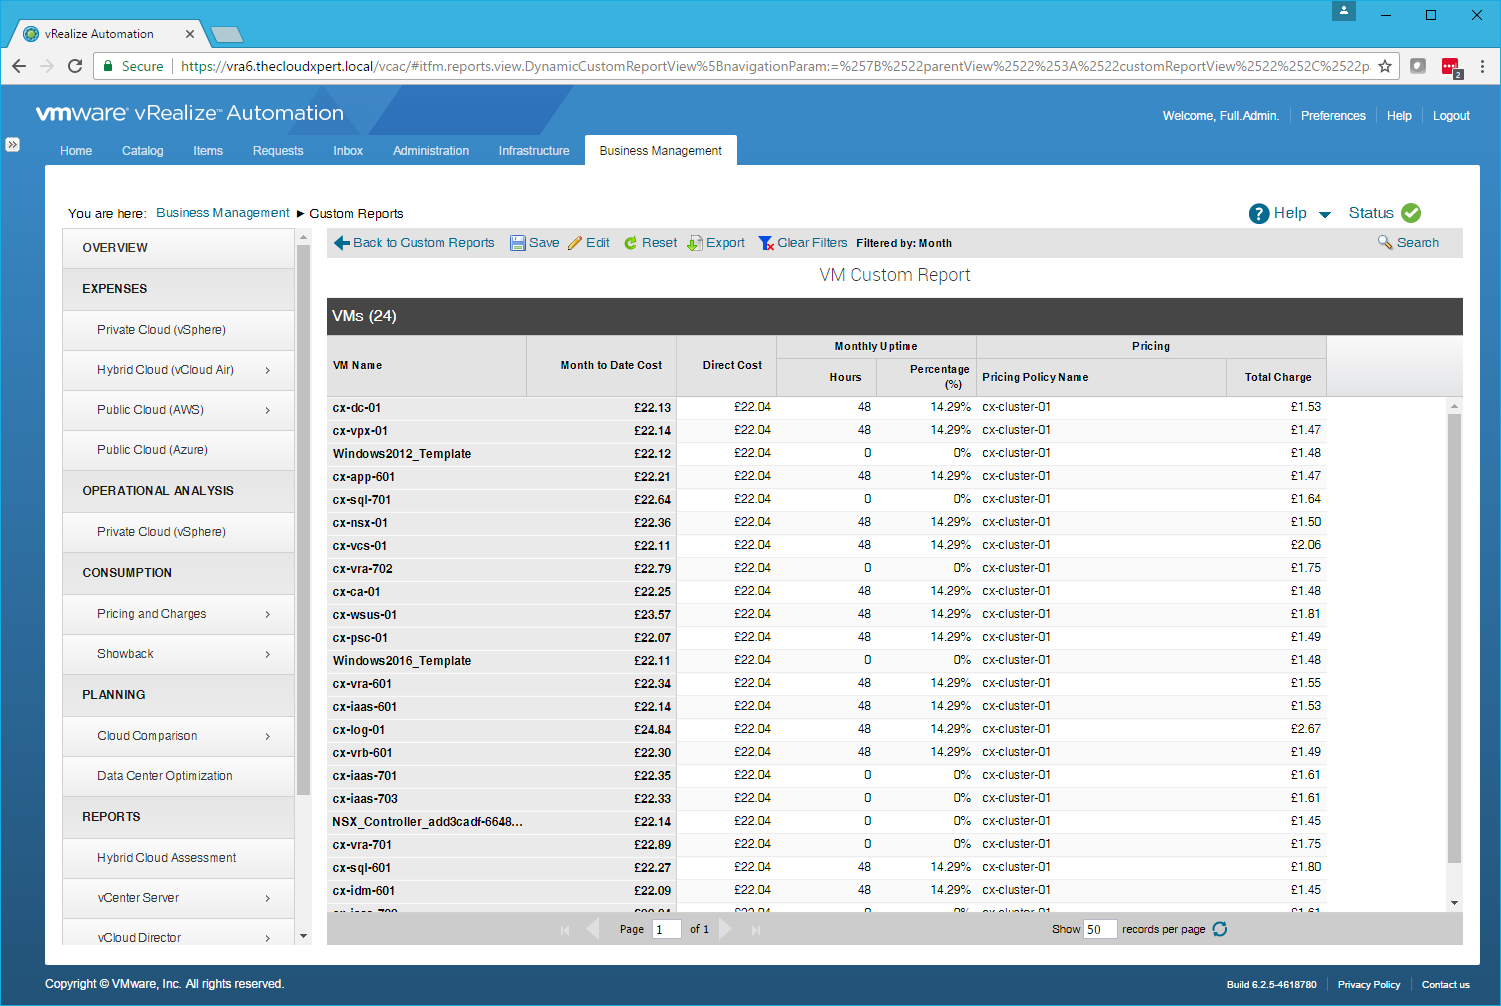
The process for creating a vRealize Automation Report is identical to creating a vCenter Server report.
Select and export the appropriate report
To Export an report, select the report and click the Export button and save the subsequent XLS document.
Filter and Search for specific reports based on customer requirements
As shown above, within a pre-generated or Custom report, you can filter the results based on a number of items from the Edit screen.
Published on 15 March 2017 by Christopher Lewis. Words: 1212. Reading Time: 6 mins.
Share this article on:
Related Post(s):
- VCAP6-CMA Deploy - Objective 7.1: Deploy and Manage a vRealize Application Services Appliance ()
- HOWTO: Deploy VMware vRealize Automation 6.x Application Services ()
- VCAP6-CMA Deploy - Objective 8.1: Deploy and Manage a vRealize Business Standard Appliance ()
- VCAP6-CMA Deploy - Objective 4.4: Import existing workloads ()
- HOWTO: Configure a vRealize Automation 6 Advanced Services Endpoint for vCenter Server ()
About the Author:

Name: Christopher Lewis
Twitter/X: thecloudxpert
Role: Domain Expert - VCF Automation & VCF Operations
Company: Broadcom
Recent Posts by Christopher Lewis:
Blog Categories:
vmware260
certification91
vrealize automation80
vcap48
nsx45
nsx v41
vmworld36
vrealize suite lifecycle manager20
vrealize suite14
vrealize orchestrator13
aria automation9
general9
vexpert9
vmware aria automation9
vsphere9
powercli8
microsoft7
active directory6
powershell6
windows6
certificate authority5
certificates5
vcf5
vmug5
vmware aria operations5
vrealize operations manager5
vsan5
vcenter4
vmware cloud3
aria operations2
aws2
home lab2
vcap62
vcix2
vmware explore2
vmware identity manager2
vrealize business2
Top Tags:
vmware 99+
vrealize automation 74
vcap6 cma 48
vcap6 45
nsx v 43
vcap6 nv 37
vcix6 nv 36
vmworld 35
howto 33
barcelona 24
vrealize orchestrator 21
vrslcm 20
vexpert 19
api 18
vmworld 2016 13
vra 13
certificates 12
vmware aria 12
vsphere 12
vrealize suite lifecycle manager 11
multi tenancy 9
vcap 9
vmware aria automation 9
vmworld 2017 9
platform services controller 8
powercli 8
vmug 8
vrealize operations 8
certification 7
microsoft 7
powershell 7
vsan 7
active directory 6
psc 6