Working with the Terraform Provider for vRealize Automation 8
vRealize Automation 8 vRealize Automation Cloud Terraform
Published on 8 April 2020 by Christopher Lewis. Words: 1671. Reading Time: 8 mins.

I tend to rebuild my vRealize Automation (vRA) labs ALOT. I am currently lucky and have two environments, my vRA 8 homelab and my vRA Cloud org. I wanted a way to provide a consistent configuration to both environments. I had two options open in front of me:
- Use native REST API
- Use the Terraform Provider for vRA 8/Cloud
As vRA 8 / Cloud is an API first platform, I could have definitely used the native API to complete the configuration I am looking to do. However, as I have been waiting for an opportunity to get some hands on time with Terraform I decided this was a good reasons to look at the VMware Terraform Provider for vRealize Automation 8 !!
The Goal
The goal was simple (or so I thought), to start with I essentially wanted to start with Infrastructure Level configuration in vRealize Automation, that is:
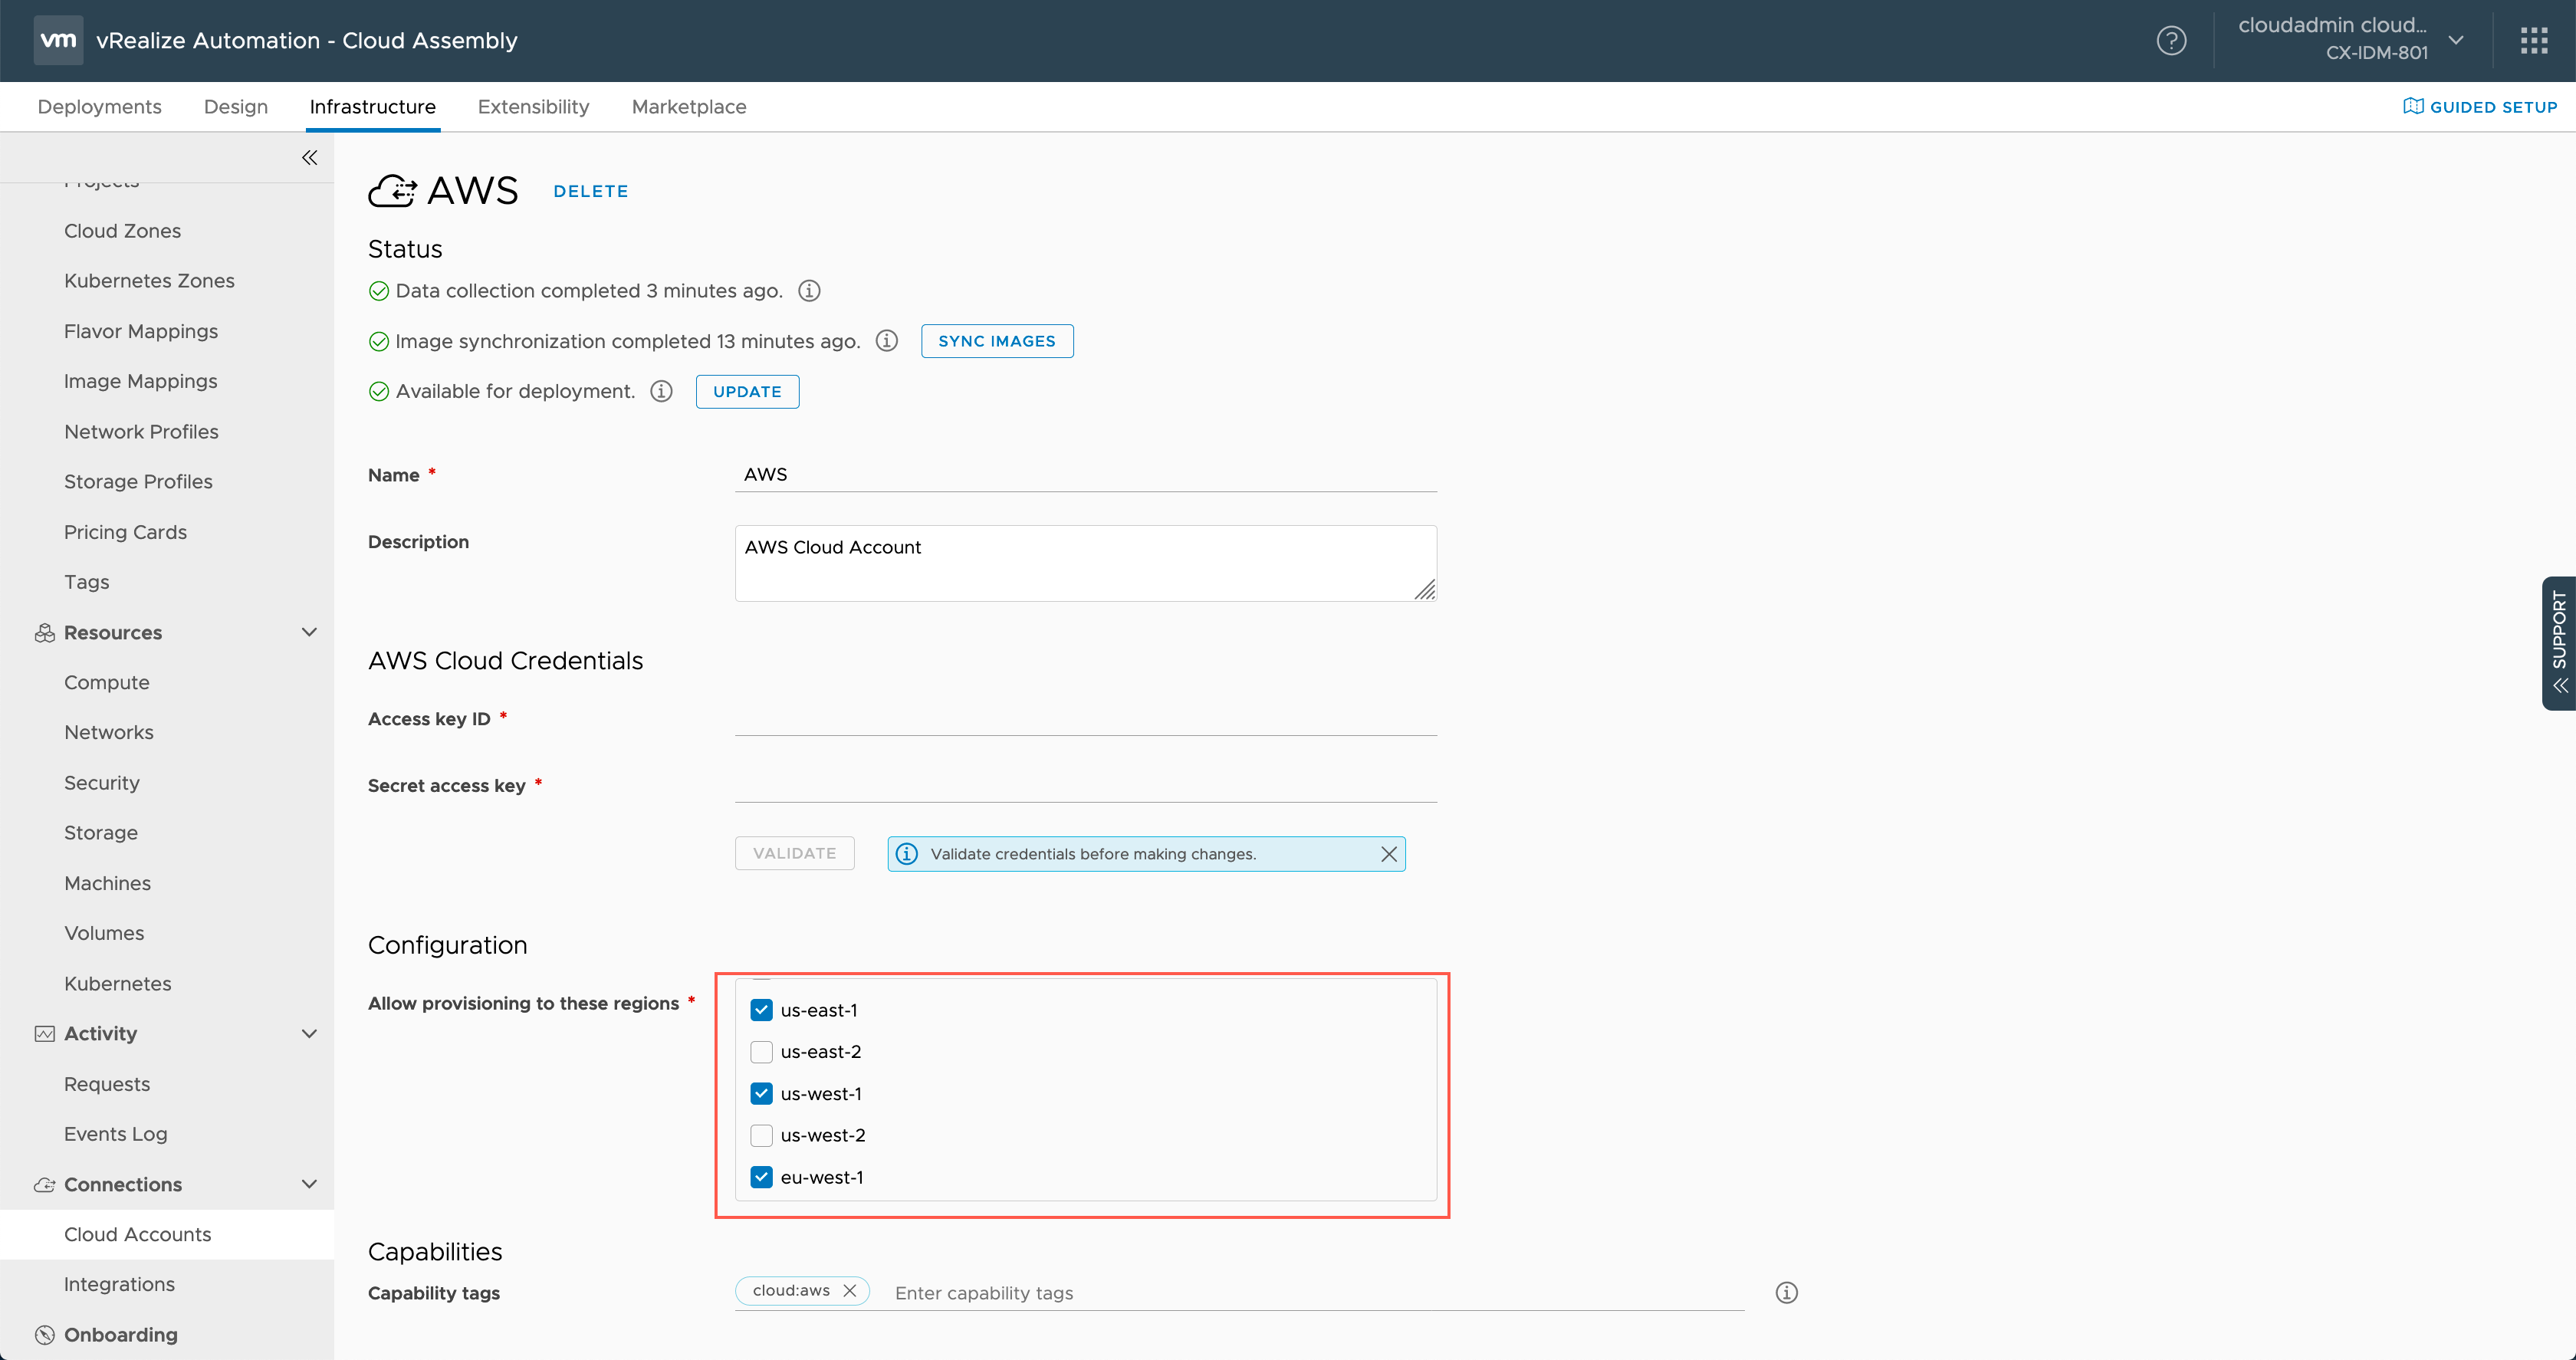
- Create a Cloud Account for each of my Clouds (AWS, Azure, GCP, vSphere) with 1 or more Region.
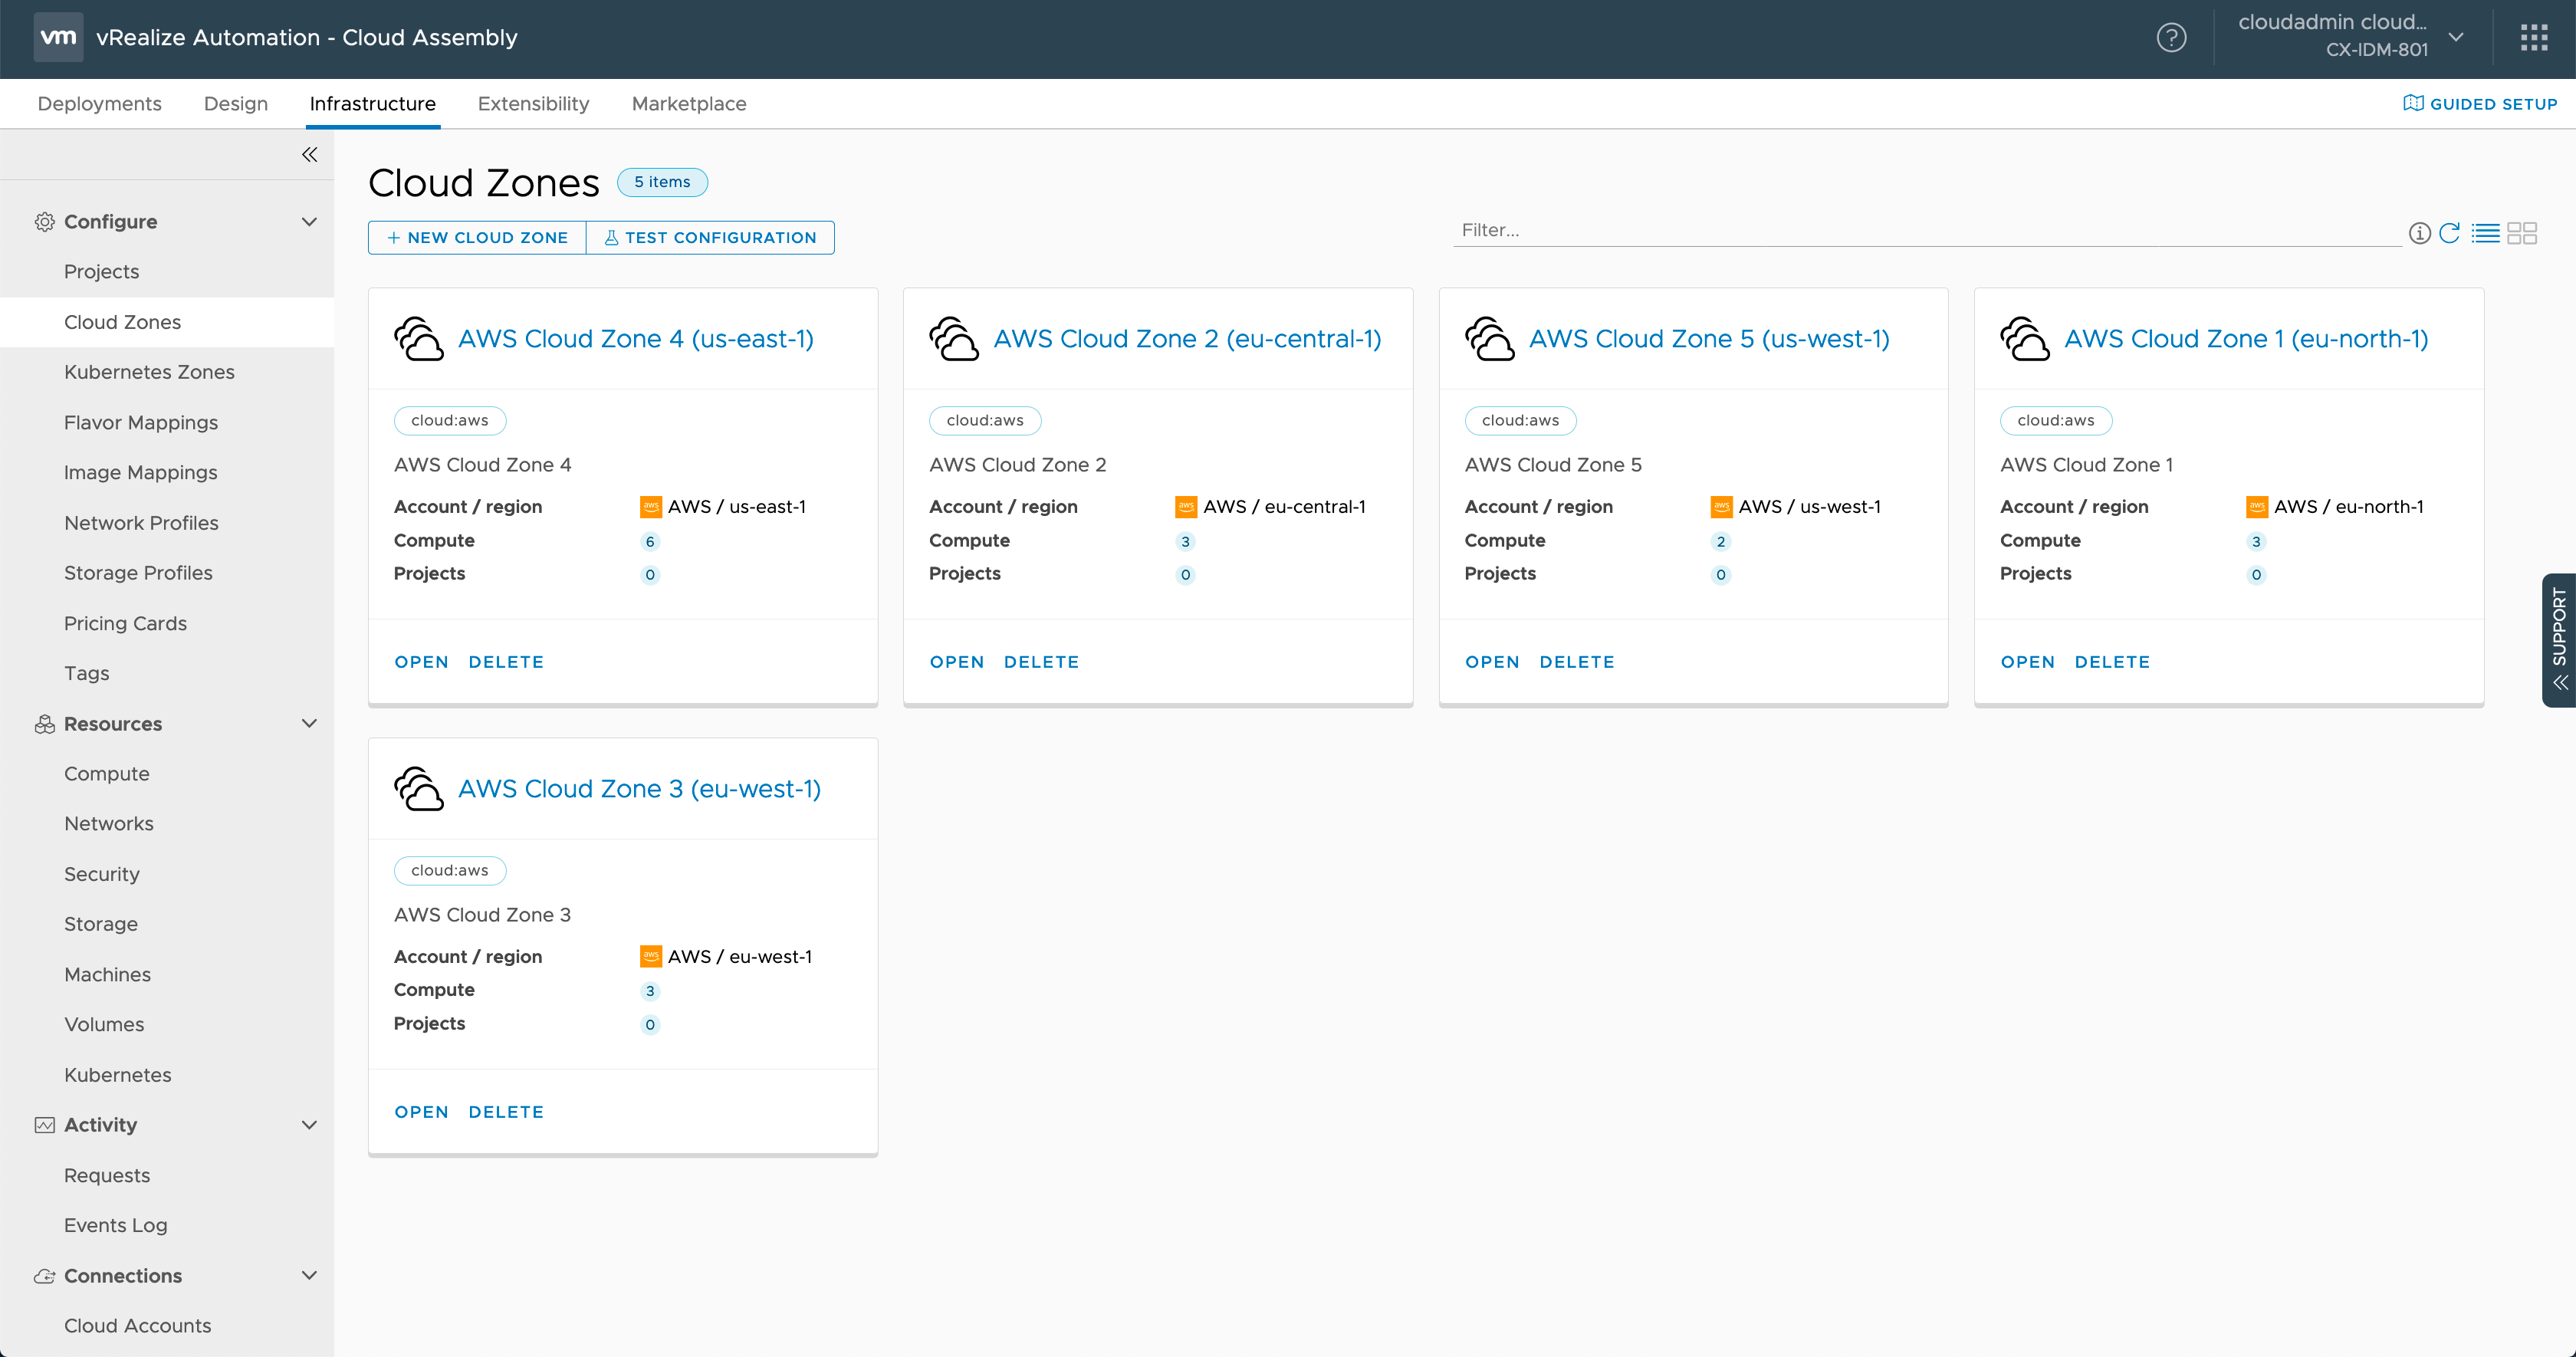
- Create a Cloud Zone for each Region / Availability Zones selected within each Cloud Account
- Create 1 or more Image Mapping in each Region.
- Create 1 or more Flavor Mappings in each Region
This meant that per Cloud Account I had:
- 5 Regions (covering the UK, Europe and US)
- 4 Cloud Zones
- 4 Image Mappings per Region (Extra Small, Small, Medium, Large and Extra Large)
- 5 Flavour Mappings (Windows Server 2012 R2, Windows Server 2016, Windows Server 2019, RedHat Linux 7, CentOS 7)
How hard could it be?
The Beginning
I started this journey by reviewing the great article Getting started with the vRealize Automation Terraform Provider written by my colleague Sam McGeown which took me through the basics of getting terraform and the vRA 8 provider installed. It also ran through some basic examples and was a great primer for what i wanted to do next!
After following the article, I realized I wanted to do more. Whilst it didn’t make me a Terraform aficionado, the article gave me enough information to be dangerous! I now understood the basic constructs of the terraform (.tf) file structure and the vRA8 Provider and so I wanted to expand the examples provided by Sam and the GitHub repo.
As I started to go through what I wanted to achieve, the first thing I realized was there wasn’t examples for everything I needed! For the examples that were there, it quickly became clear that the examples were great when you wanted to configure a single Cloud Account with a single Cloud Zone with a single set of Image Mappings and Flavor Mappings.
But how could those be scaled for multiple cloud accounts and multiple regions?
The Implementation
The following sections walks through the process I went through to get to my current files. If you’re not interested in the journey (shame on you, this post is about the journey and lessons learnt!) and just want instant gratification, go straight to the The Solution section to see the final code.
This section also assumes you have setup terraform, installed the vRA8 provider and understand the usage of the different terraform files (including the terraform.tfvars and variables.tf) - see
Getting started with the vRealize Automation Terraform Provider
if you need help.
The First Iteration
In my first iteration of this journey, I decided to concentrate on one cloud account, AWS. The assumption being that if I could get it right for one cloud, I should be able to scale it to multiple clouds pretty easily.
I started with updating the main.tf by updating the AWS Cloud Account and added multiple entries into the regions part of the yaml for the vra_cloud_account_aws.
This gave me a Cloud Account with multiple regions configured!
The next step was to configure a Cloud Zone per region. I did this by just adding more of the same code but adding a number and incrementing the name by 1 each time. Essentially adding the following code into the main.tf multiple times.
At this point the code in my main.tf looked like below:
Which resulted in my Cloud Account and Cloud Zones being created!
It was at this point I started to think to myself, just to create a cloud account and 5 cloud zones has taken 95 lines of code. If I have 4 Cloud Accounts, thats almost 400 lines of code in a single main.tf file and I haven’t even thought about Flavor Mappings or Image Mappings yet…
There has to be a better way…
The Second Iteration - Multiple TF Files = Winning!
I went to my favourite encyclopedic reference database (aka Google) and came up with a number of articles around tips and tricks around using Terraform. The first one that resonated with me was Terraform – using multiple files for configurations and variables .
From this article, I took away one key piece of information that I didn’t know in my first iteration:
When you run
terraform planorterraform apply, it essentially merges any .tf file it can find within the working directory into one big file before running it. #MindBlown
Note: I acknowledge this may have been something everyone else knew, but it was news to me!
So how does this actually help? Well it means I don’t have to have one main.tf file with ~400 lines of code in it covering all of my Cloud Accounts. I can create a logical structure and separate the different Cloud Accounts (and in the future Projects or Blueprints) into separate files (within a folder) which will automatically get merged.
So my current file structure looks like:
| File Name | Description | Resources included |
|---|---|---|
| main.tf | Stores the `vra` provider resource. | |
| prod.aws.tf | Contains the details for AWS | Including `vra_cloud_account_aws`, `vra_region`, `vra_zone`, `vra_flavor_profile` and `vra_image_profile` |
| prod.azure.tf | Contains the details for Azure | Including `vra_cloud_account_azure`, `vra_region`, `vra_zone`, `vra_flavor_profile` and `vra_image_profile` |
| prod.gcp.tf | Contains the details for GCP | Including `vra_cloud_account_gcp`, `vra_region`, `vra_zone`, `vra_flavor_profile` and `vra_image_profile` |
| prod.vsphere.tf | Contains the details for vSphere | Including `vra_cloud_account_vsphere`, `vra_region`, `vra_zone`, `vra_flavor_profile` and `vra_image_profile` |
| terraform.tfvars | List of variables | Including secret keys and access keys etc |
| variables.tf | Declaring variable structure |
I’m sure it will evolve in the future but thats what I’m using right now and it is working!
I was a little happier with this setup, but I now I had ~400 lines of code across 5 files. With each Cloud Account configuration file being nearly identical, I asked myself again…
Say it with me… There has to be a better way…
The Third Iteration - for_each for success!
I went to back to my favourite encyclopedic reference database (aka Google) and found this article
Terraform tips & tricks: loops, if-statements, and gotchas
which helped direct me to the for_each and count constructs within terraform.
Note: It is important to give another shout out to Sam McGeown here. I got some of the way to getting this work before I hit issues and Sam helped fill in the gaps that I was missing which made the code work!
So what will the for_each loop do to my .tf files? Well if we just look at vra_region, the code block changes from:
to this:
But it is more than just a smaller amount of code. The second code block now dynamically creates the Regions based on the declared regions of the Cloud Account! How #AWESOME is that?
It wasn’t all plain sailing though because using a for_each loop did add additional complexity around identifying the correct region_id (as I wasn’t manually setting the value) the other resources that required to use the attribute.
If we use Cloud Zones as the example, that complexity was easily overcome using another for_each loop. This not only reduced the amount of code significantly (rather than 70 lines I know have 11) it also made it dynamic based on the the set of Regions objects we created in the previous code snippet (which itself is dynamically generated from the list of Regions in the Cloud Account). The code sample for Cloud Zones is below:
What is great is that, the same approach above can be taken with both Image Mapping and Flavor Mapping.
I haven’t covered count in this blog because I haven’t used it. But essentially if i wasn’t using identical blocks of code and I wanted to create resources that had configuration that was near identical but differed only in, for example, the name incrementing by 1, that is where you could take advantage of count.
The Solution

So what does my current prod.aws.tf file look like after all this re-work?
Well it’s still ~100 code lines long, but also includes Image Mapping and Flavor Mapping! I estimate that is a ~70% reduction in code lines to worry about maintaining! The full code is below for one Cloud Account:
main.tf.
If we forget the different connection parameters required for different clouds, the beauty of this for_each loop code approach is that I can effectively duplicate the file and replace all instances of AWS with Azure or GCP.
Final Thoughts
It has been an interesting journey over the last few days with Terraform. I still have some way to go with getting my environment configuration to be completely Infrastructure-As-Code (IaC) but I now have a better understanding of what Terraform is capable of. The vRA 8/Cloud provider is definitely adding value to the vRA story and I can definitely see where the products are going to be better together!
So the key takeaways are:
- Use Multiple .tf files to logically separate you code into consumable chunks via role or purpose.
- Use
for_eachandcountto minimise on the code you need to create in the right situations. - Take a look at the good work that can be done with the Terraform Provide for vRealize Automation 8/Cloud .
Now let me take a look at Projects and Blueprints!
Published on 8 April 2020 by Christopher Lewis. Words: 1671. Reading Time: 8 mins.