Configuring Multi-Org Tenancy in vRA 8.x - Part 5: Configuring Directories
vRealize Automation vRA Multi-Tenancy
Published on 1 October 2020 by Christopher Lewis. Words: 1069. Reading Time: 6 mins.
Introduction
In this series of posts, we will be taking a look at how to configure a Multi-Organization Tenancy (aka Multi-Tenancy) in vRealize Automation (vRA) 8.x.
In this post, I will tackle the management of User Directories in a vRA 8.x Multi-Organizational Tenancy deployment. Specifically, we will look at:
- Migrating a User Directory from the Provider Tenant into the Customer Tenant.
- Adding a new User Directory to the Customer Tenant using VMware Identity Manager.
- Deleting a User Directory from the Customer Tenant using VMware Identity Manager.
For more information on the rest of the posts in this series, click here .
Walkthrough
Adding User Directories to an Organization/Tenant
We’re going to be adding new User Directories to the MedTech Organization we created previously. This objective can be completed using vRSLCM. Obviously using vRSLCM potentially means that your provider tenant needs to have a number of customer Active Directories (based on your requirements) configured.
Migrating a User Directory from the Provider Tenant into the Customer Tenant
One thing to note before we start is that whilst I have classed this as a migration, the User Directory is also still left in the Master/Provider Tenant after this procedure.
- Navigate to the vRSLCM homepage, https://vrslcm.fqdn .
- Enter the user credentials for an Admin user and click LOGIN.
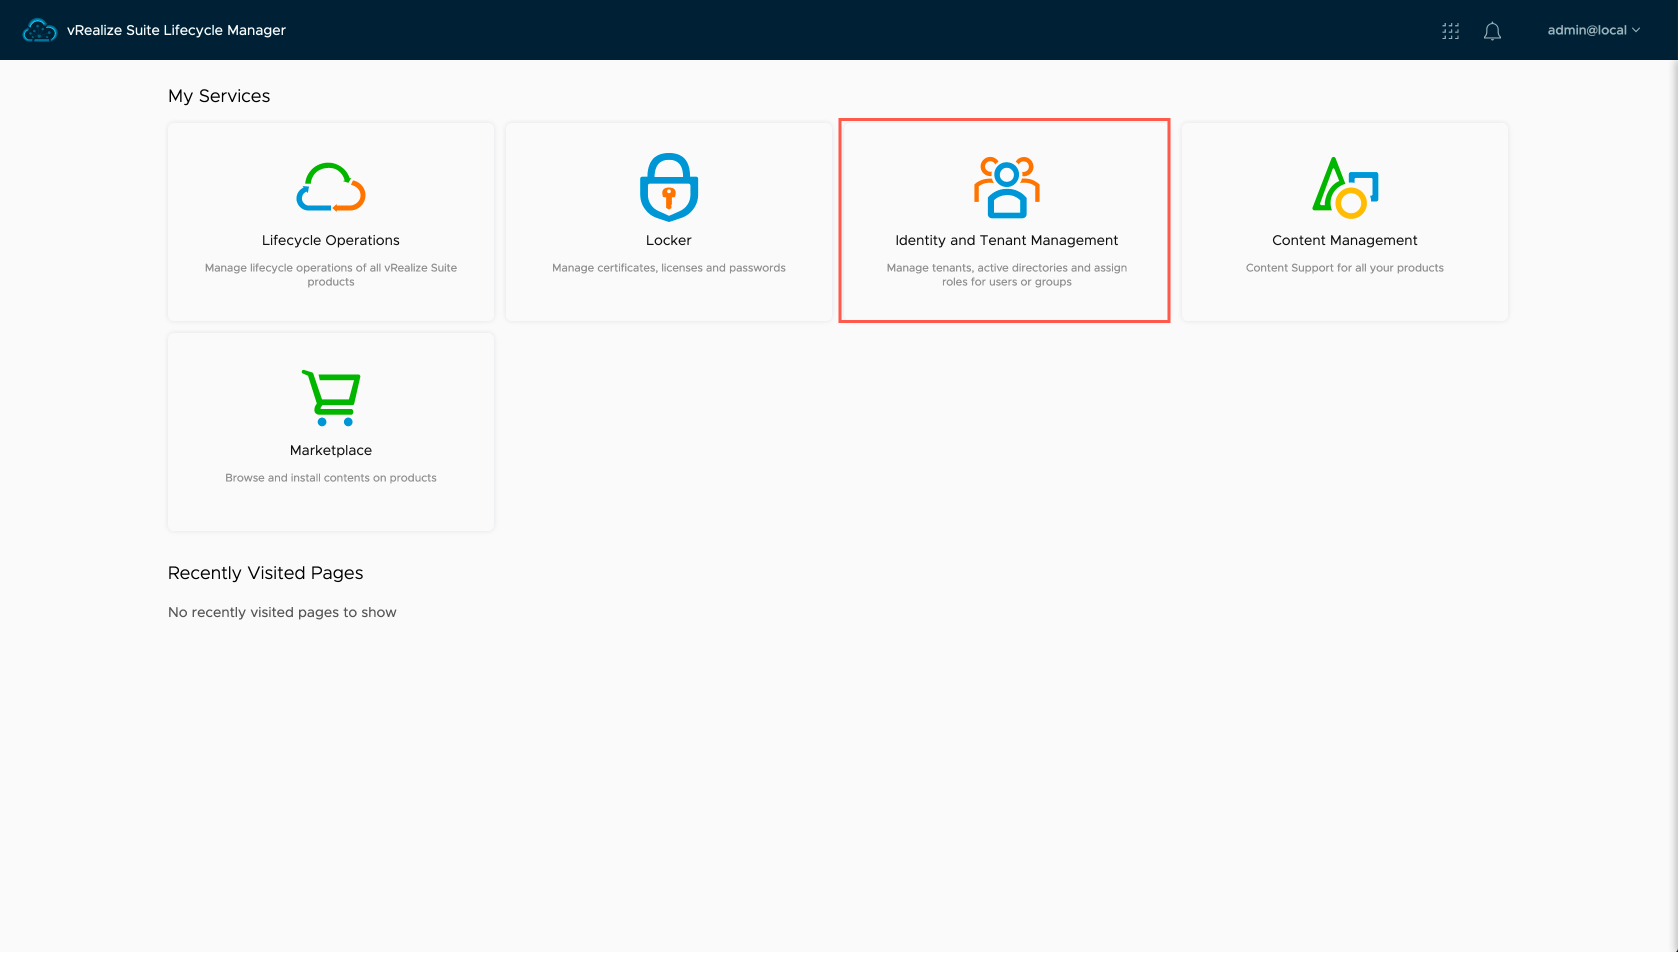
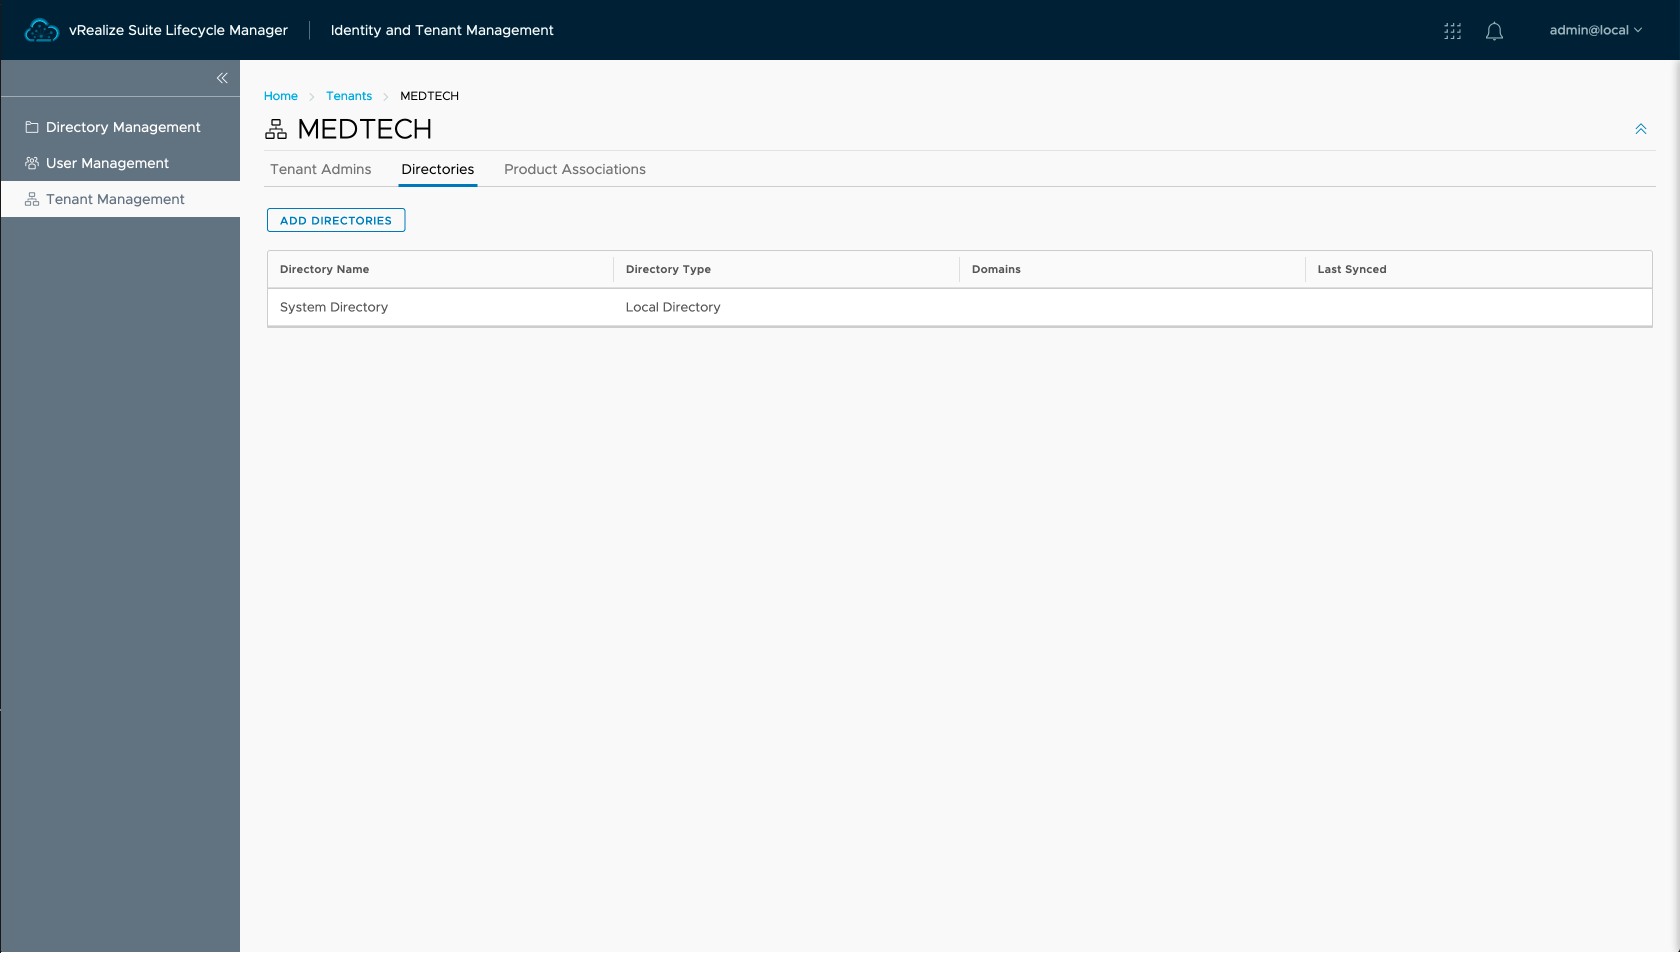
- At the My Services screen, click Identity and Tenant Management.
- Click Tenant Management.
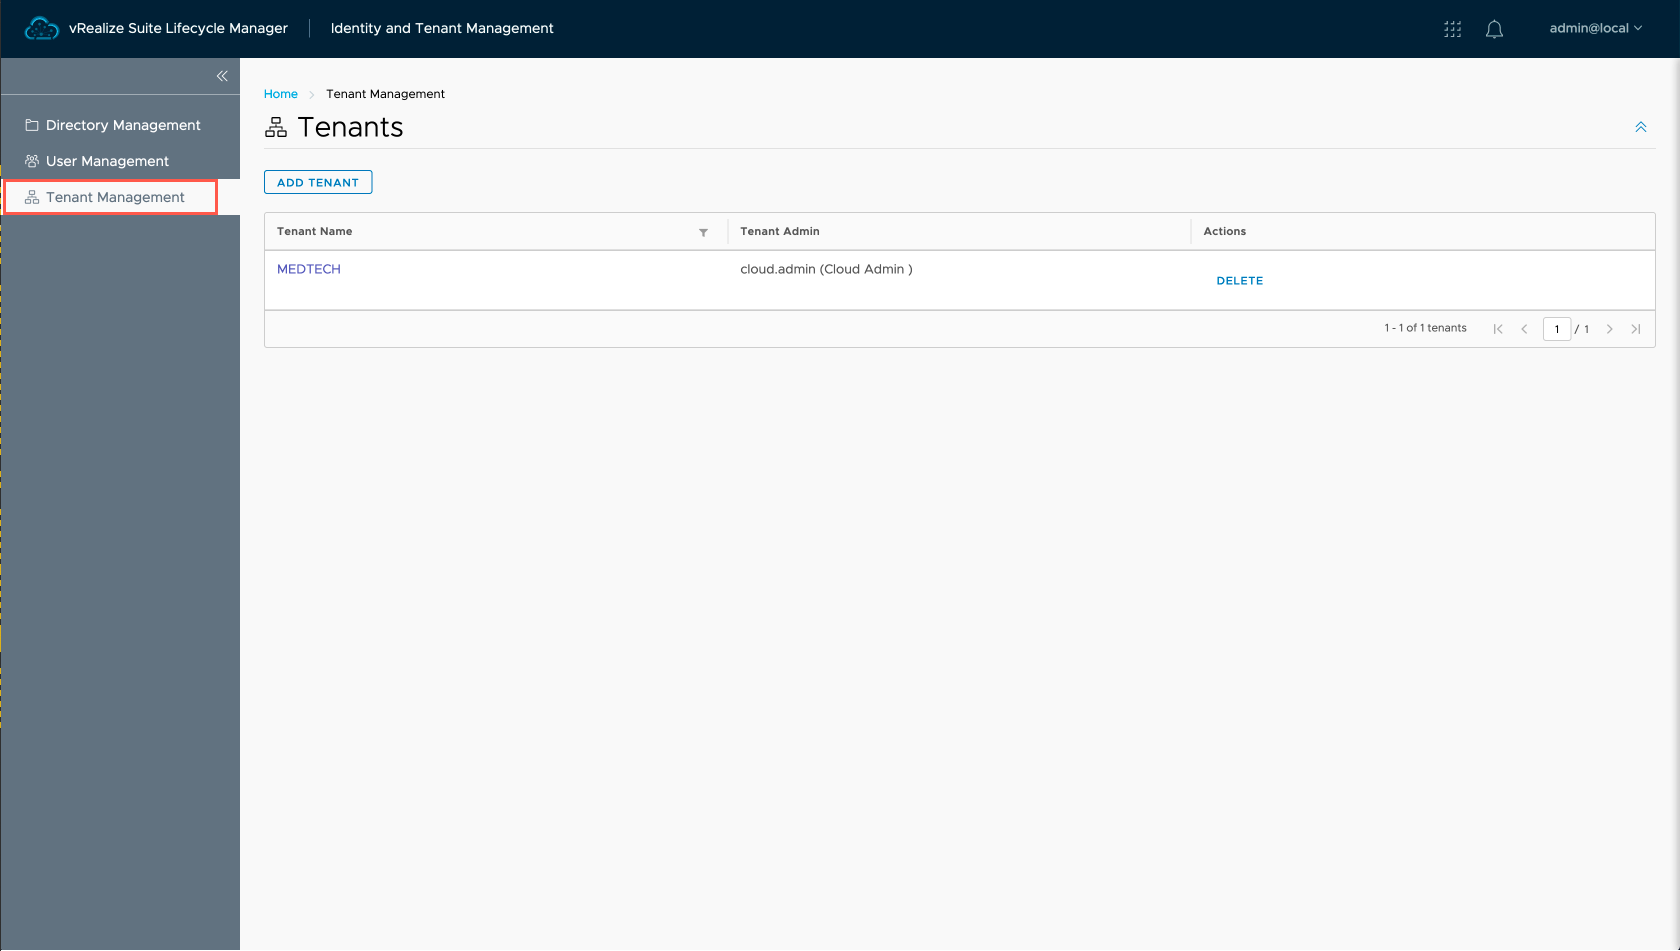
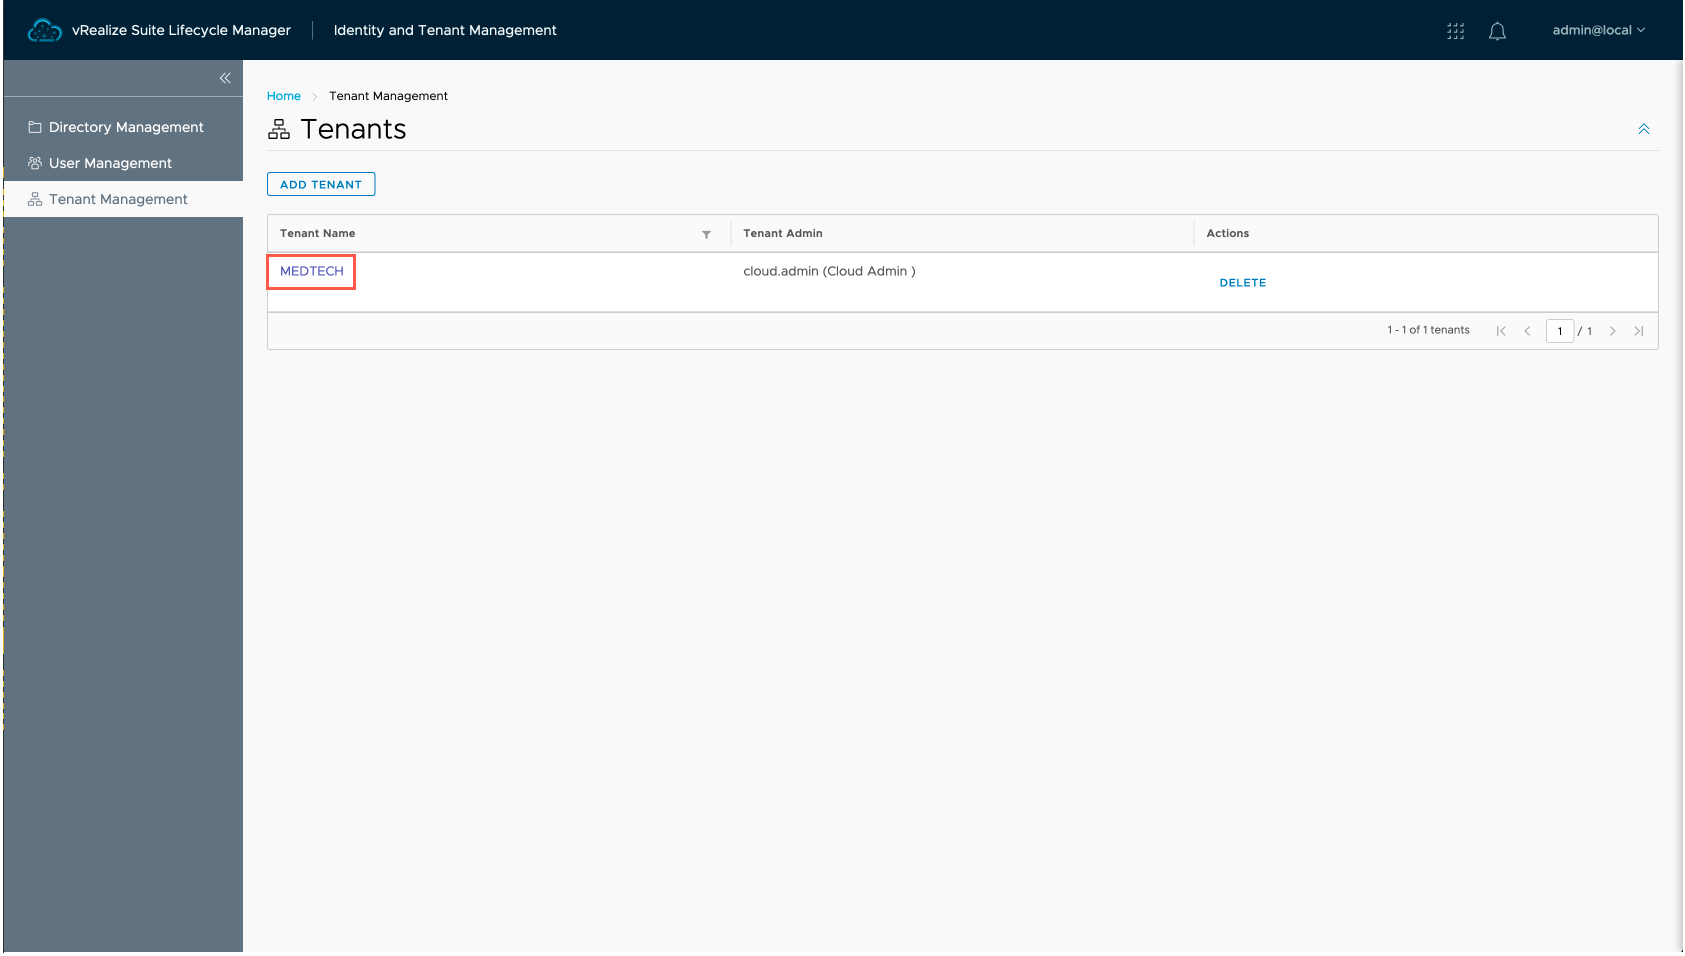
- At the Tenants screen, Click the MEDTECH Tenant.
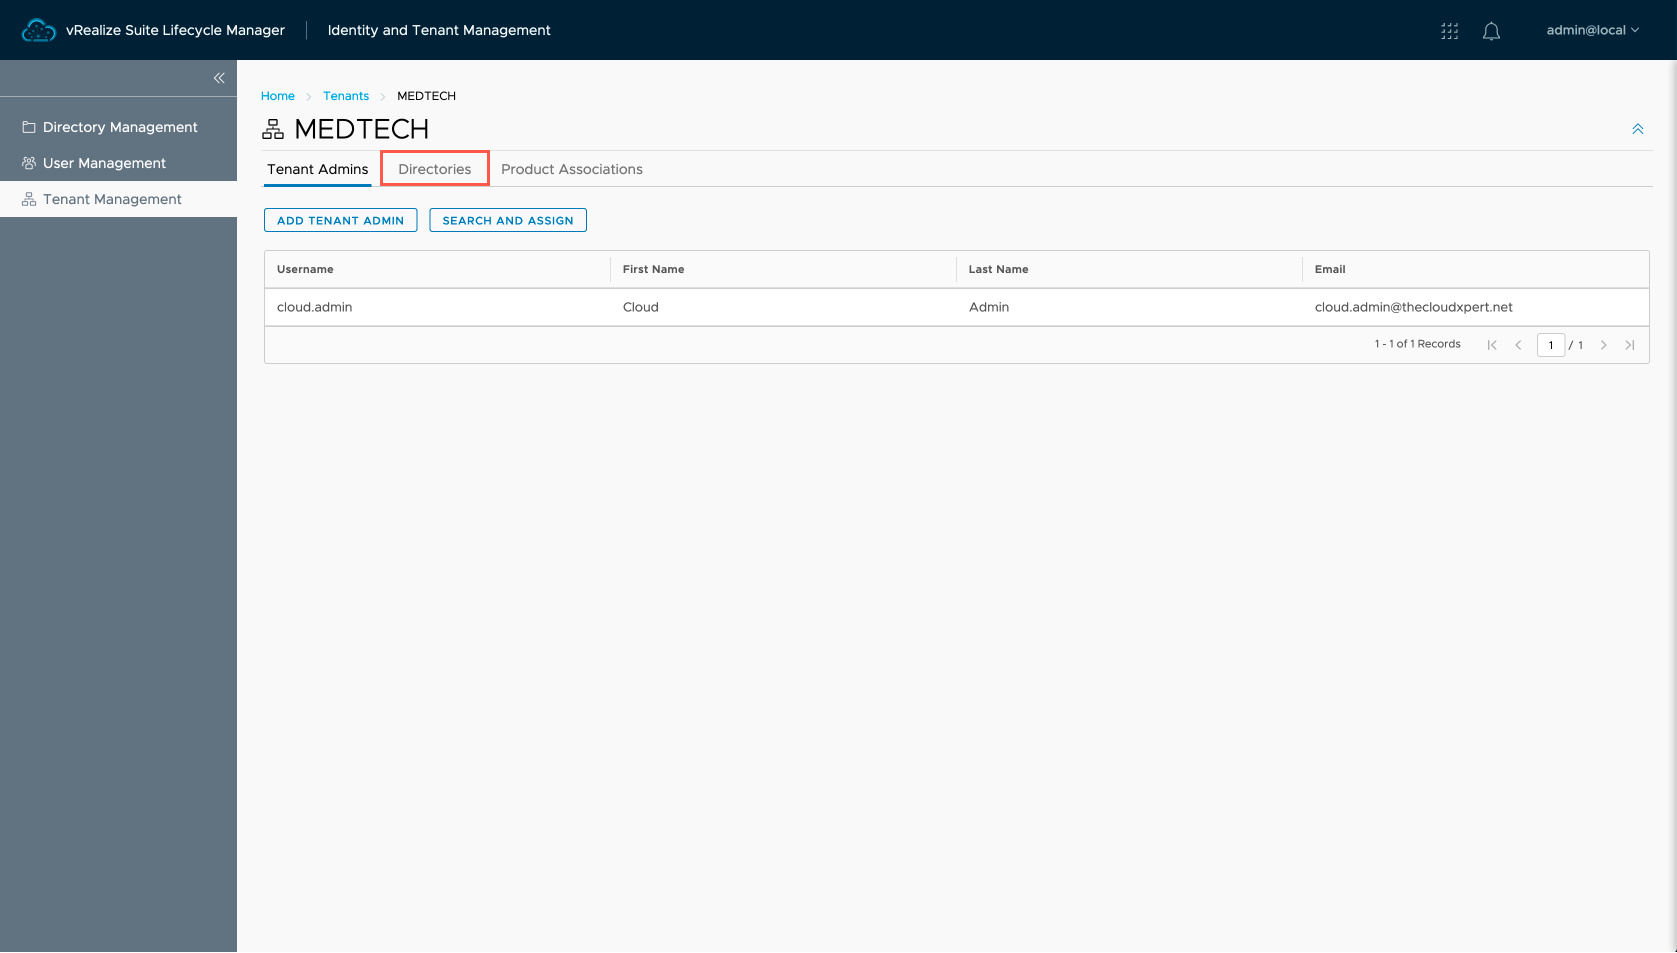
- At the MEDTECH screen, click Directories.
- At the MEDTECH screen, click ADD DIRECTORIES.

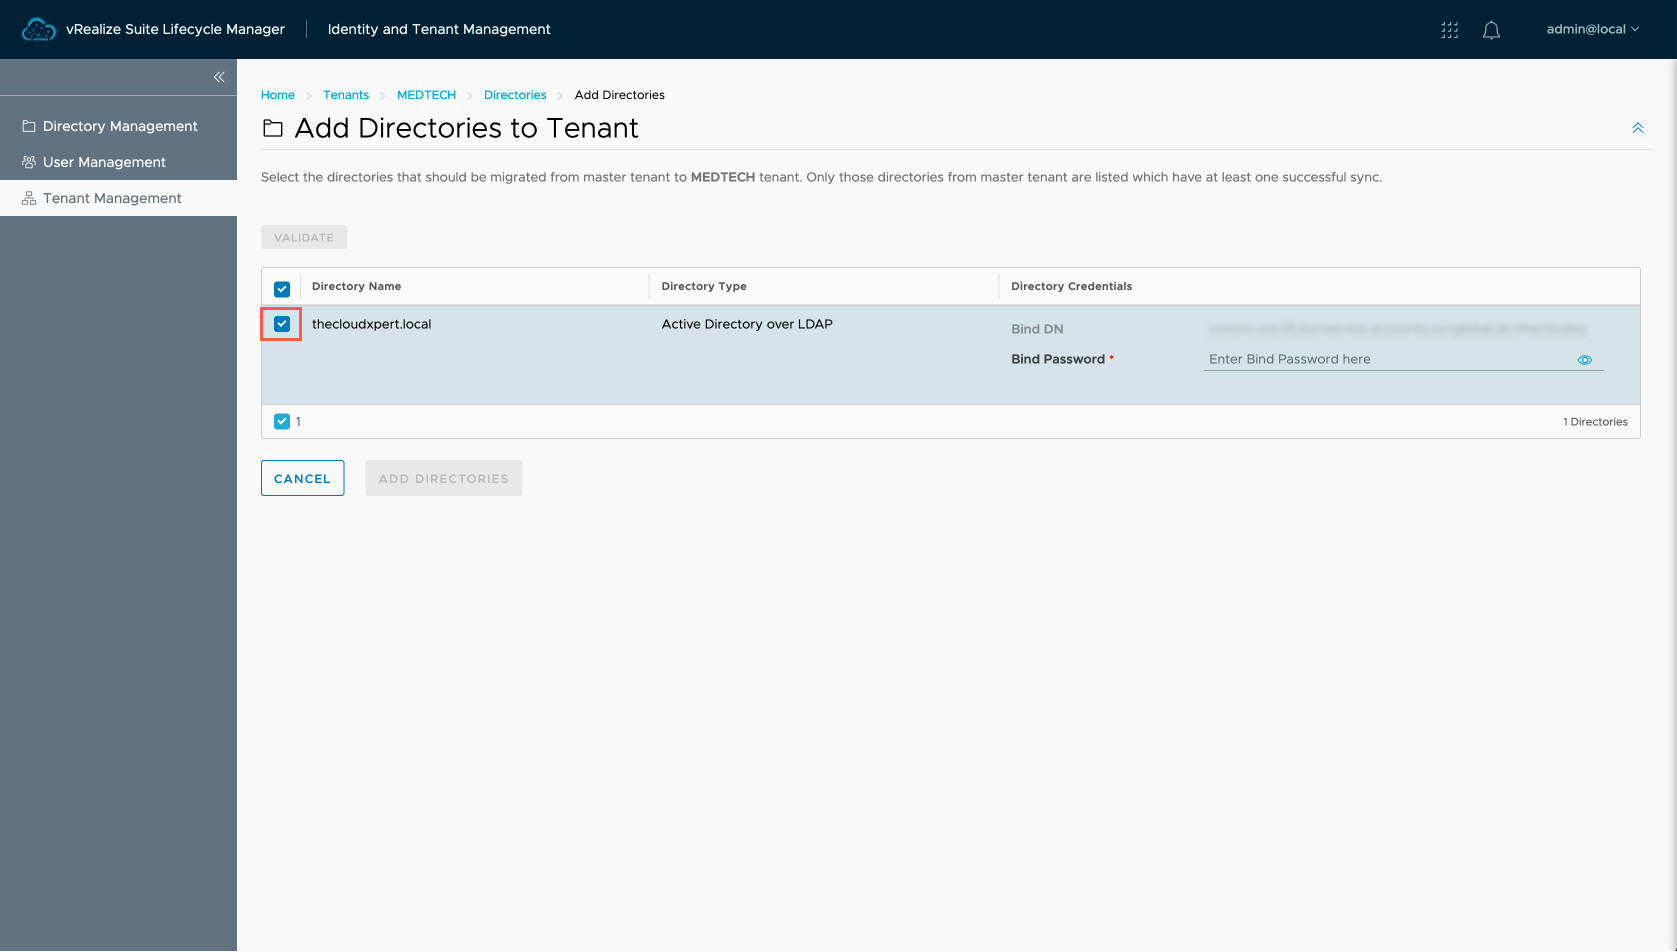
- At the Add Directories to Tenant screen, click the checkbox next to the target Directory Name.
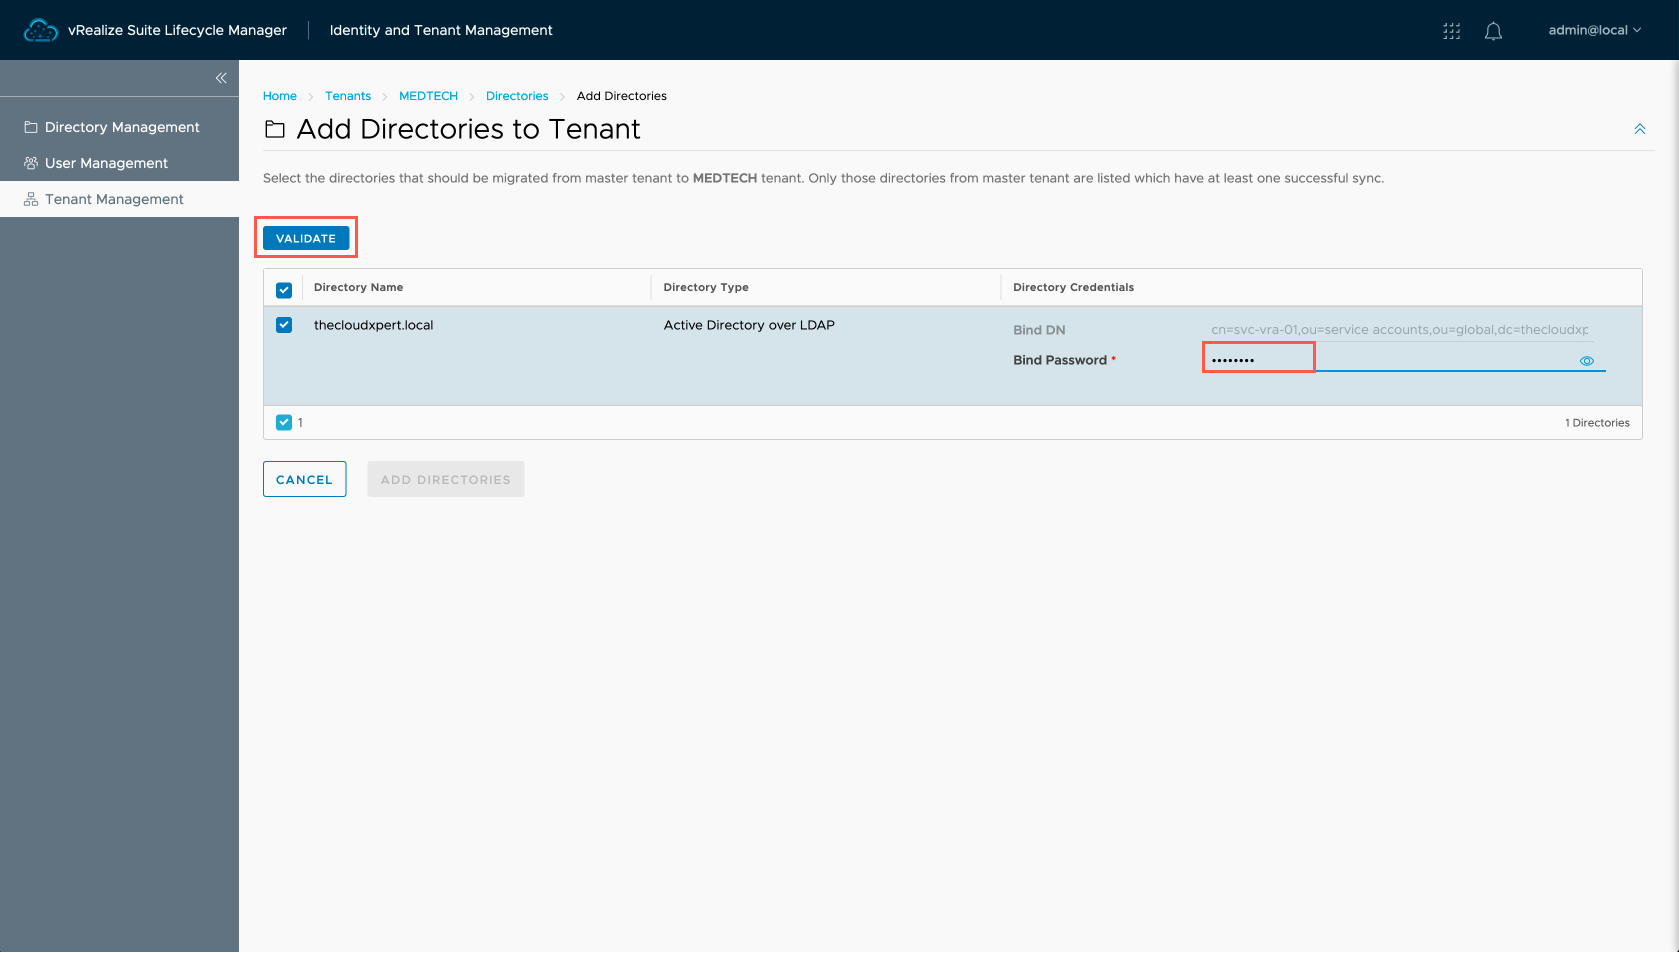
- At the Add Directories to Tenant screen, enter the Bind Password into the textbox and click VALIDATE.
- At the Add Directories to Tenant screen, click ADD DIRECTORIES.
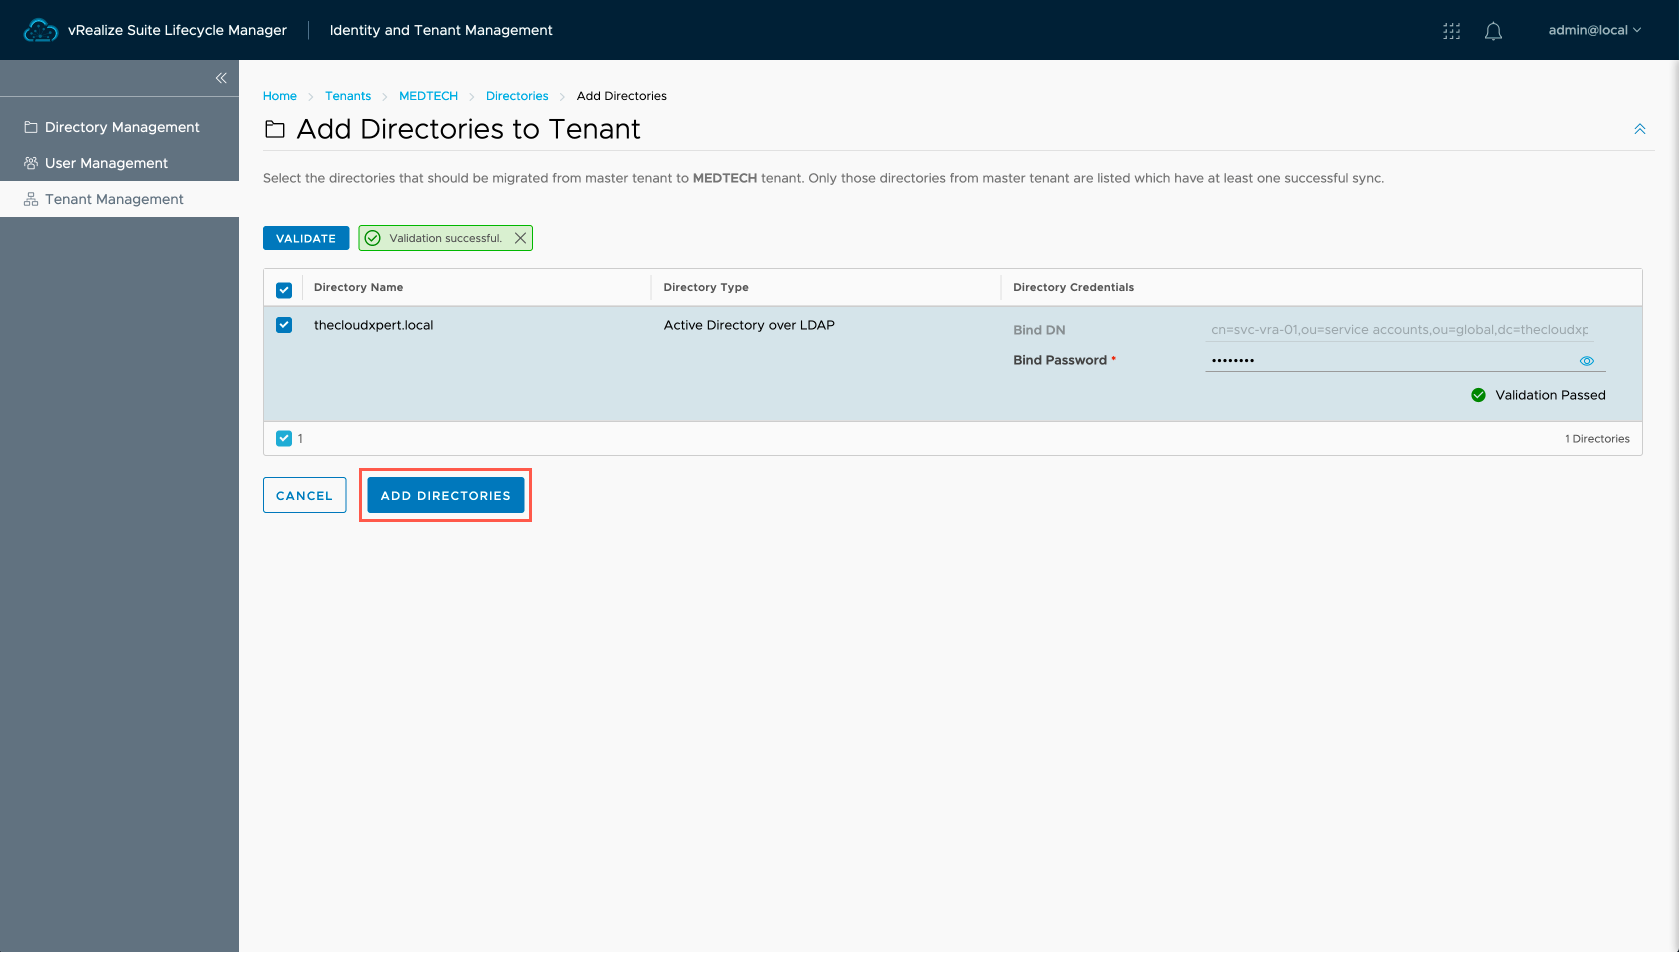
- The directory has now been added to the Tenant!

Adding a New User Directory to the Customer Tenant using VMware Identity Manager
- Navigate to the vIDM Administrator portal for the tenant,
https://tenant.idm.fqdn/admin.
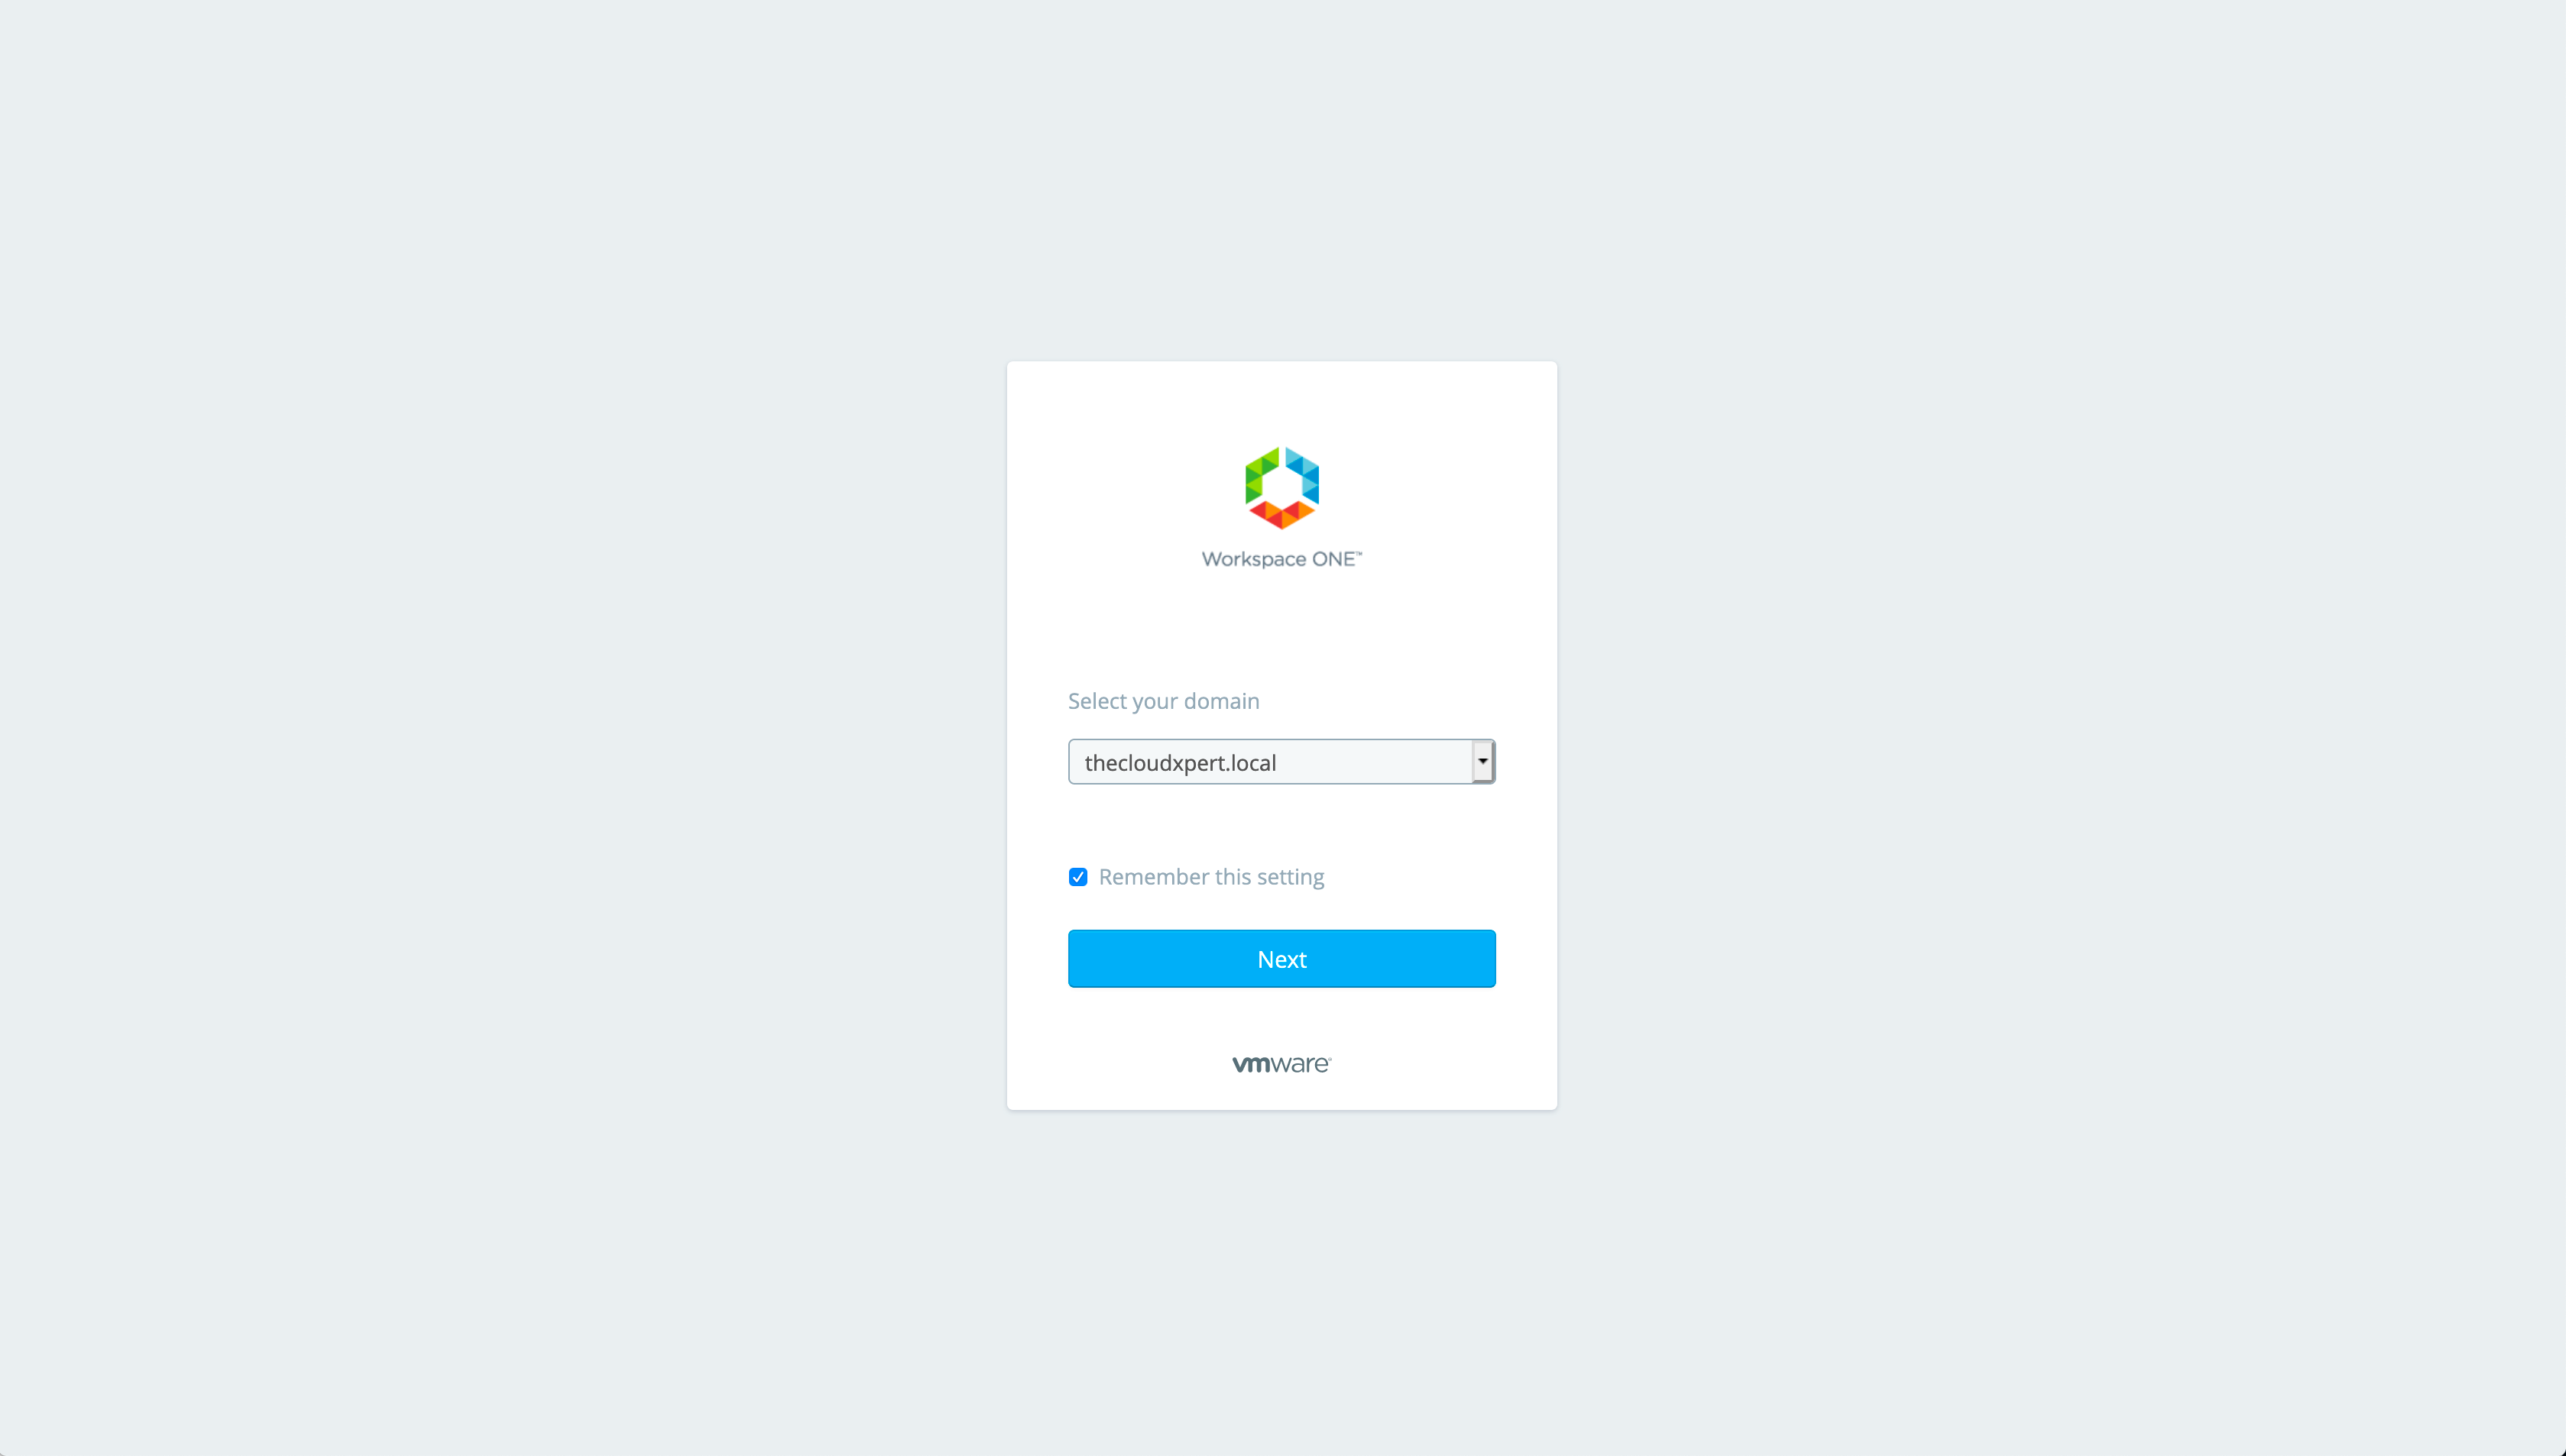
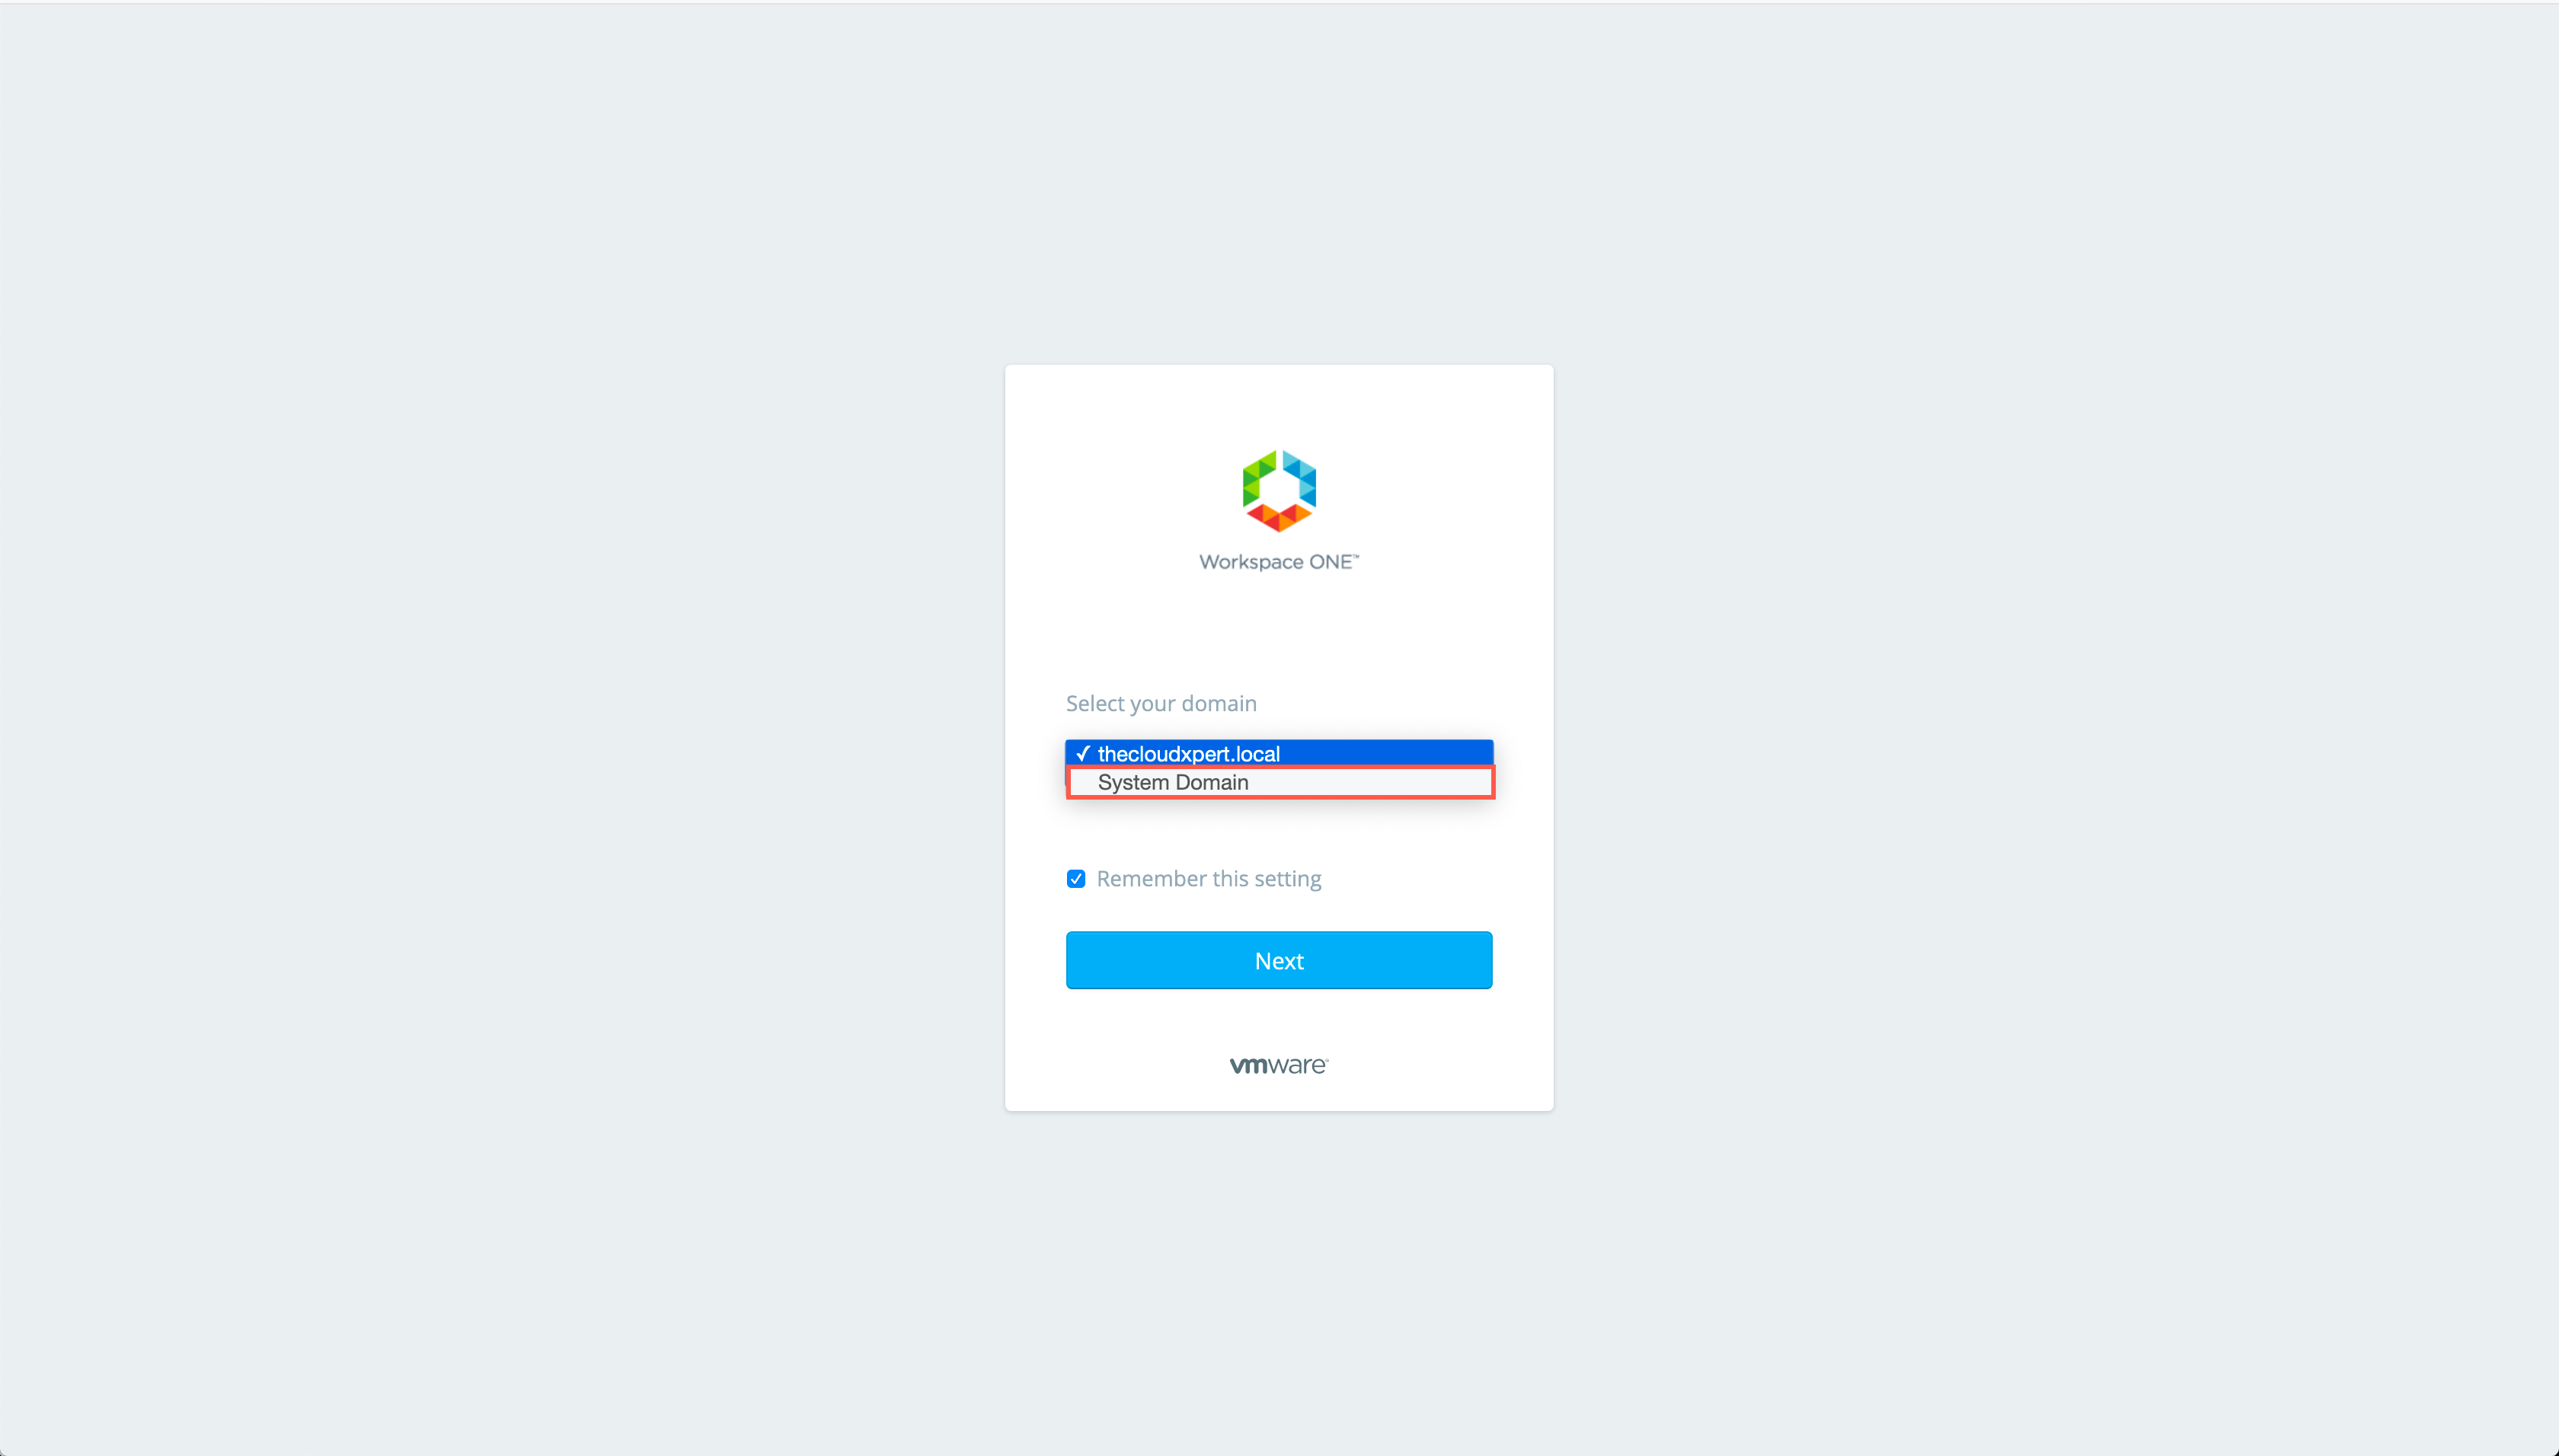
- At the login screen, select the System Domain value from the Select your domain dropdown.

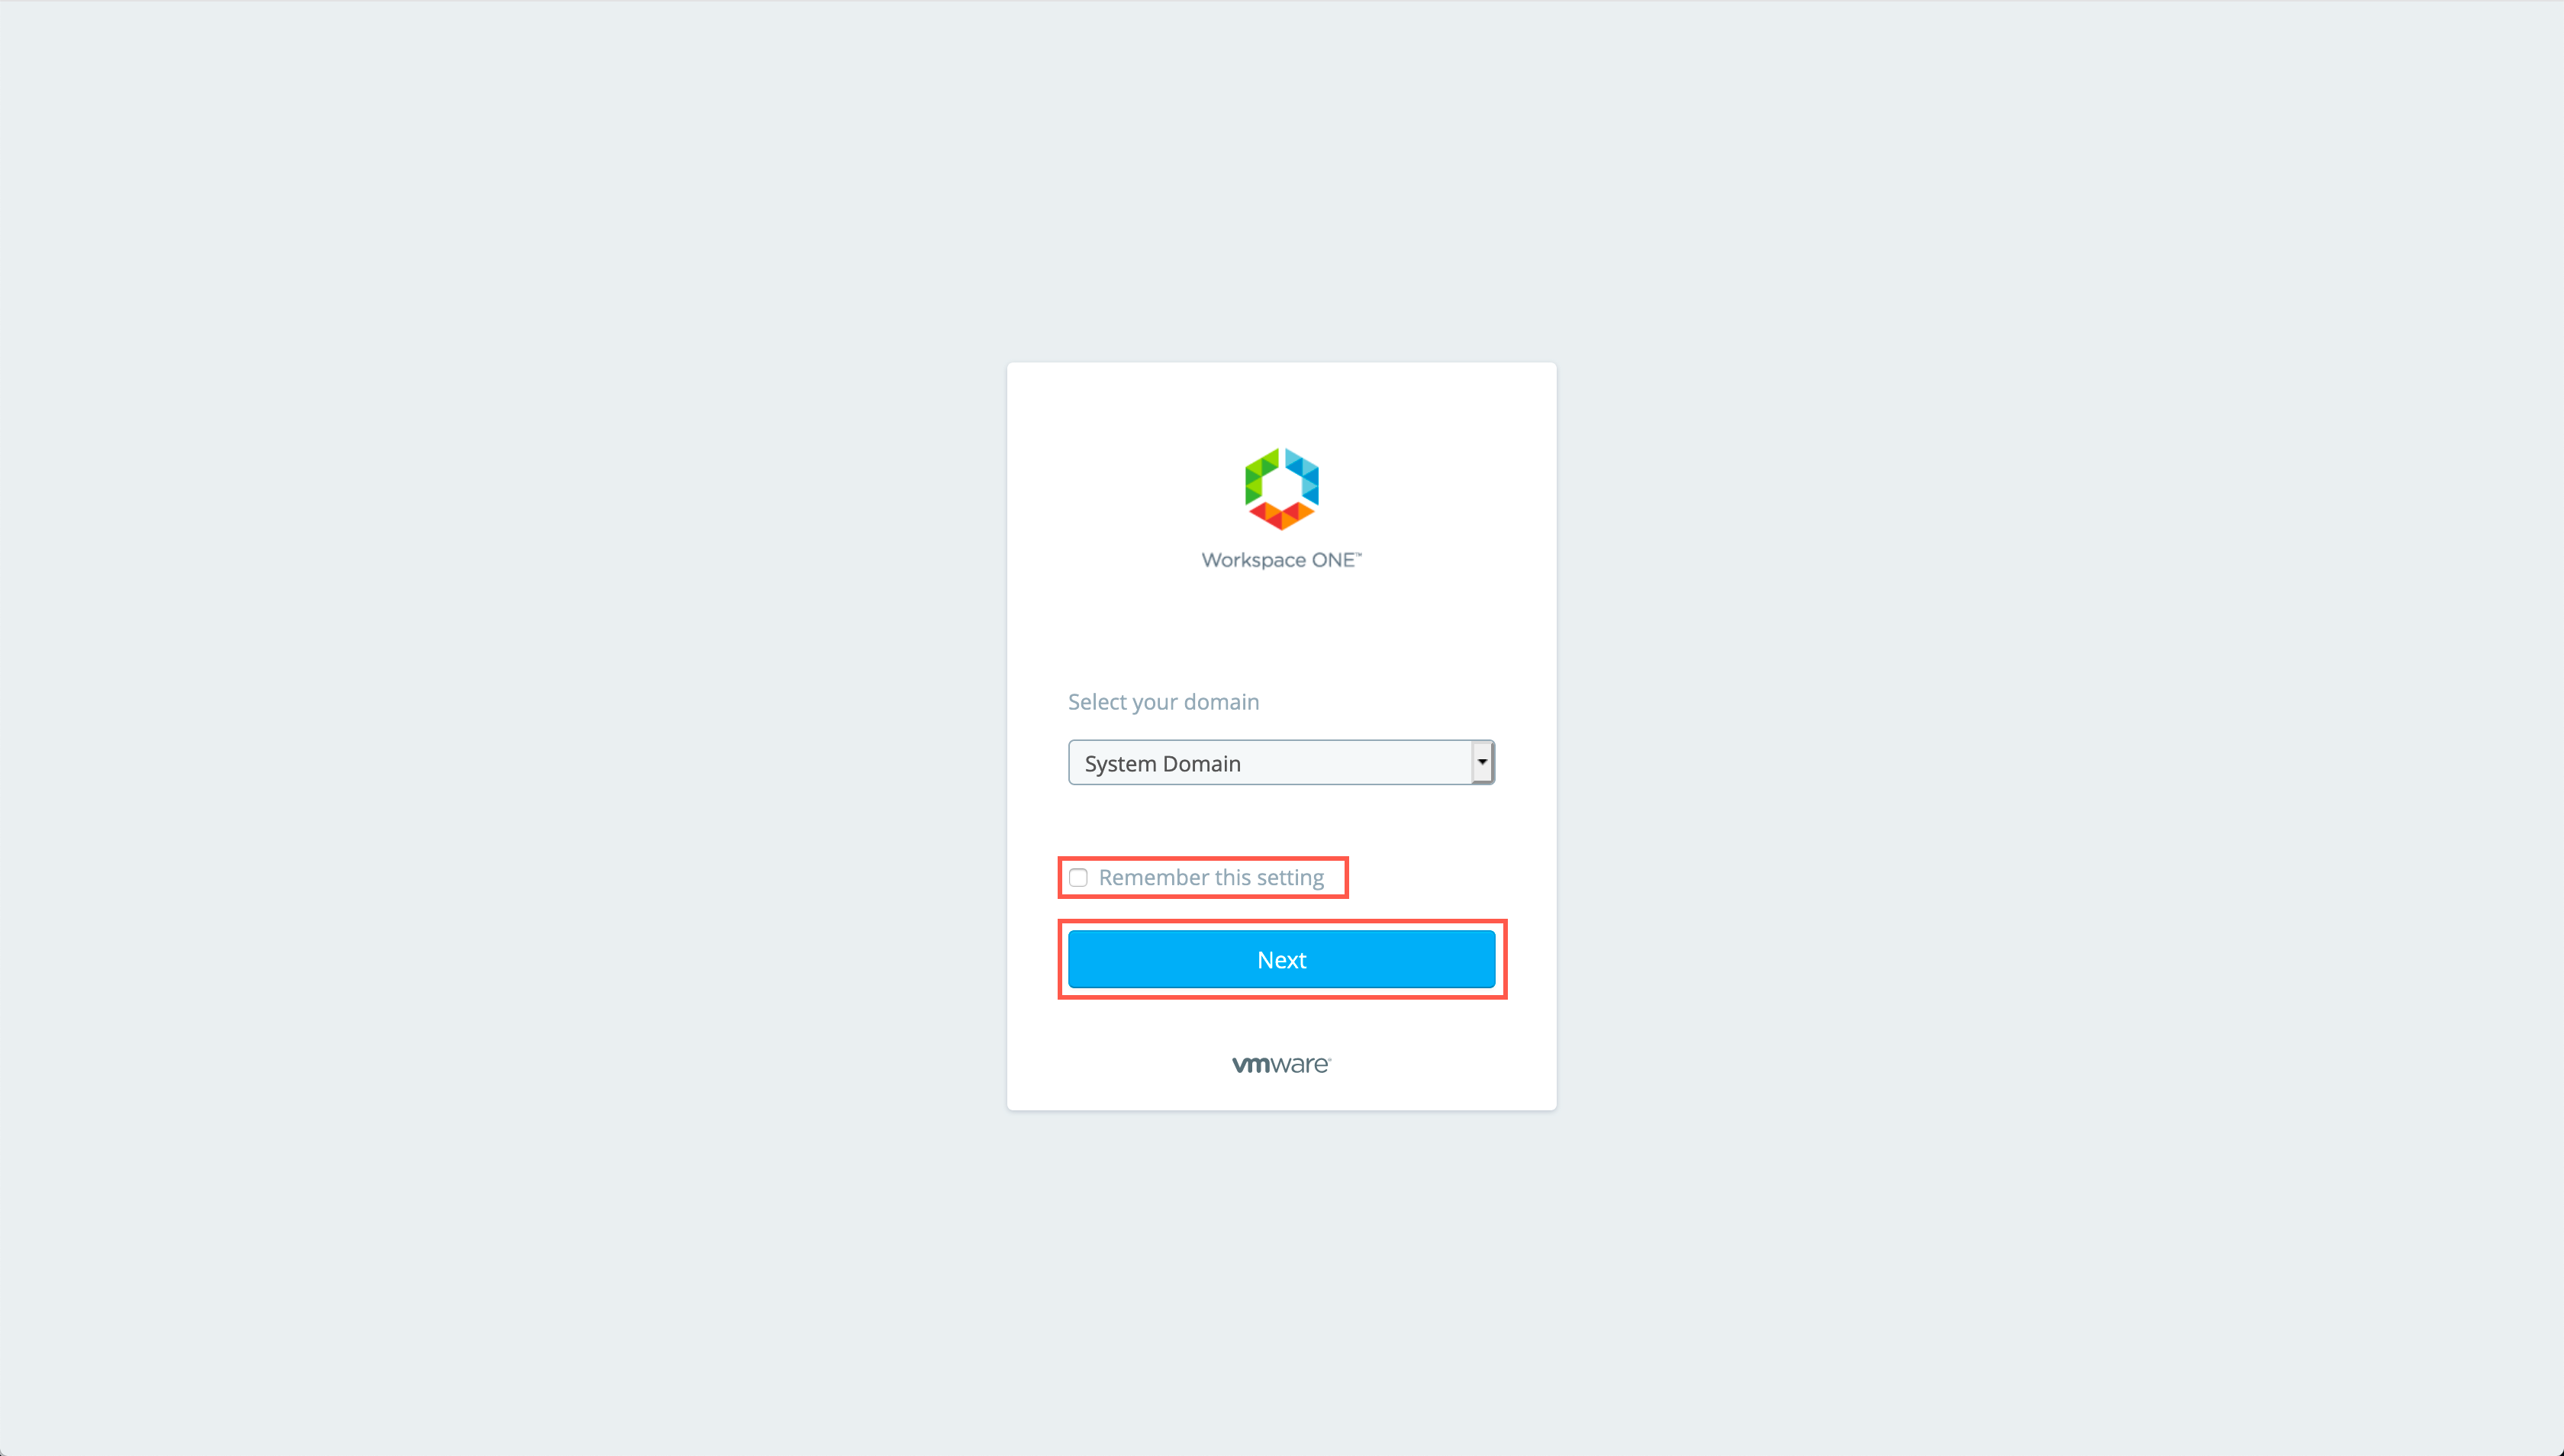
- At the login screen, un-tick the Remember this setting checkbox and click Next.
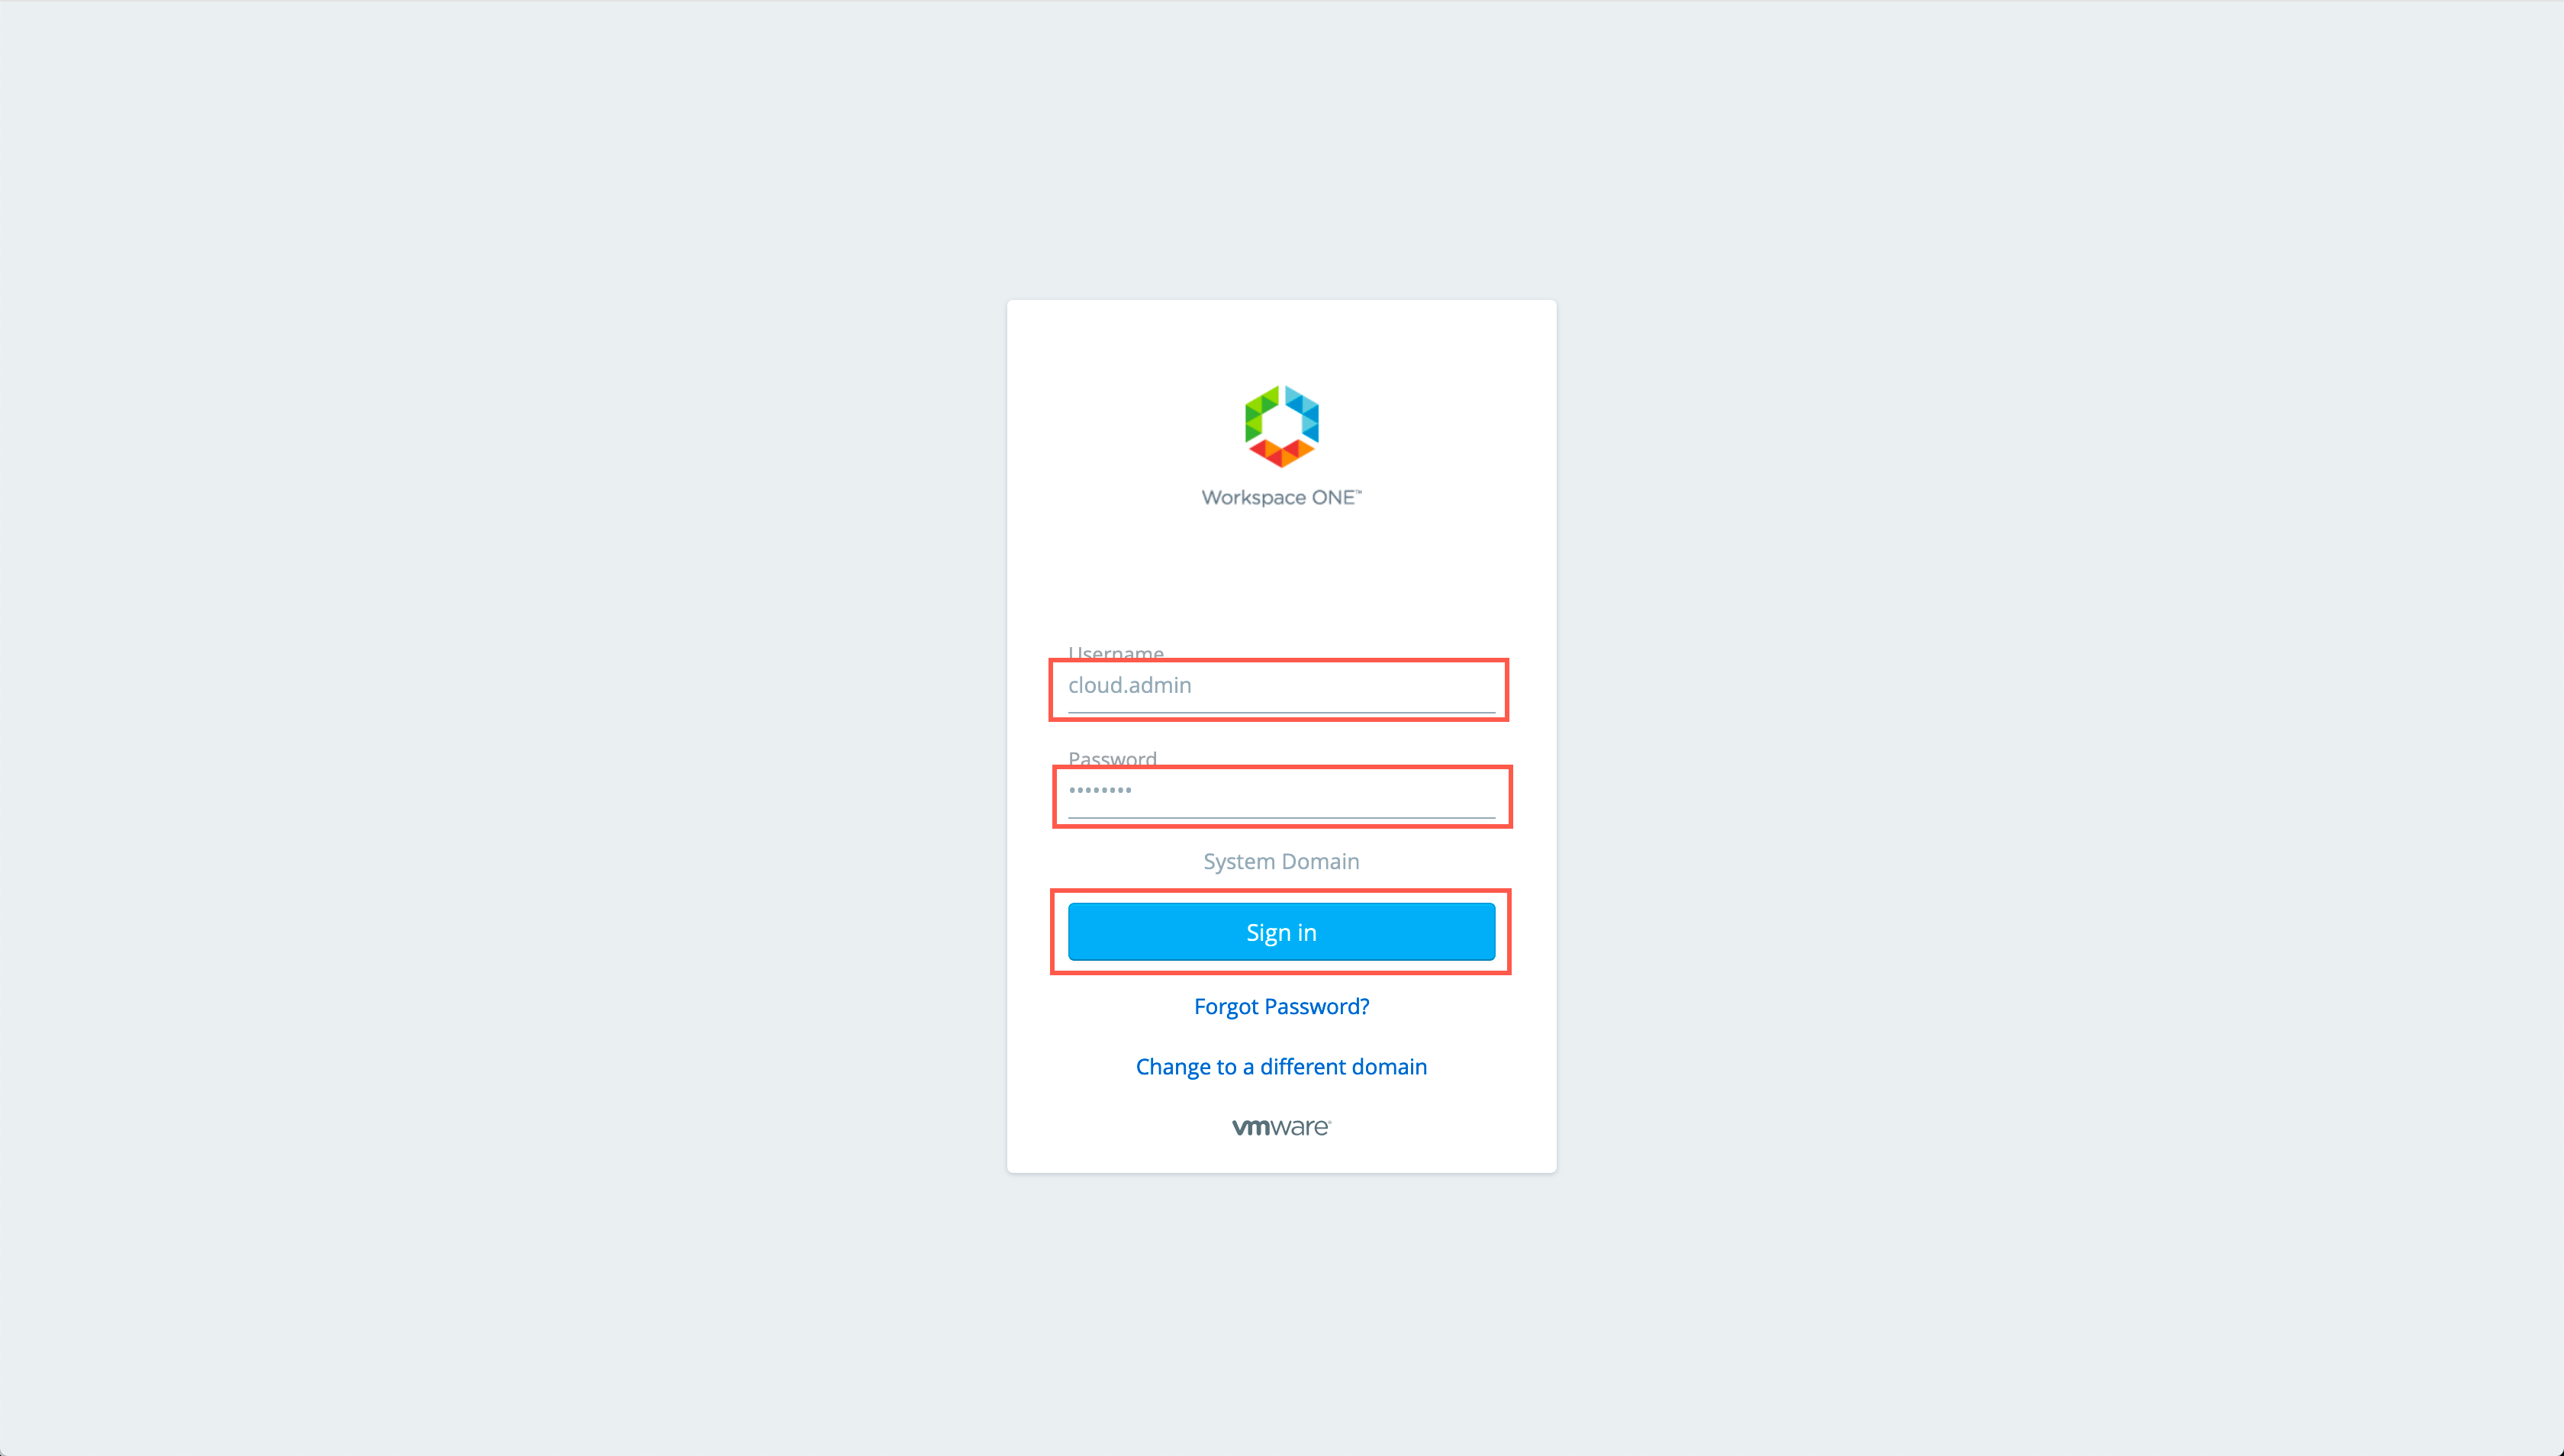
- Enter the Tenant Administrator credentials for an Admin user and click LOGIN.

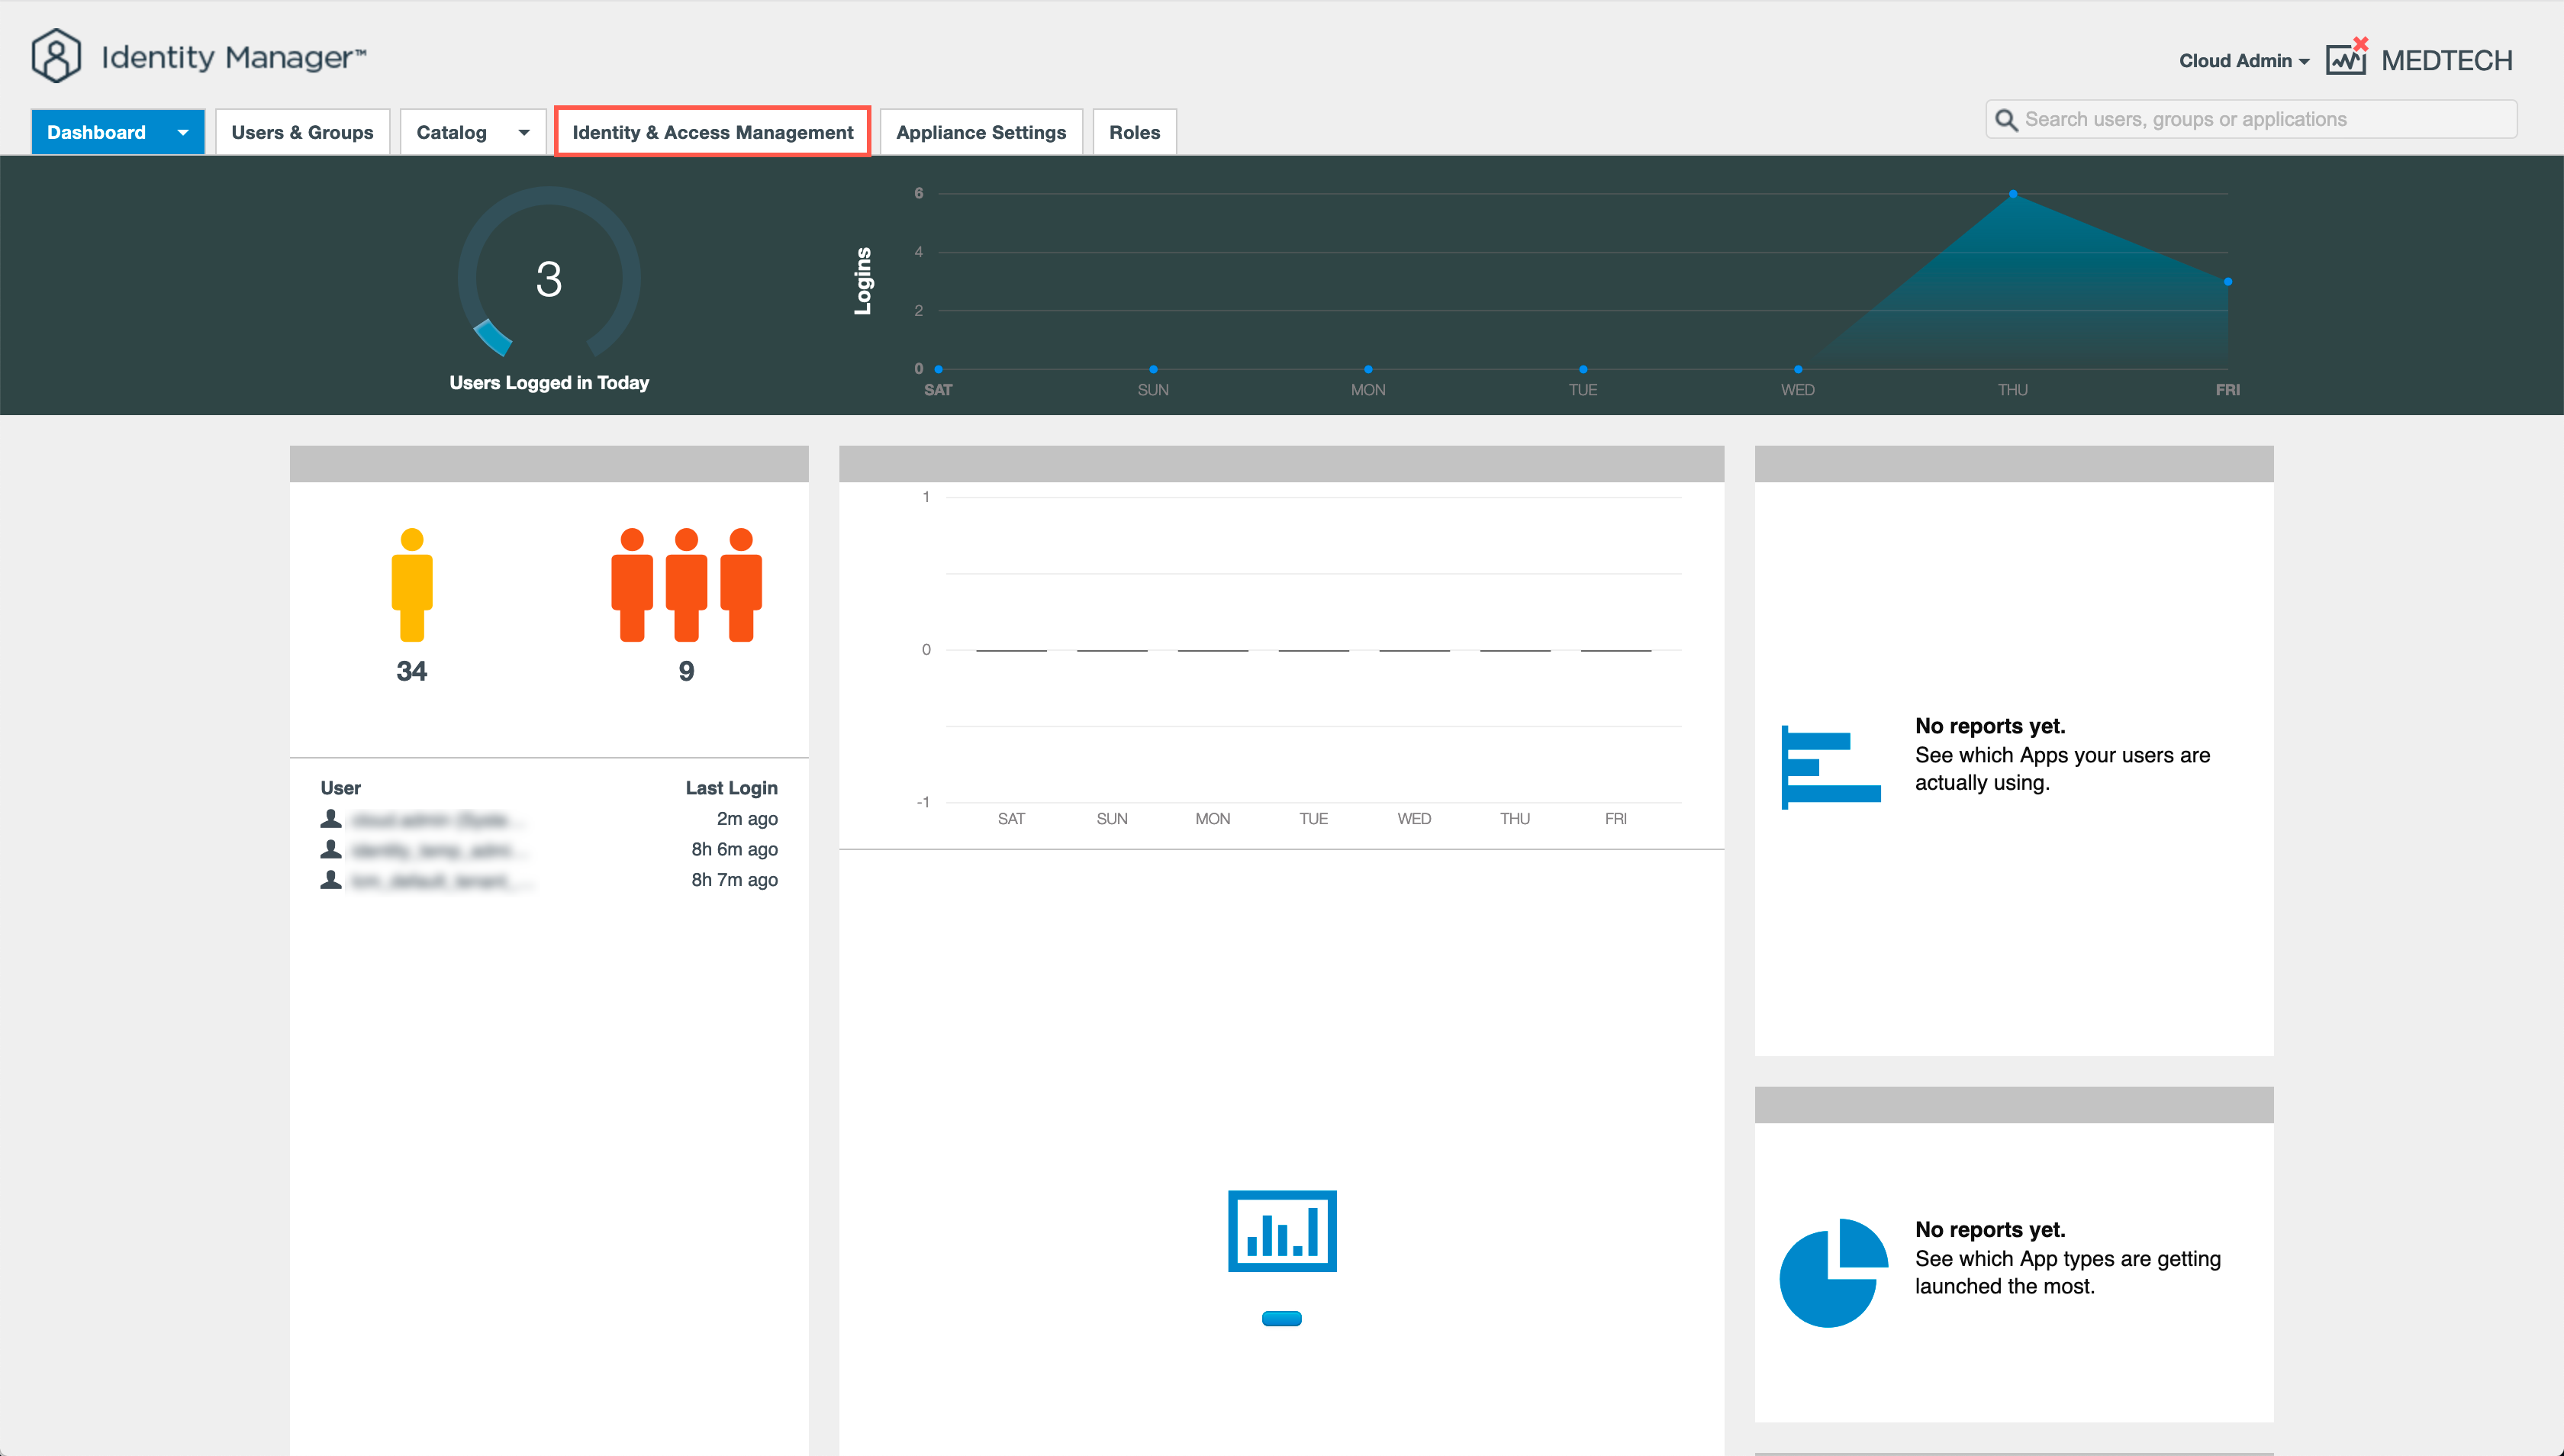
- At the Identity Manager screen, click Identity & Access Management.
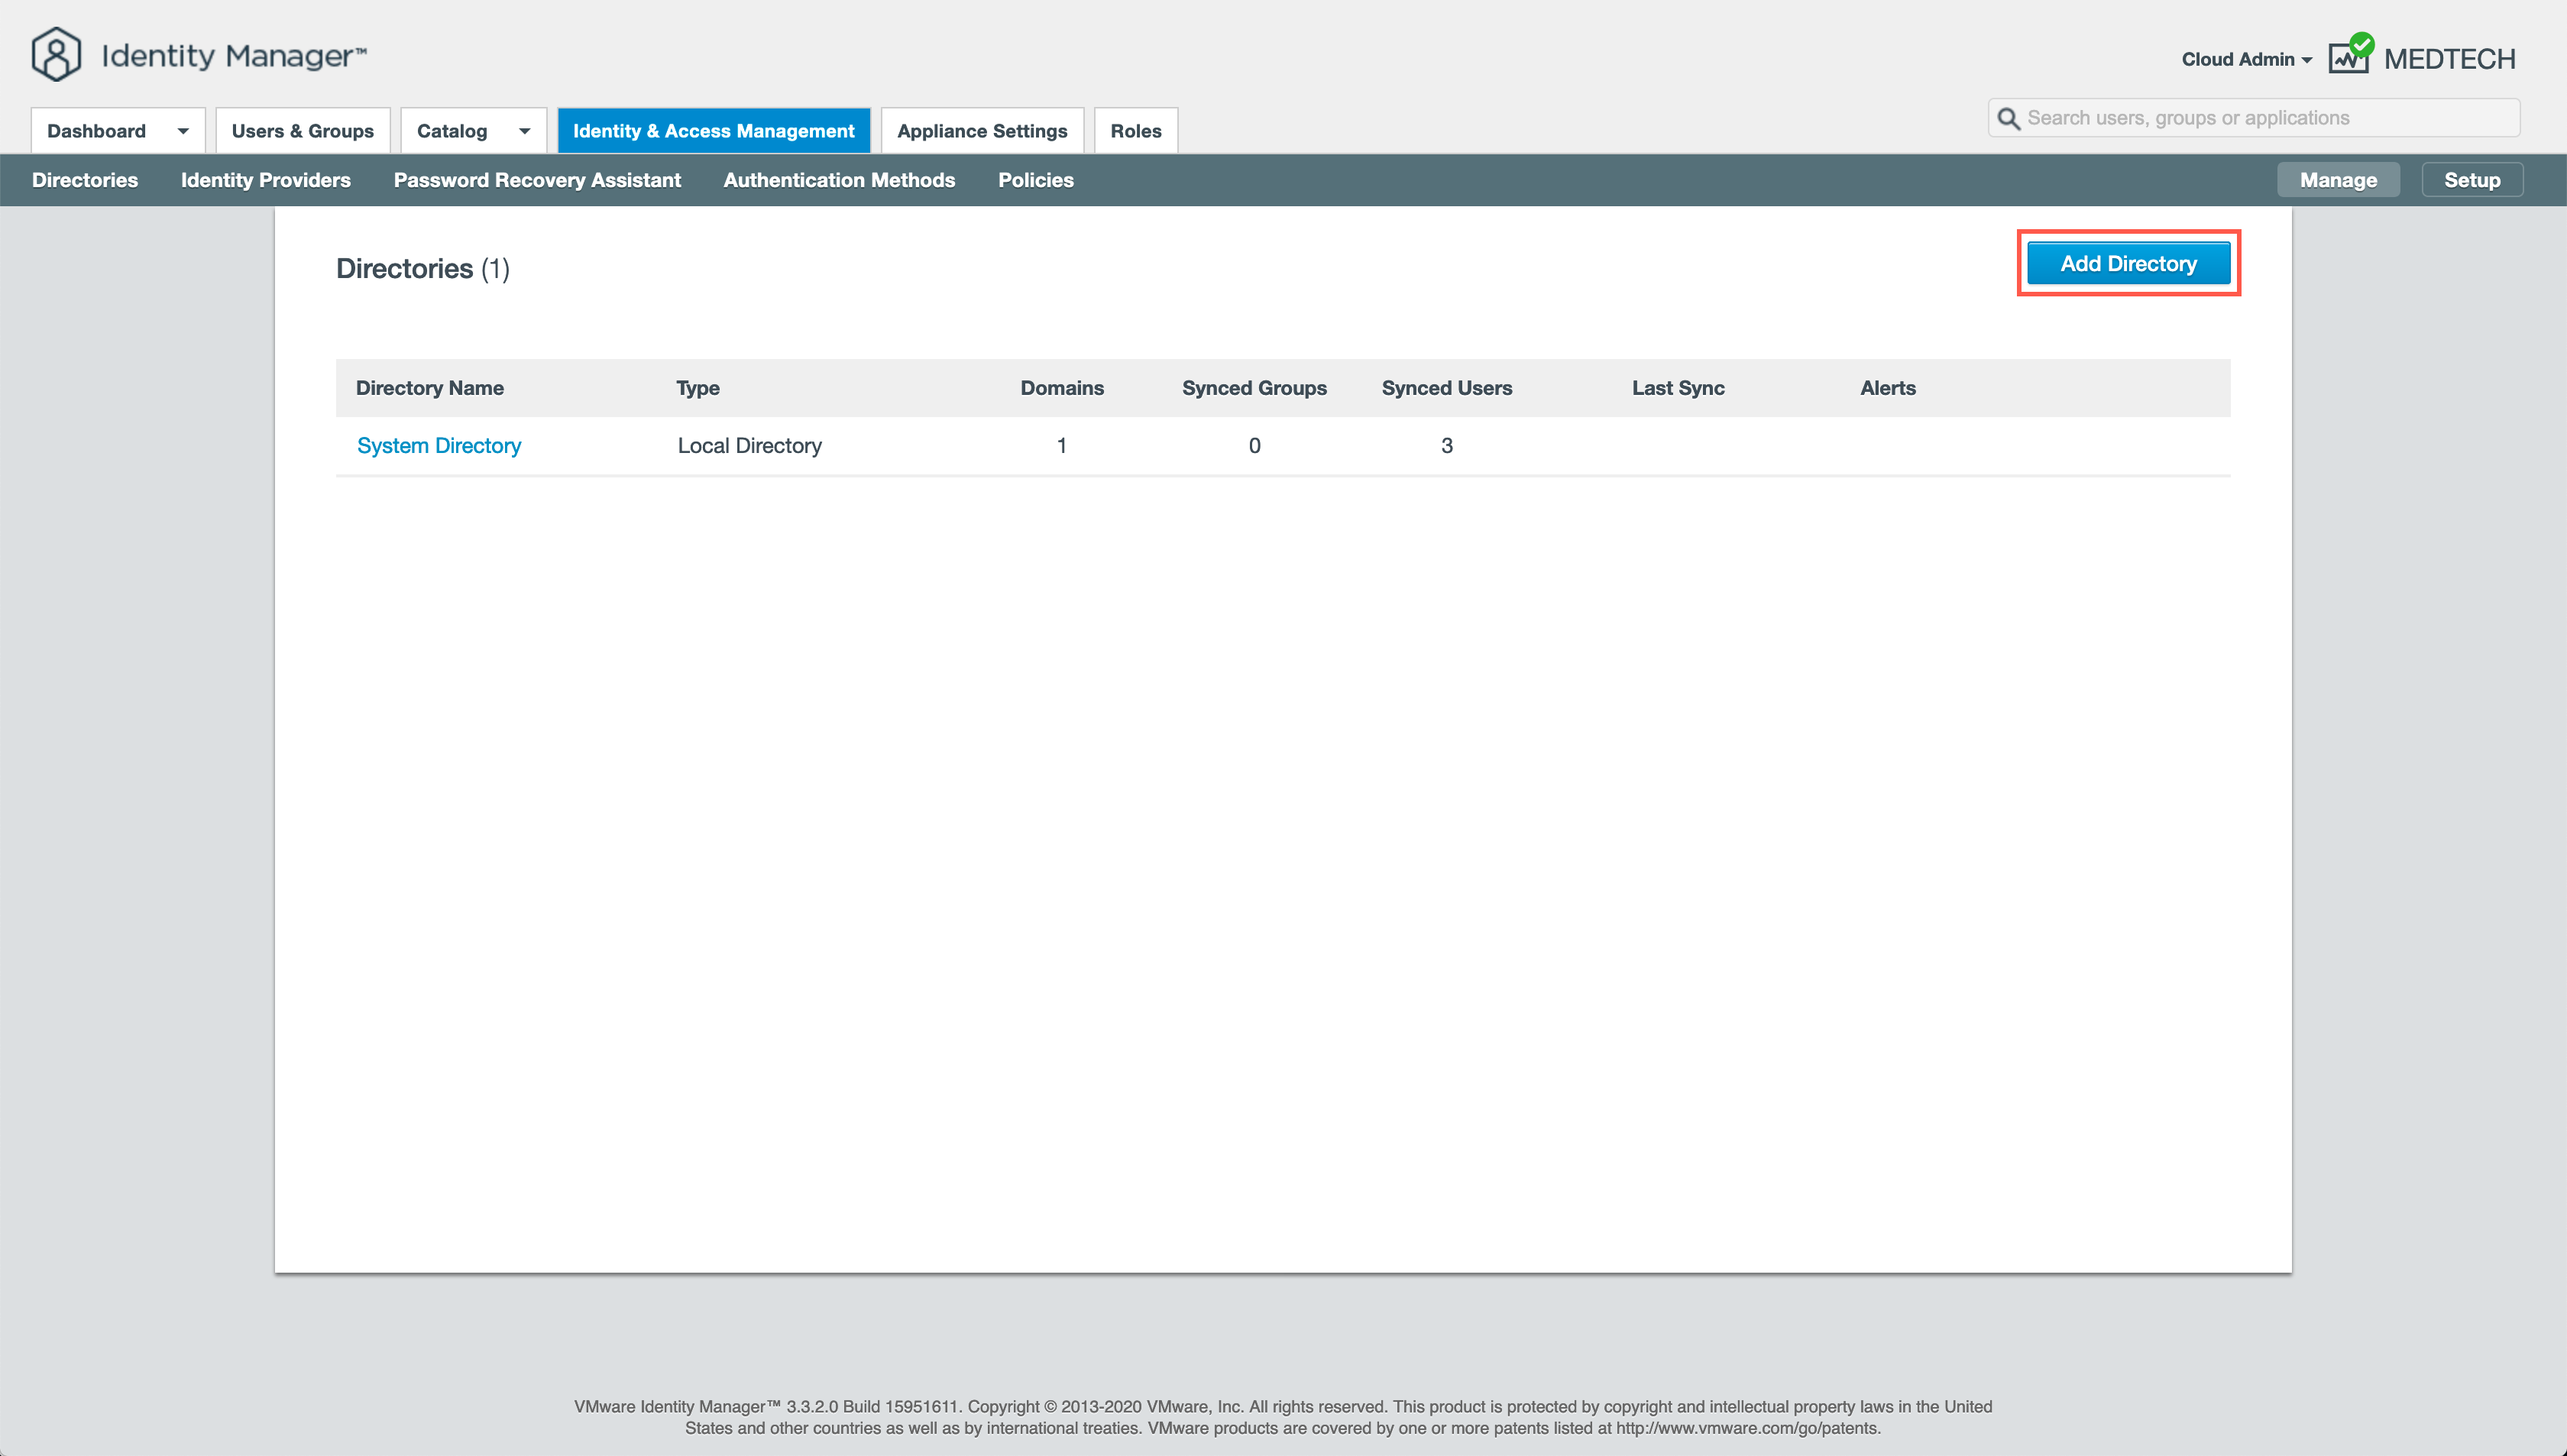
- At the Directories screen, click Add Directory.
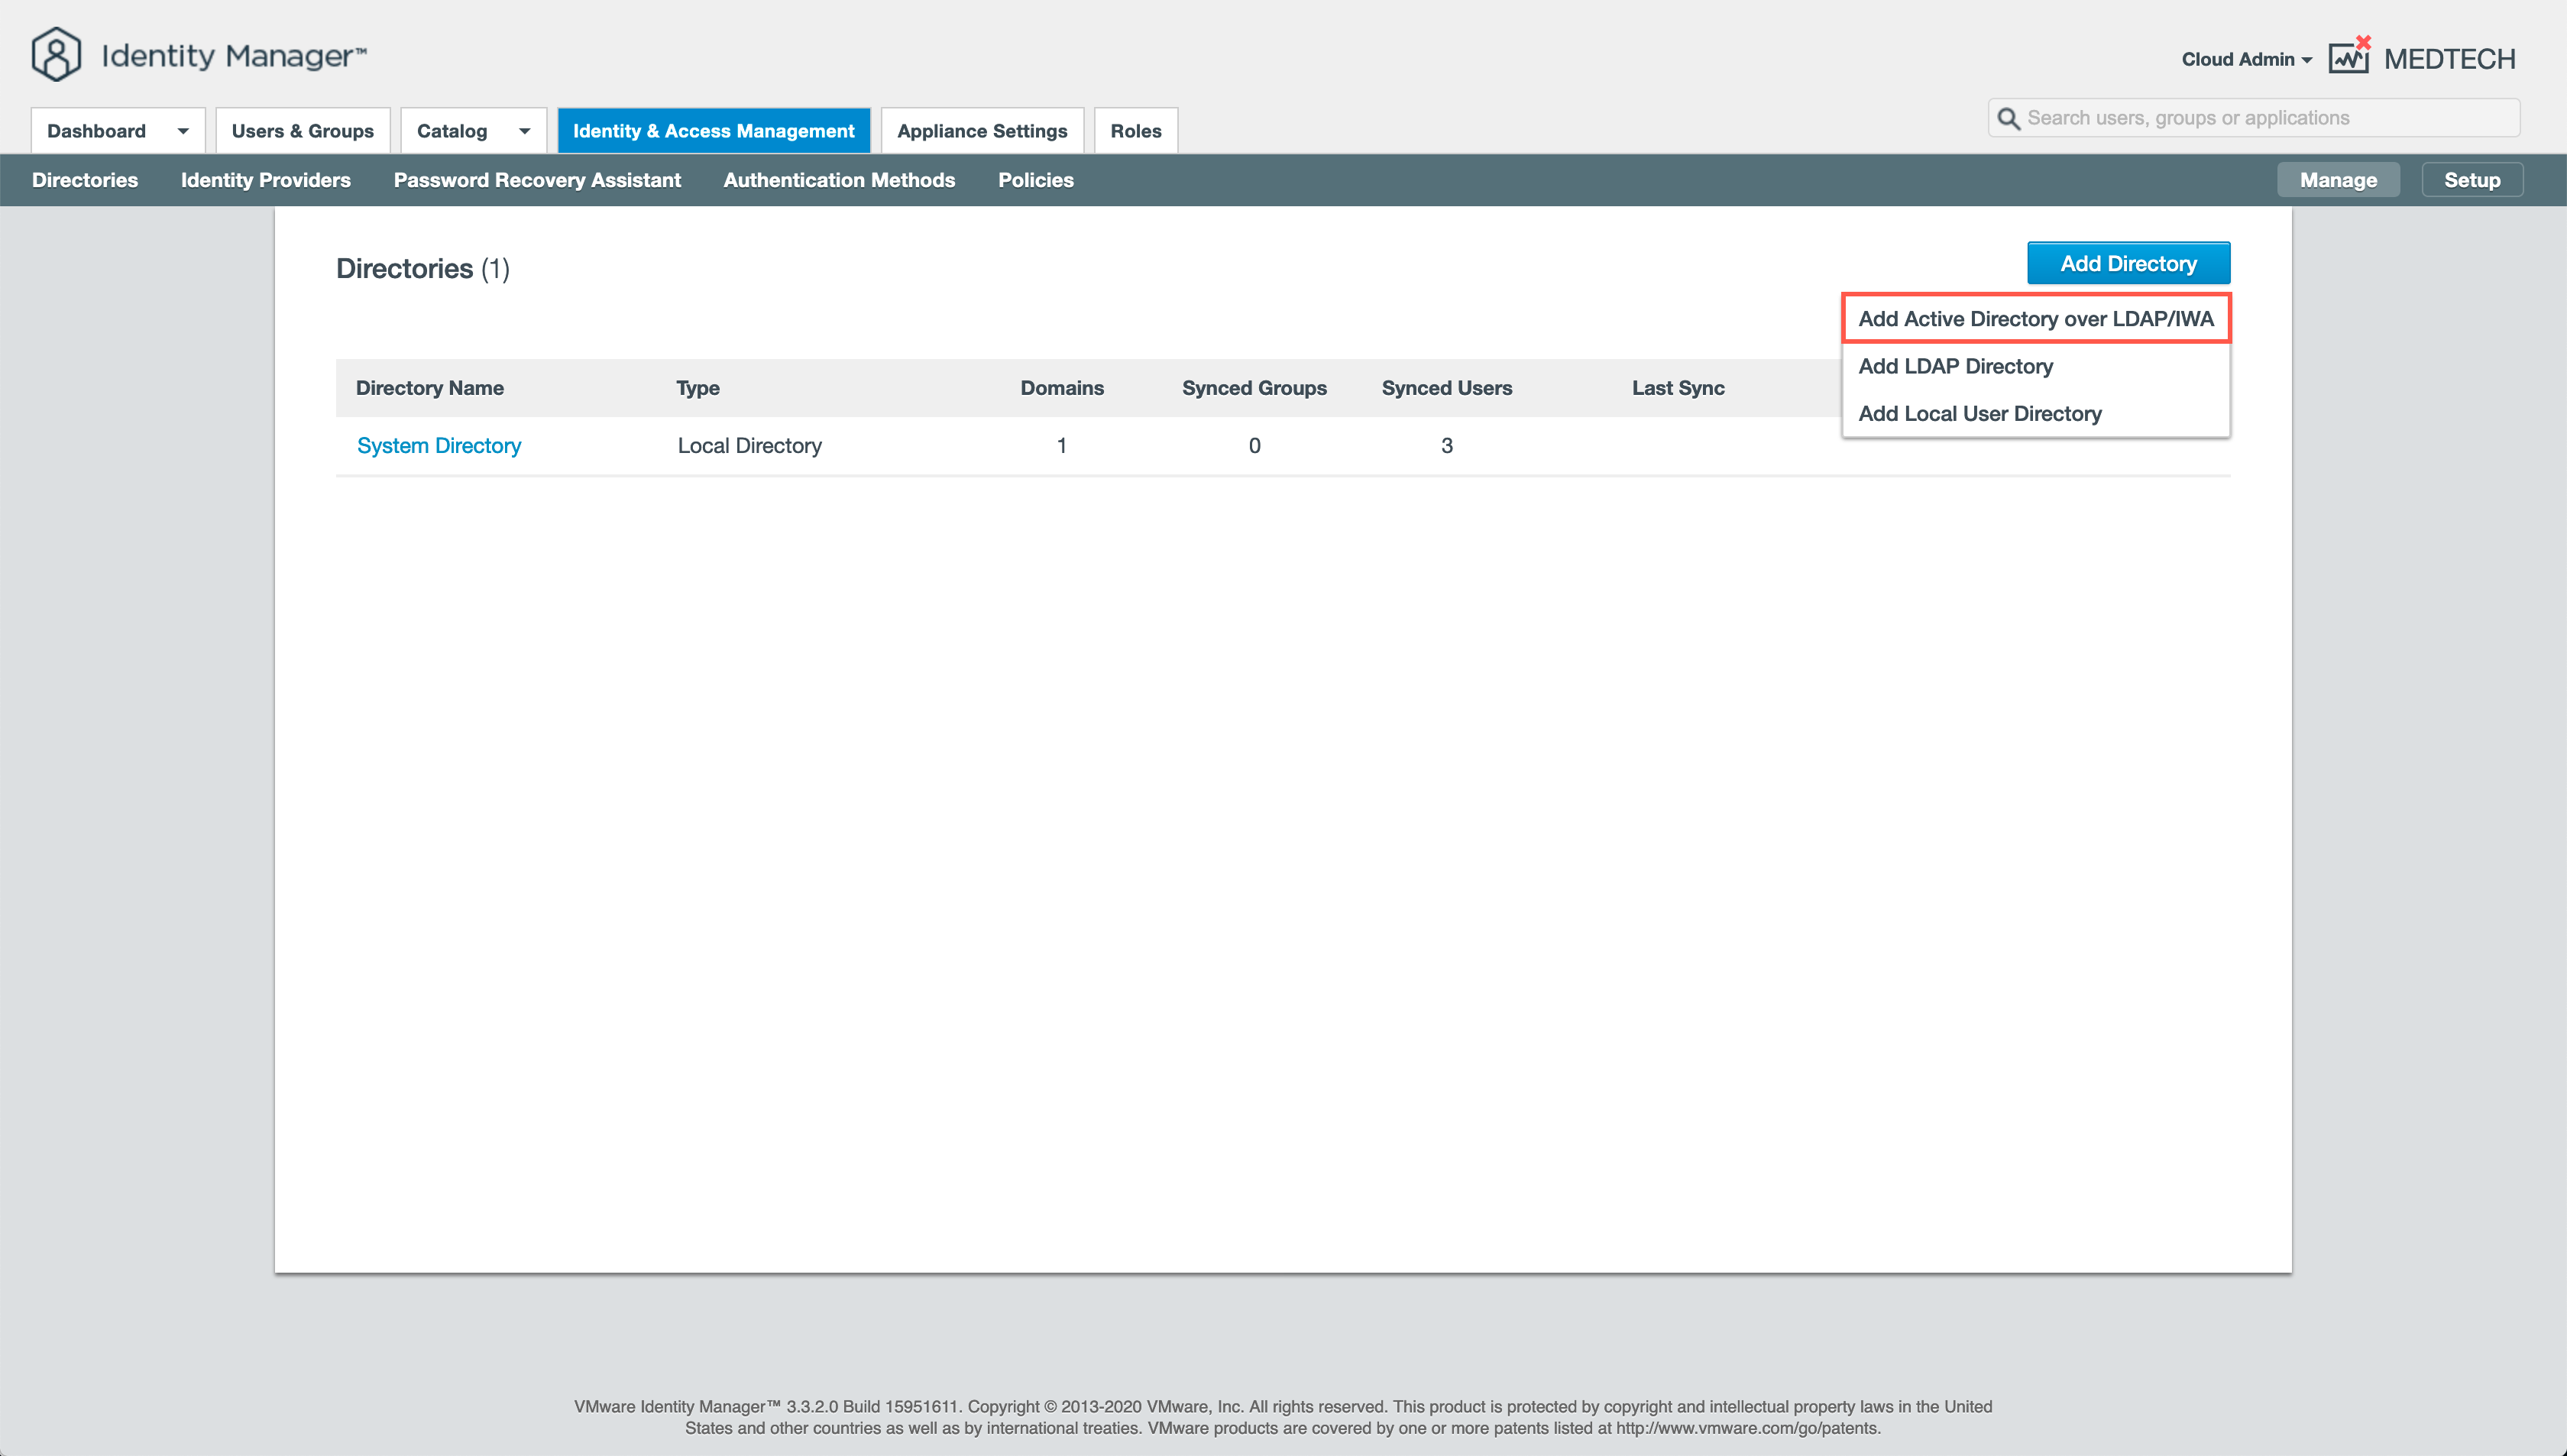
- Select Add Active Directory over LDAP/IWA.
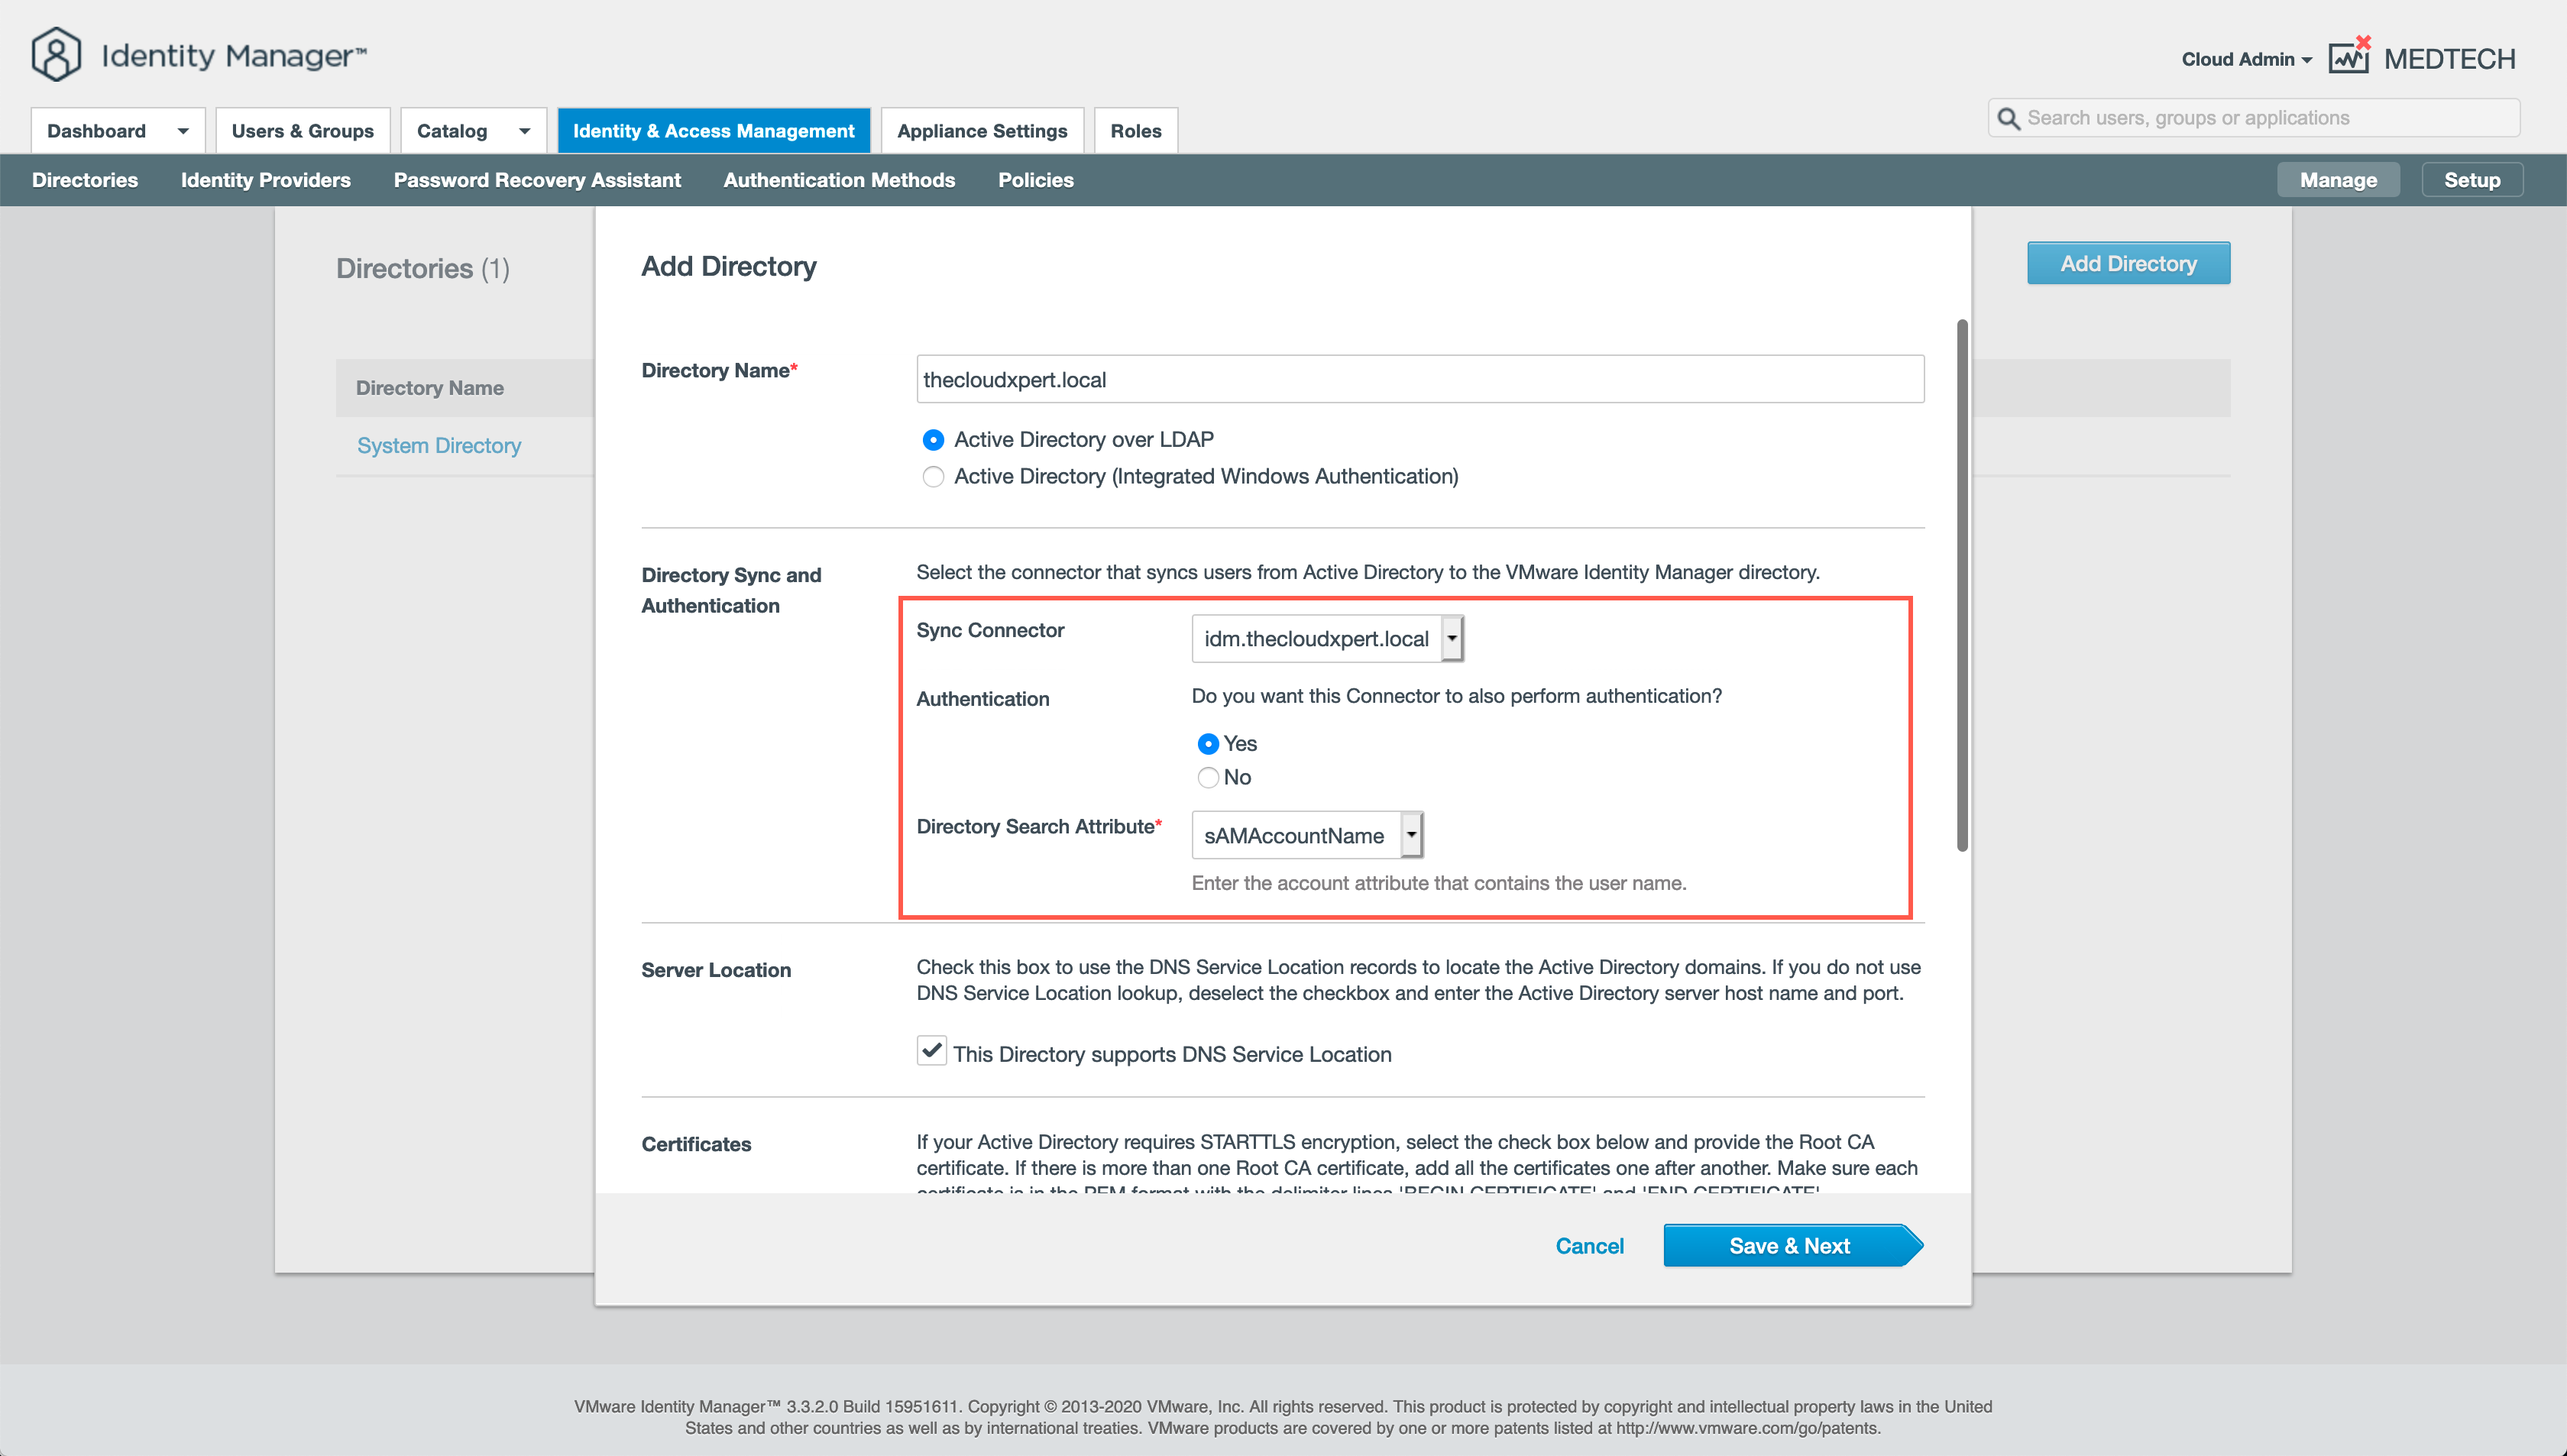
- At the Add Directory screen, enter the name of the new directory into the Directory Name textbox.
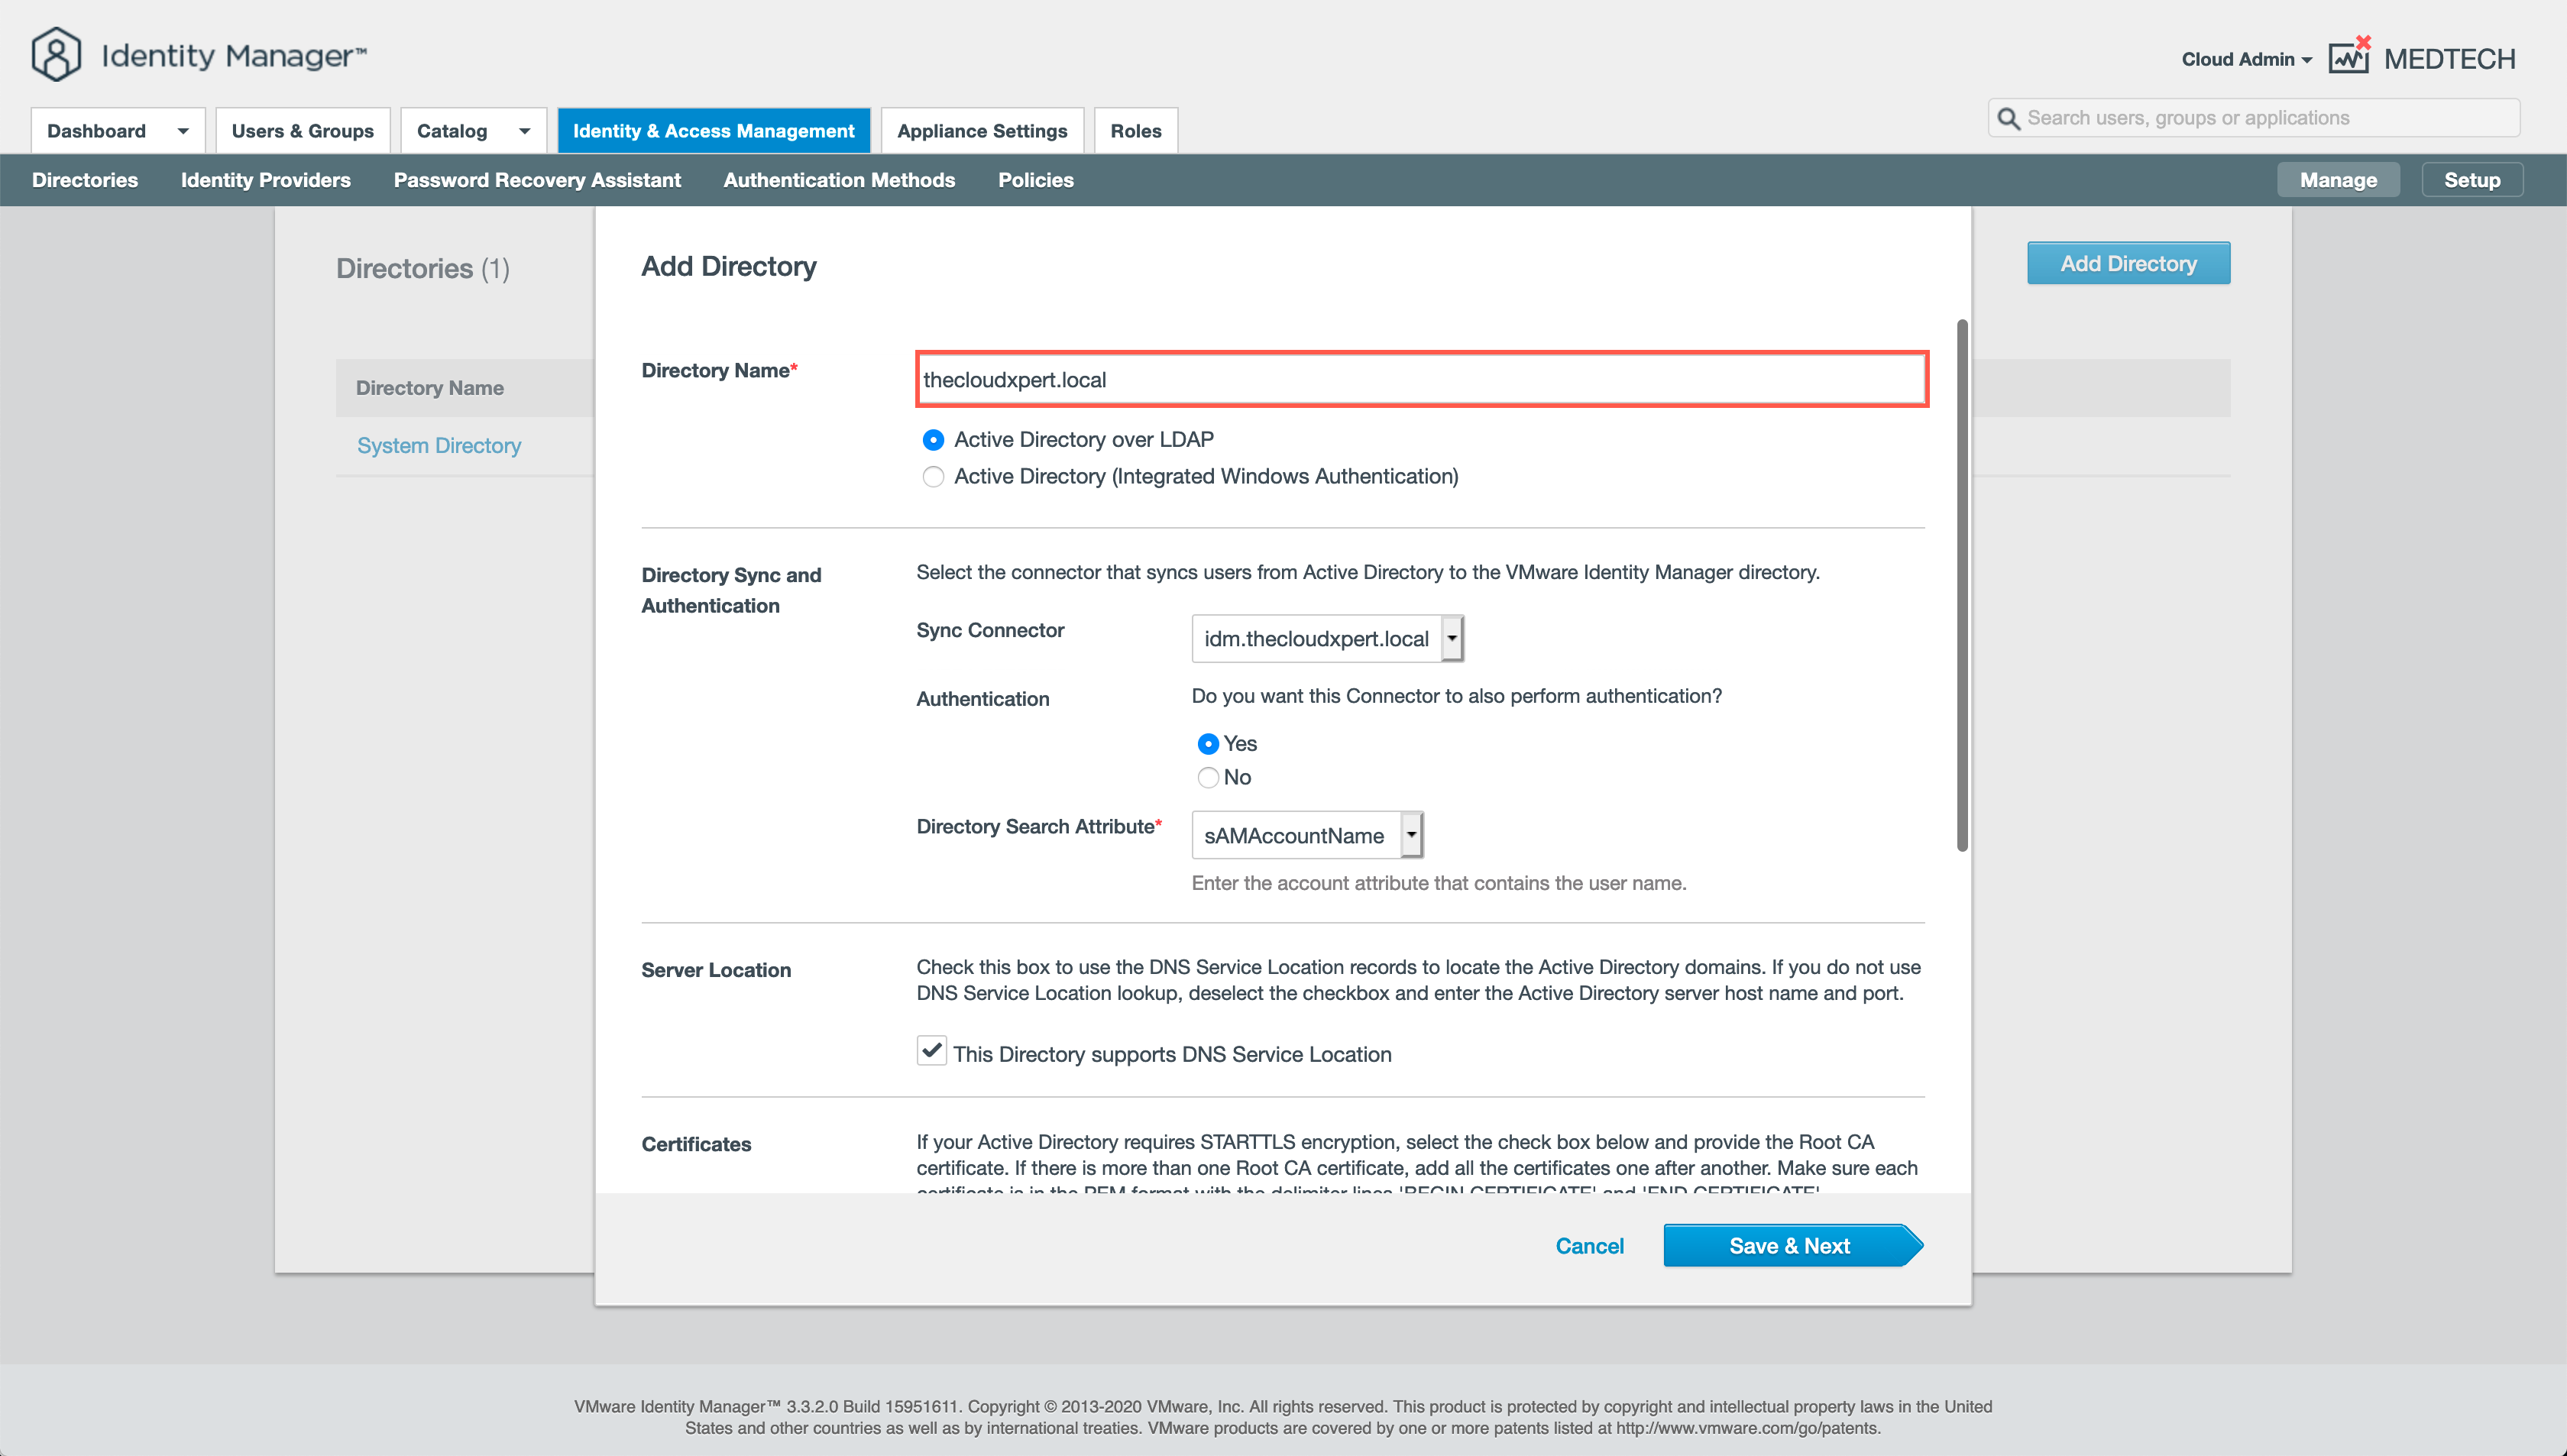
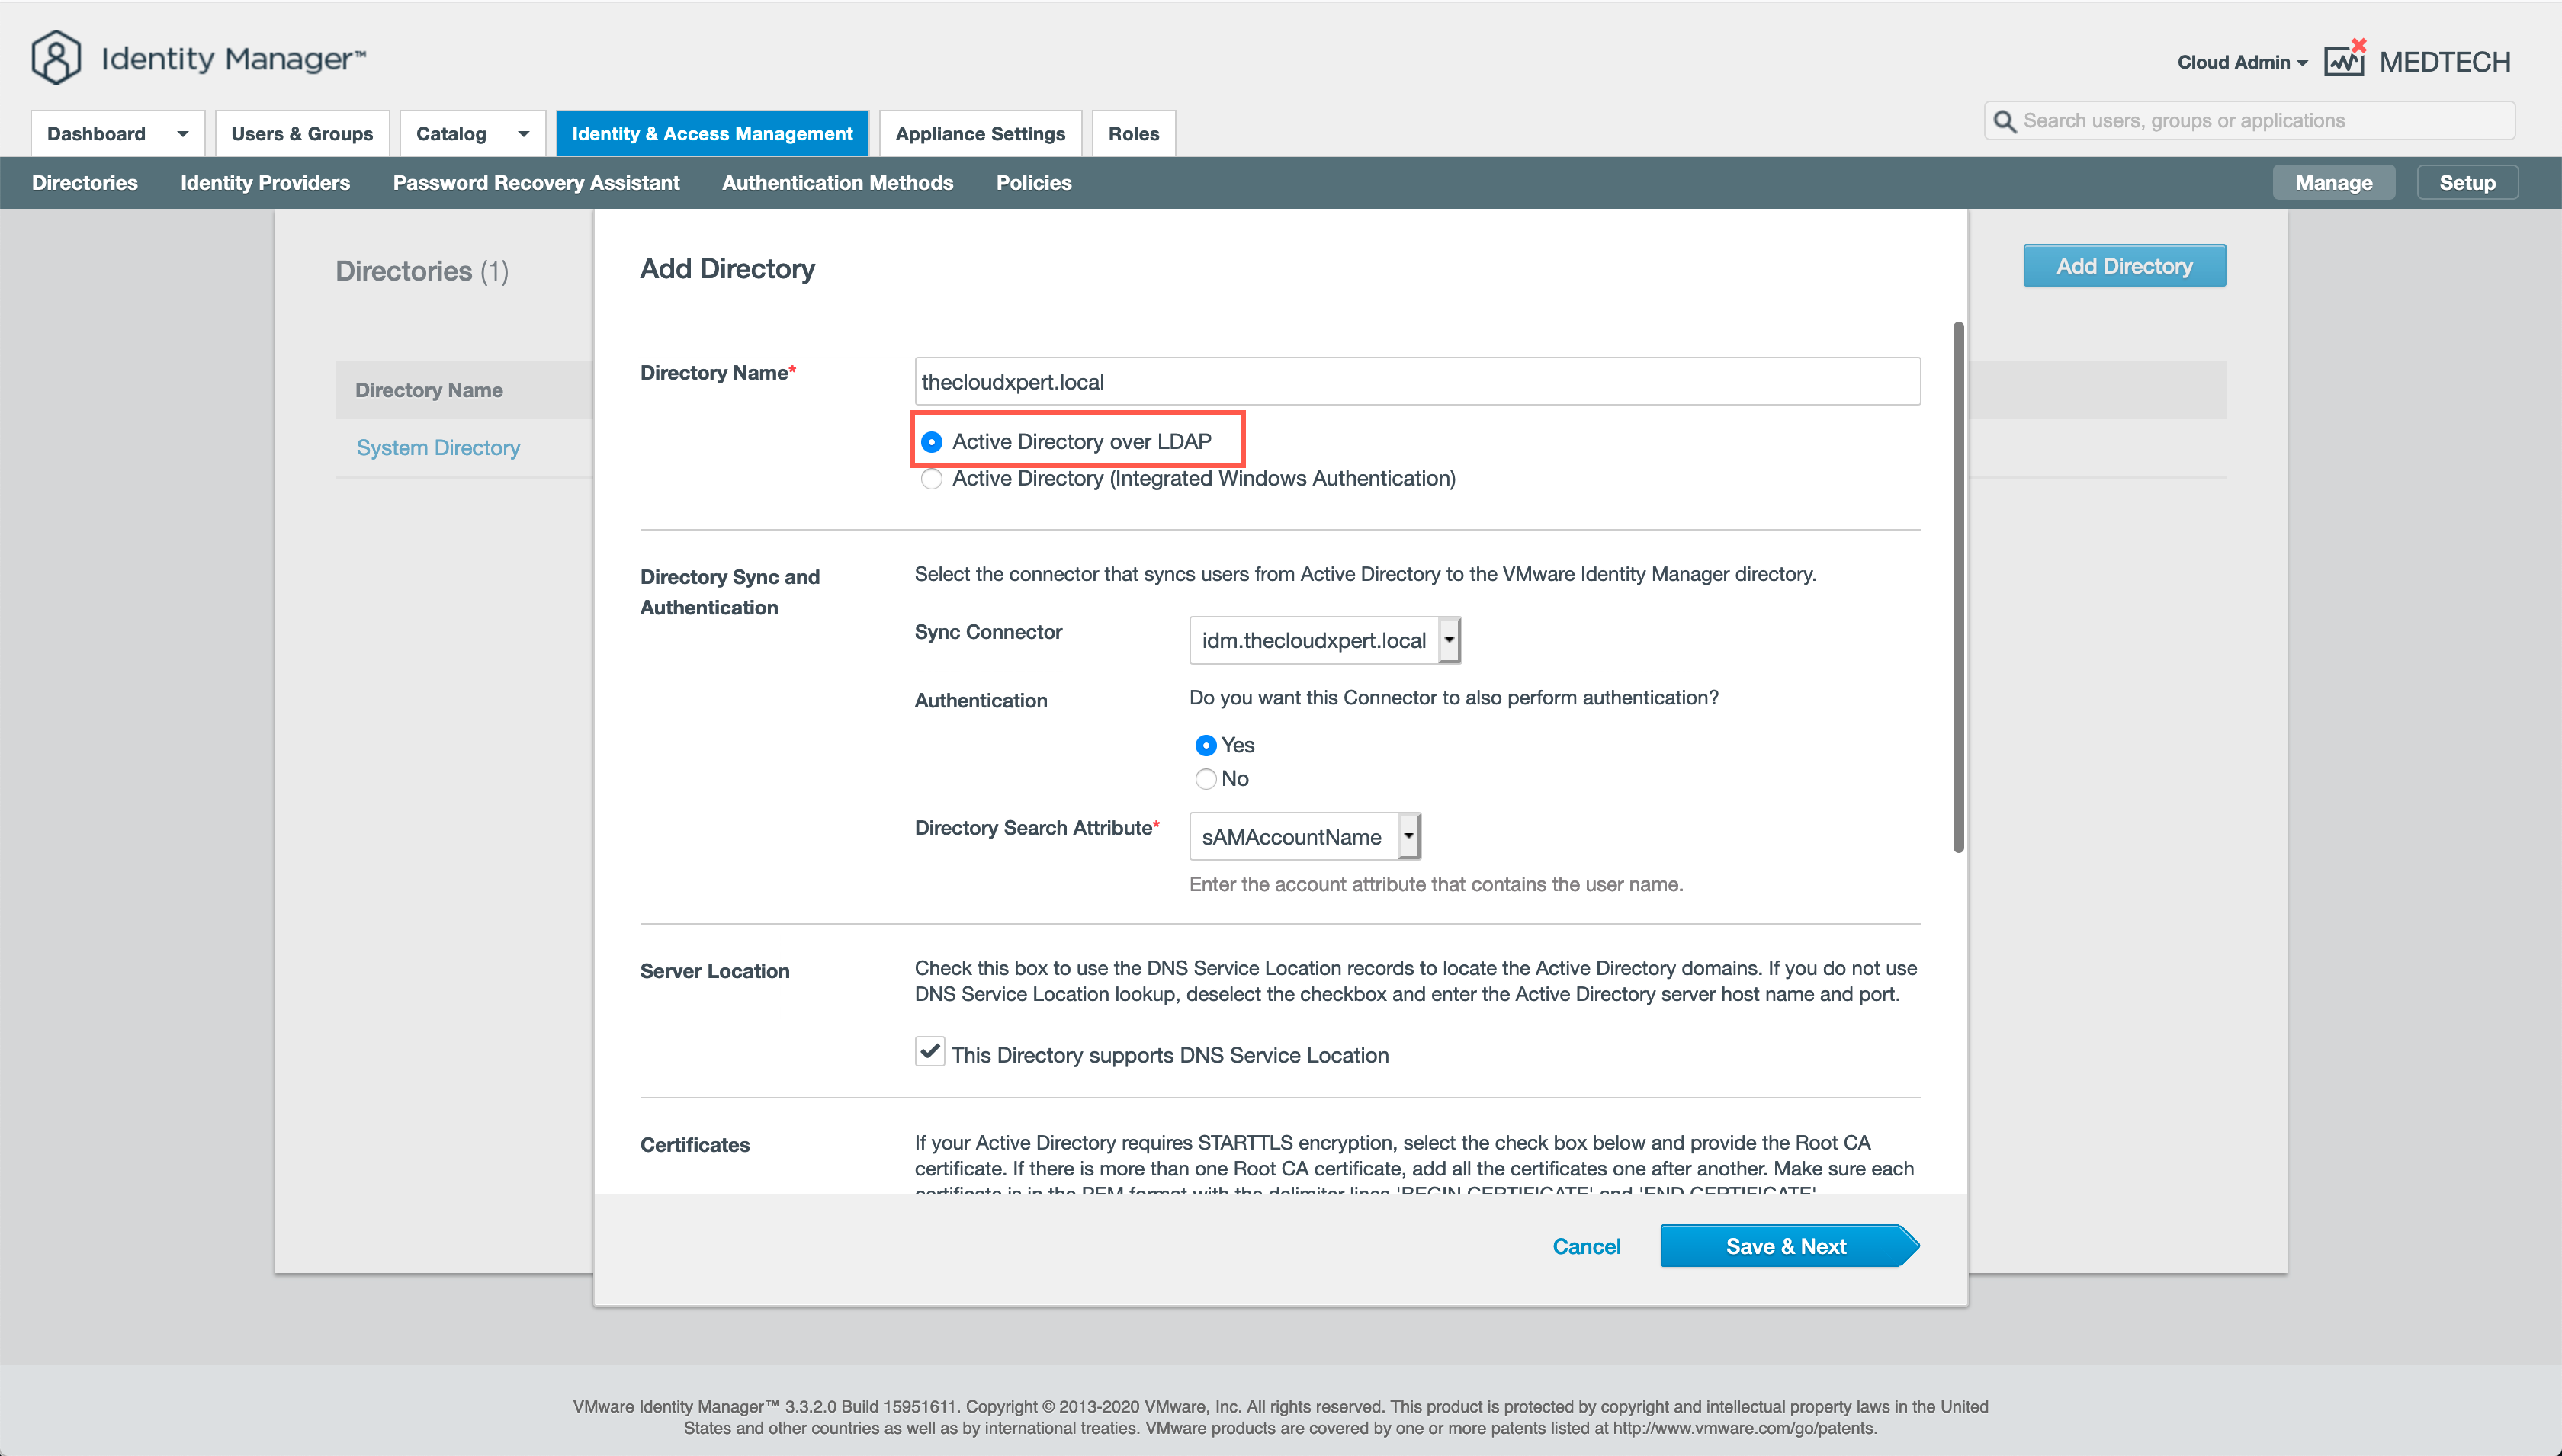
- At the Add Directory screen, select the Active Directory over LDAP option.
- At the Add Directory screen, under Directory Sync and Authentication, leave the defaults settings.
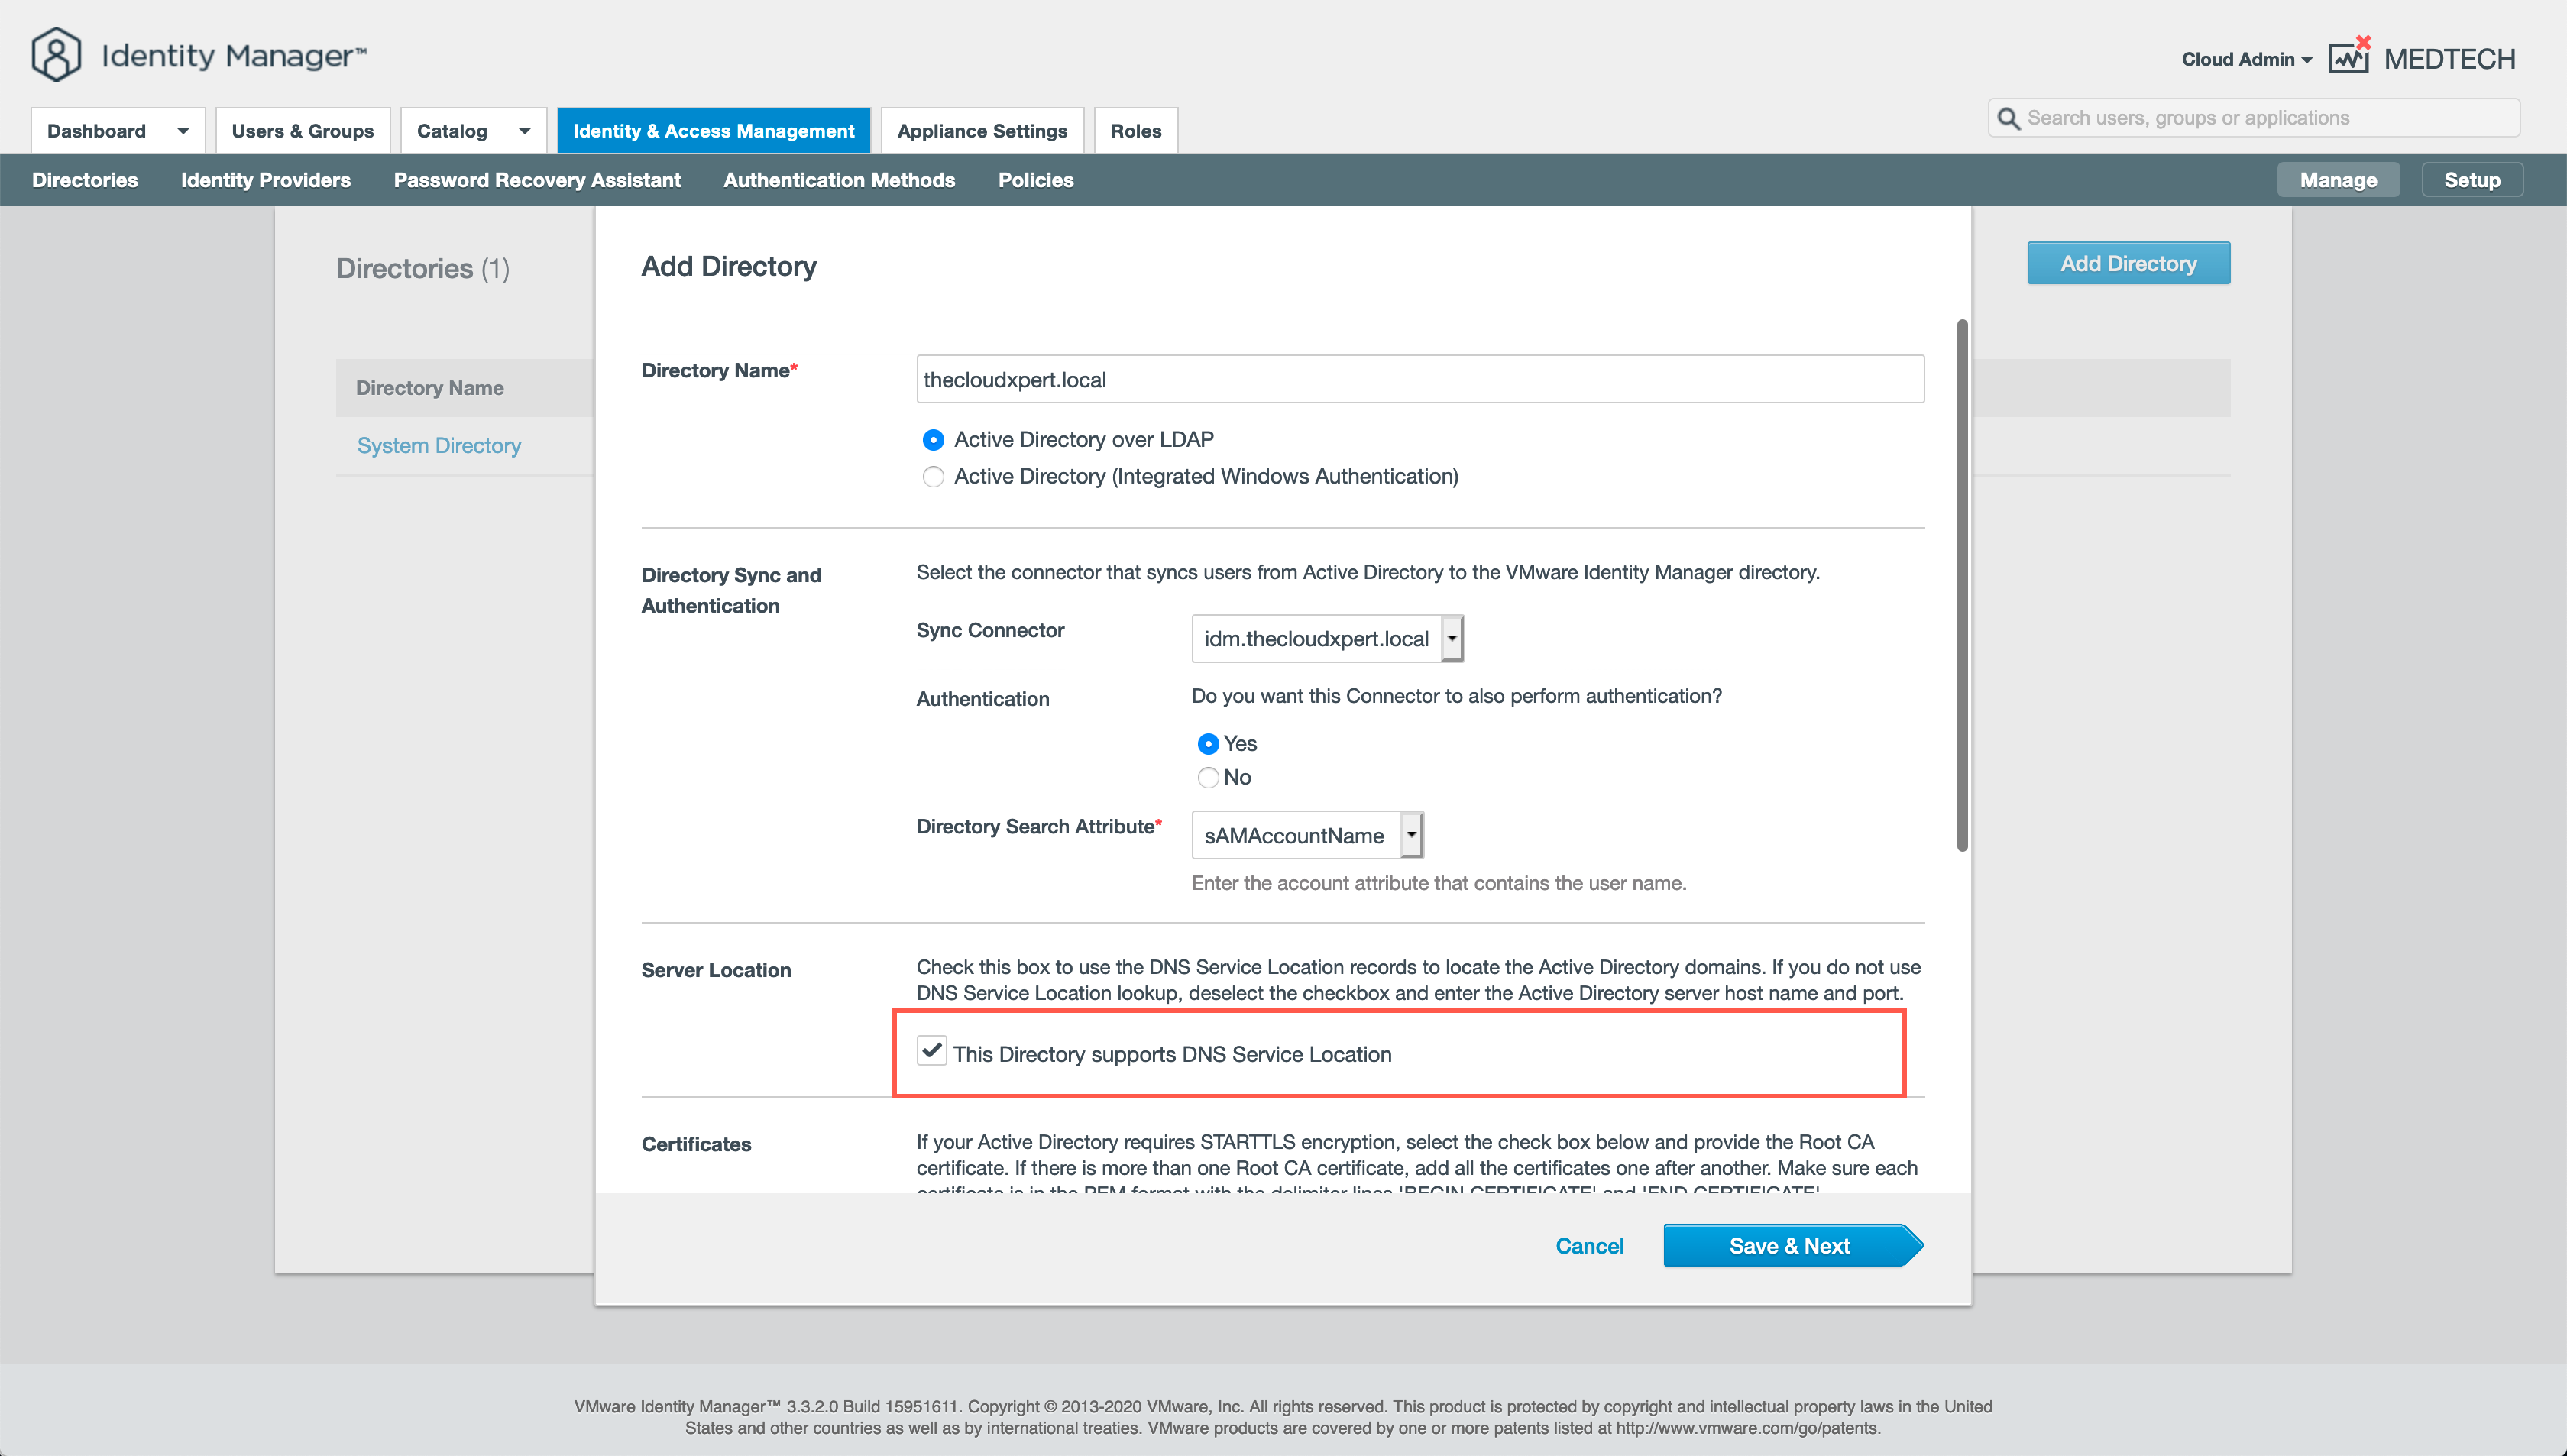
- At the Add Directory screen, under Server Location, ensure that The Directory supports DNS Service Location checkbox is checked.
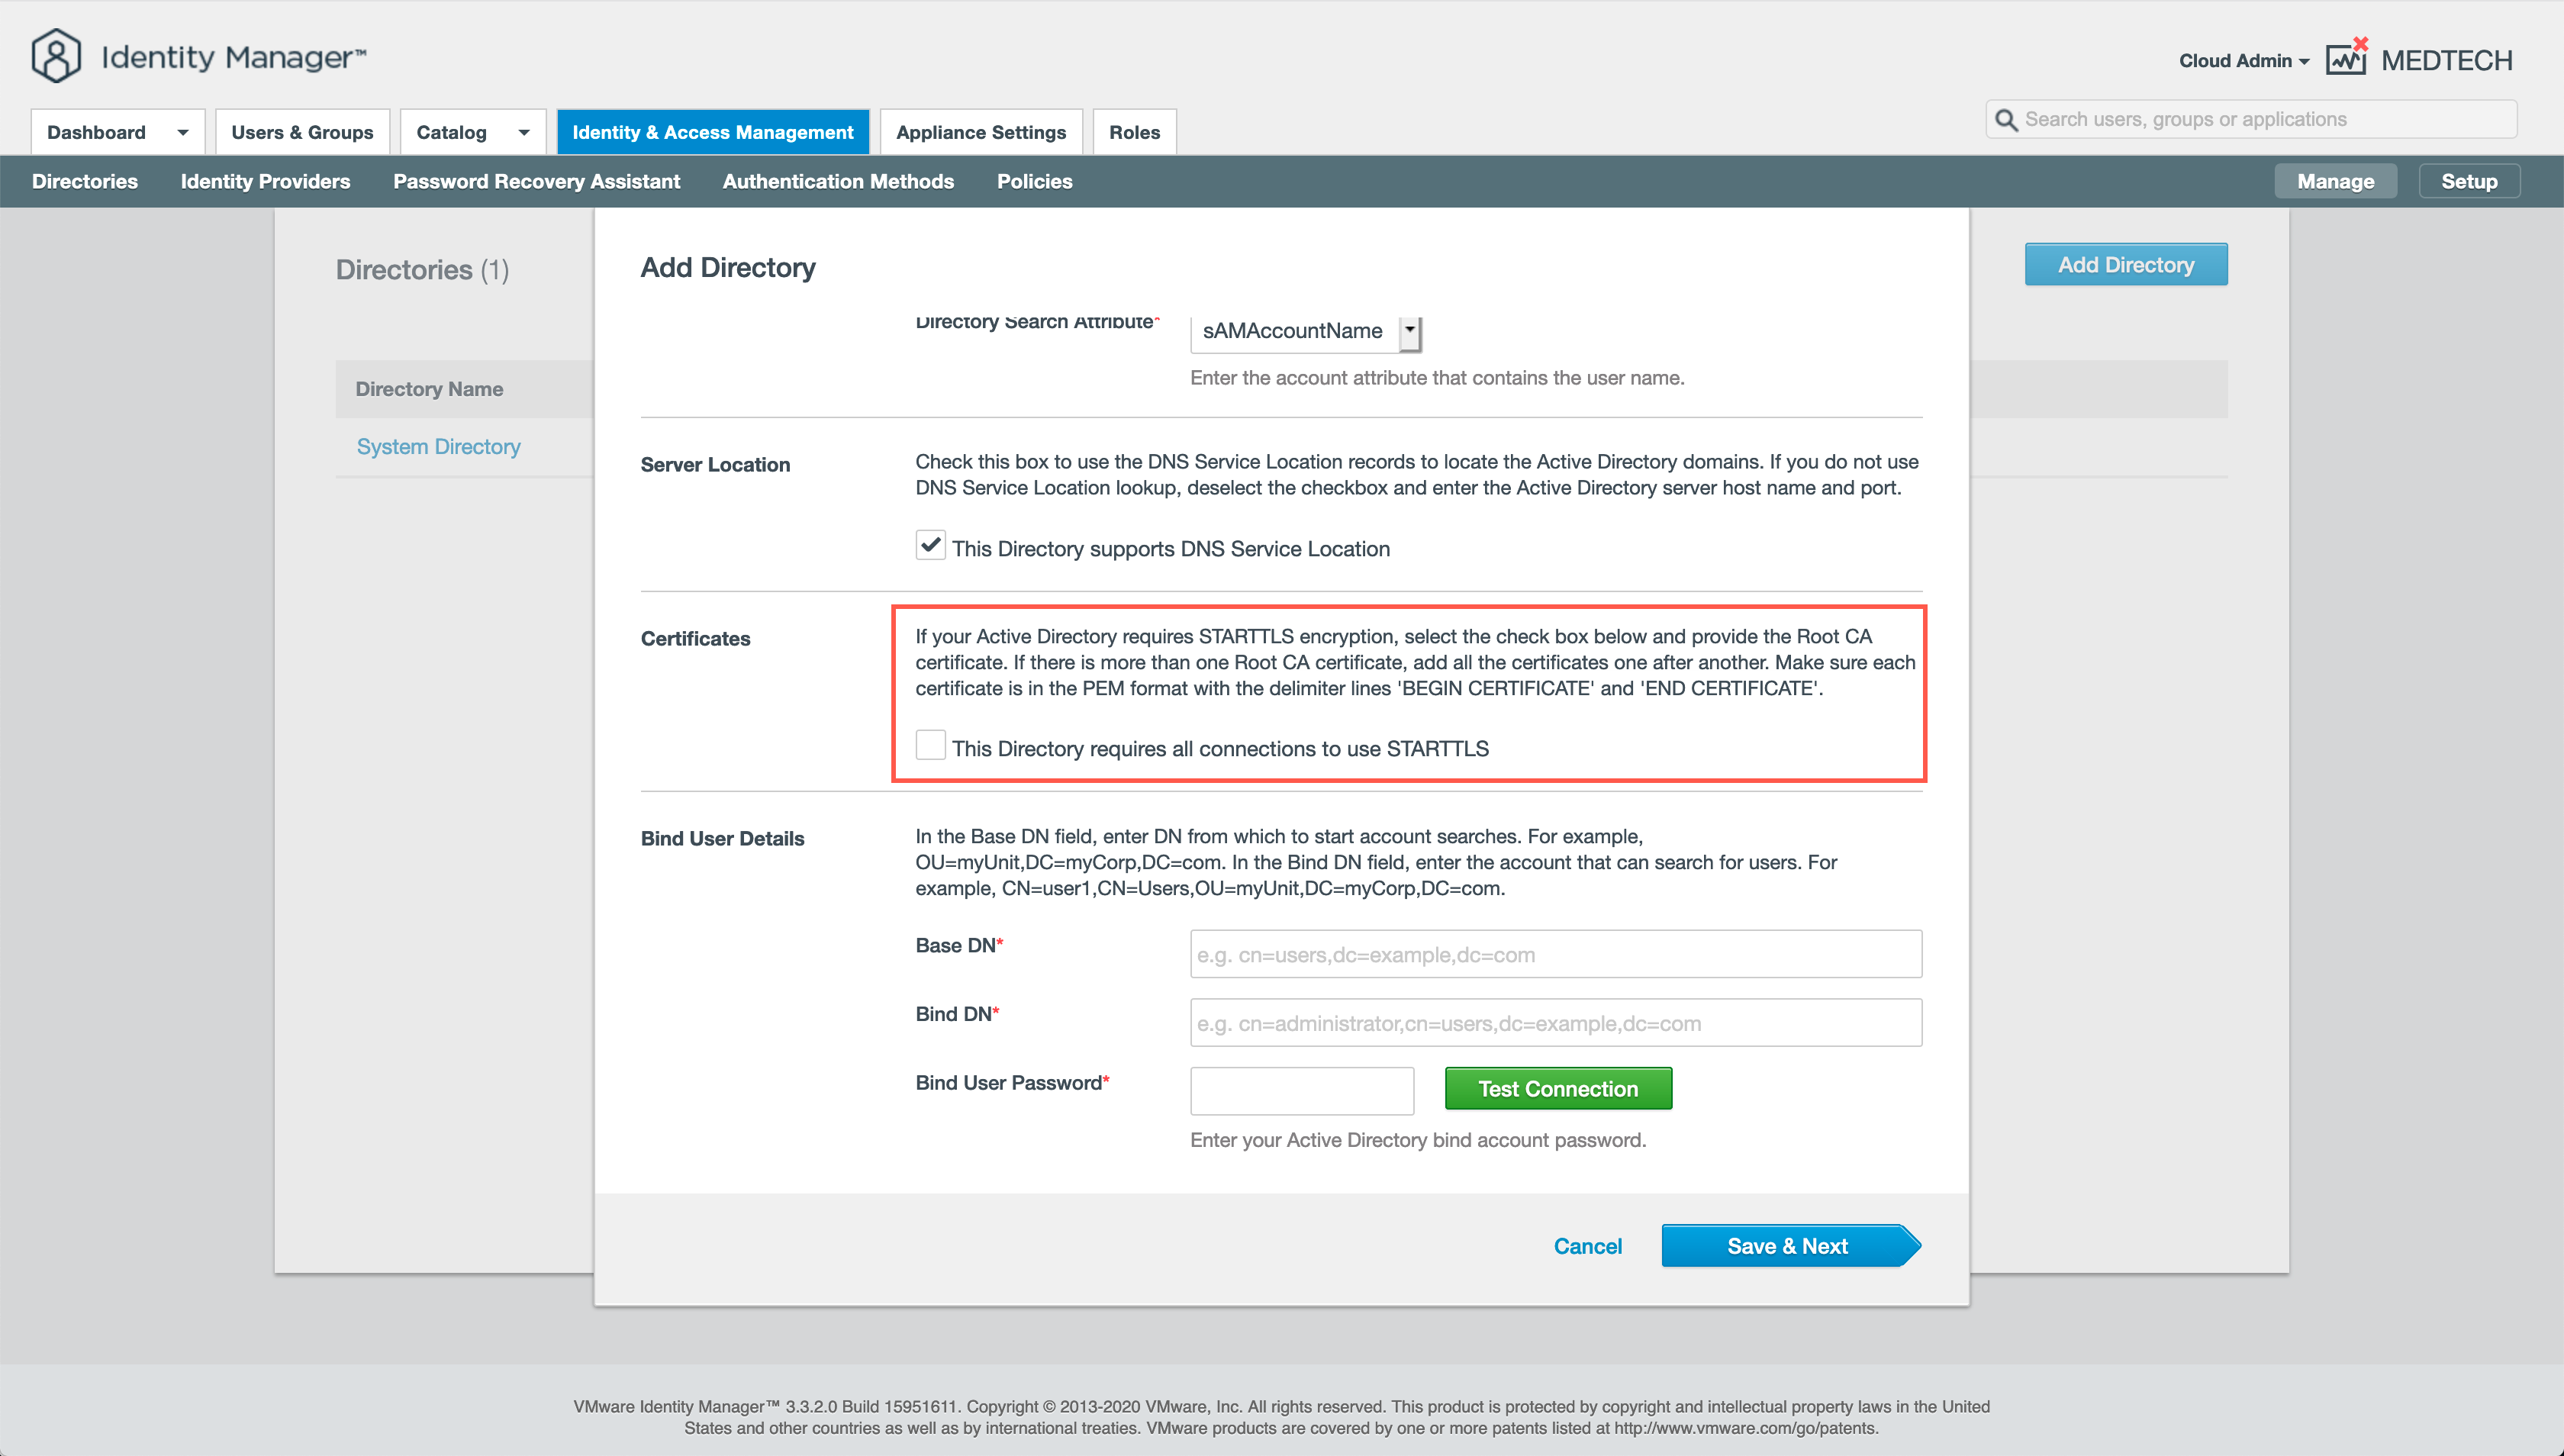
- At the Add Directory screen, under Certificates, leave the default settings.
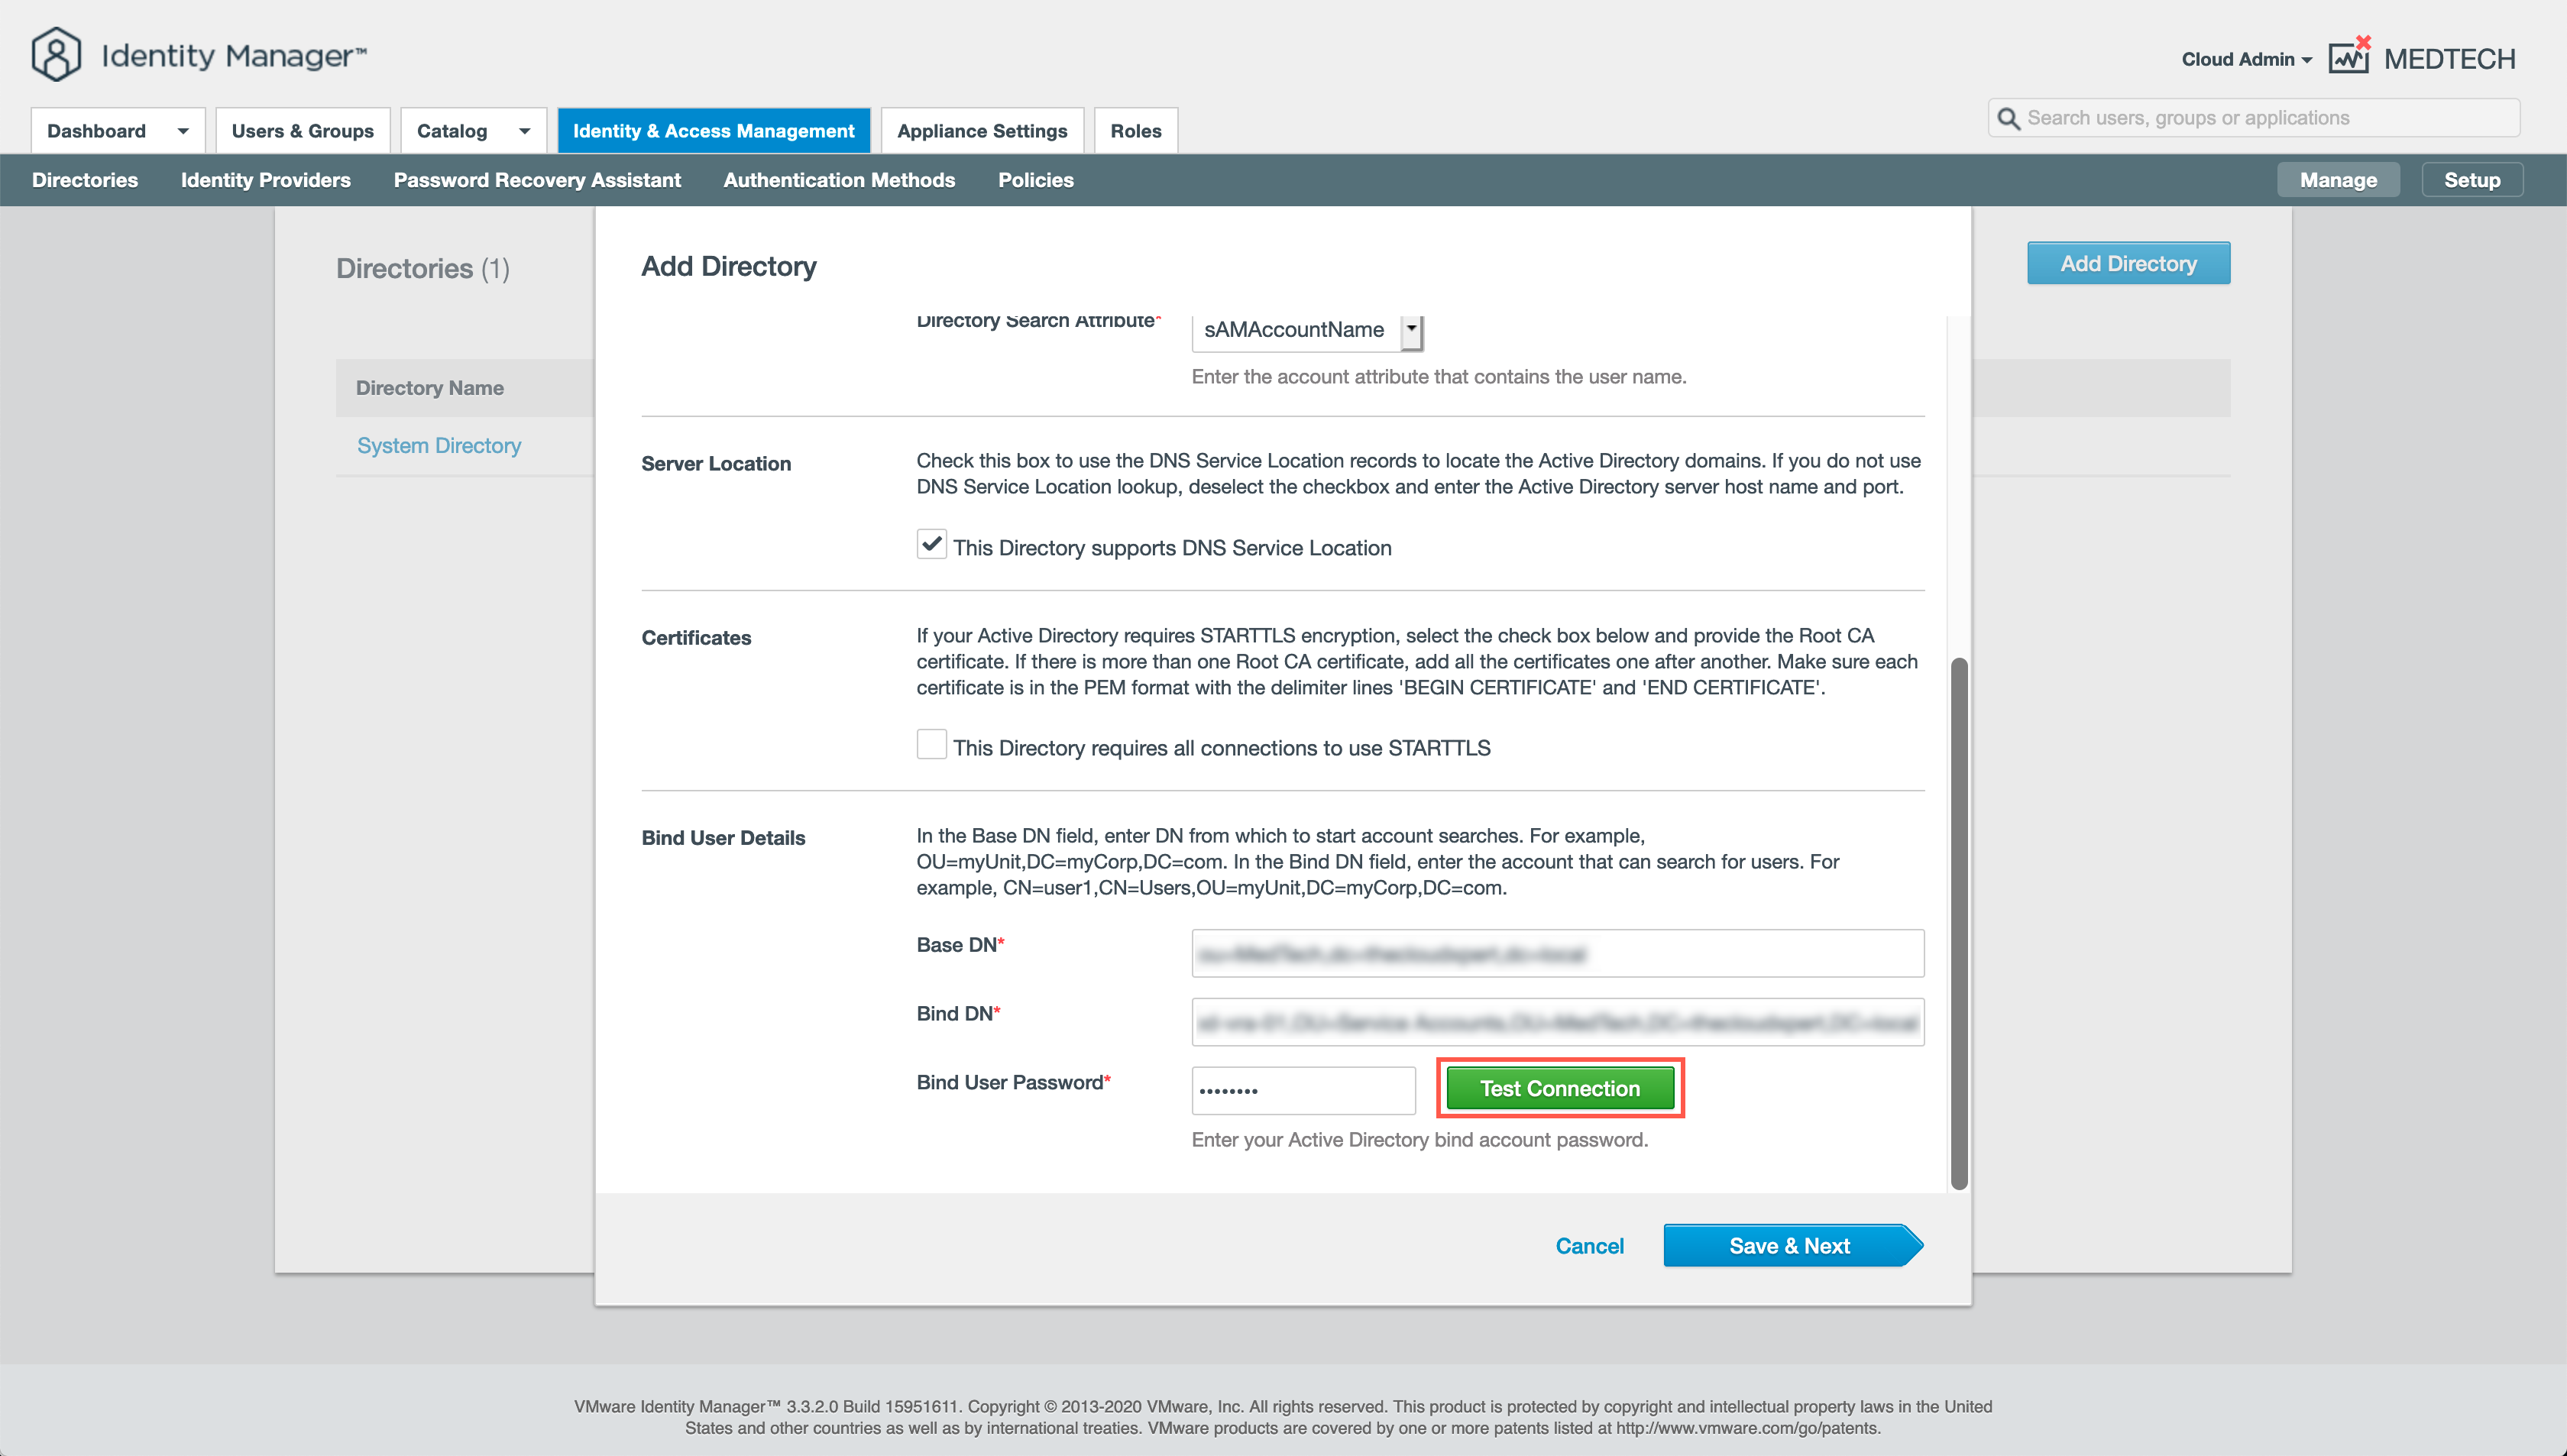
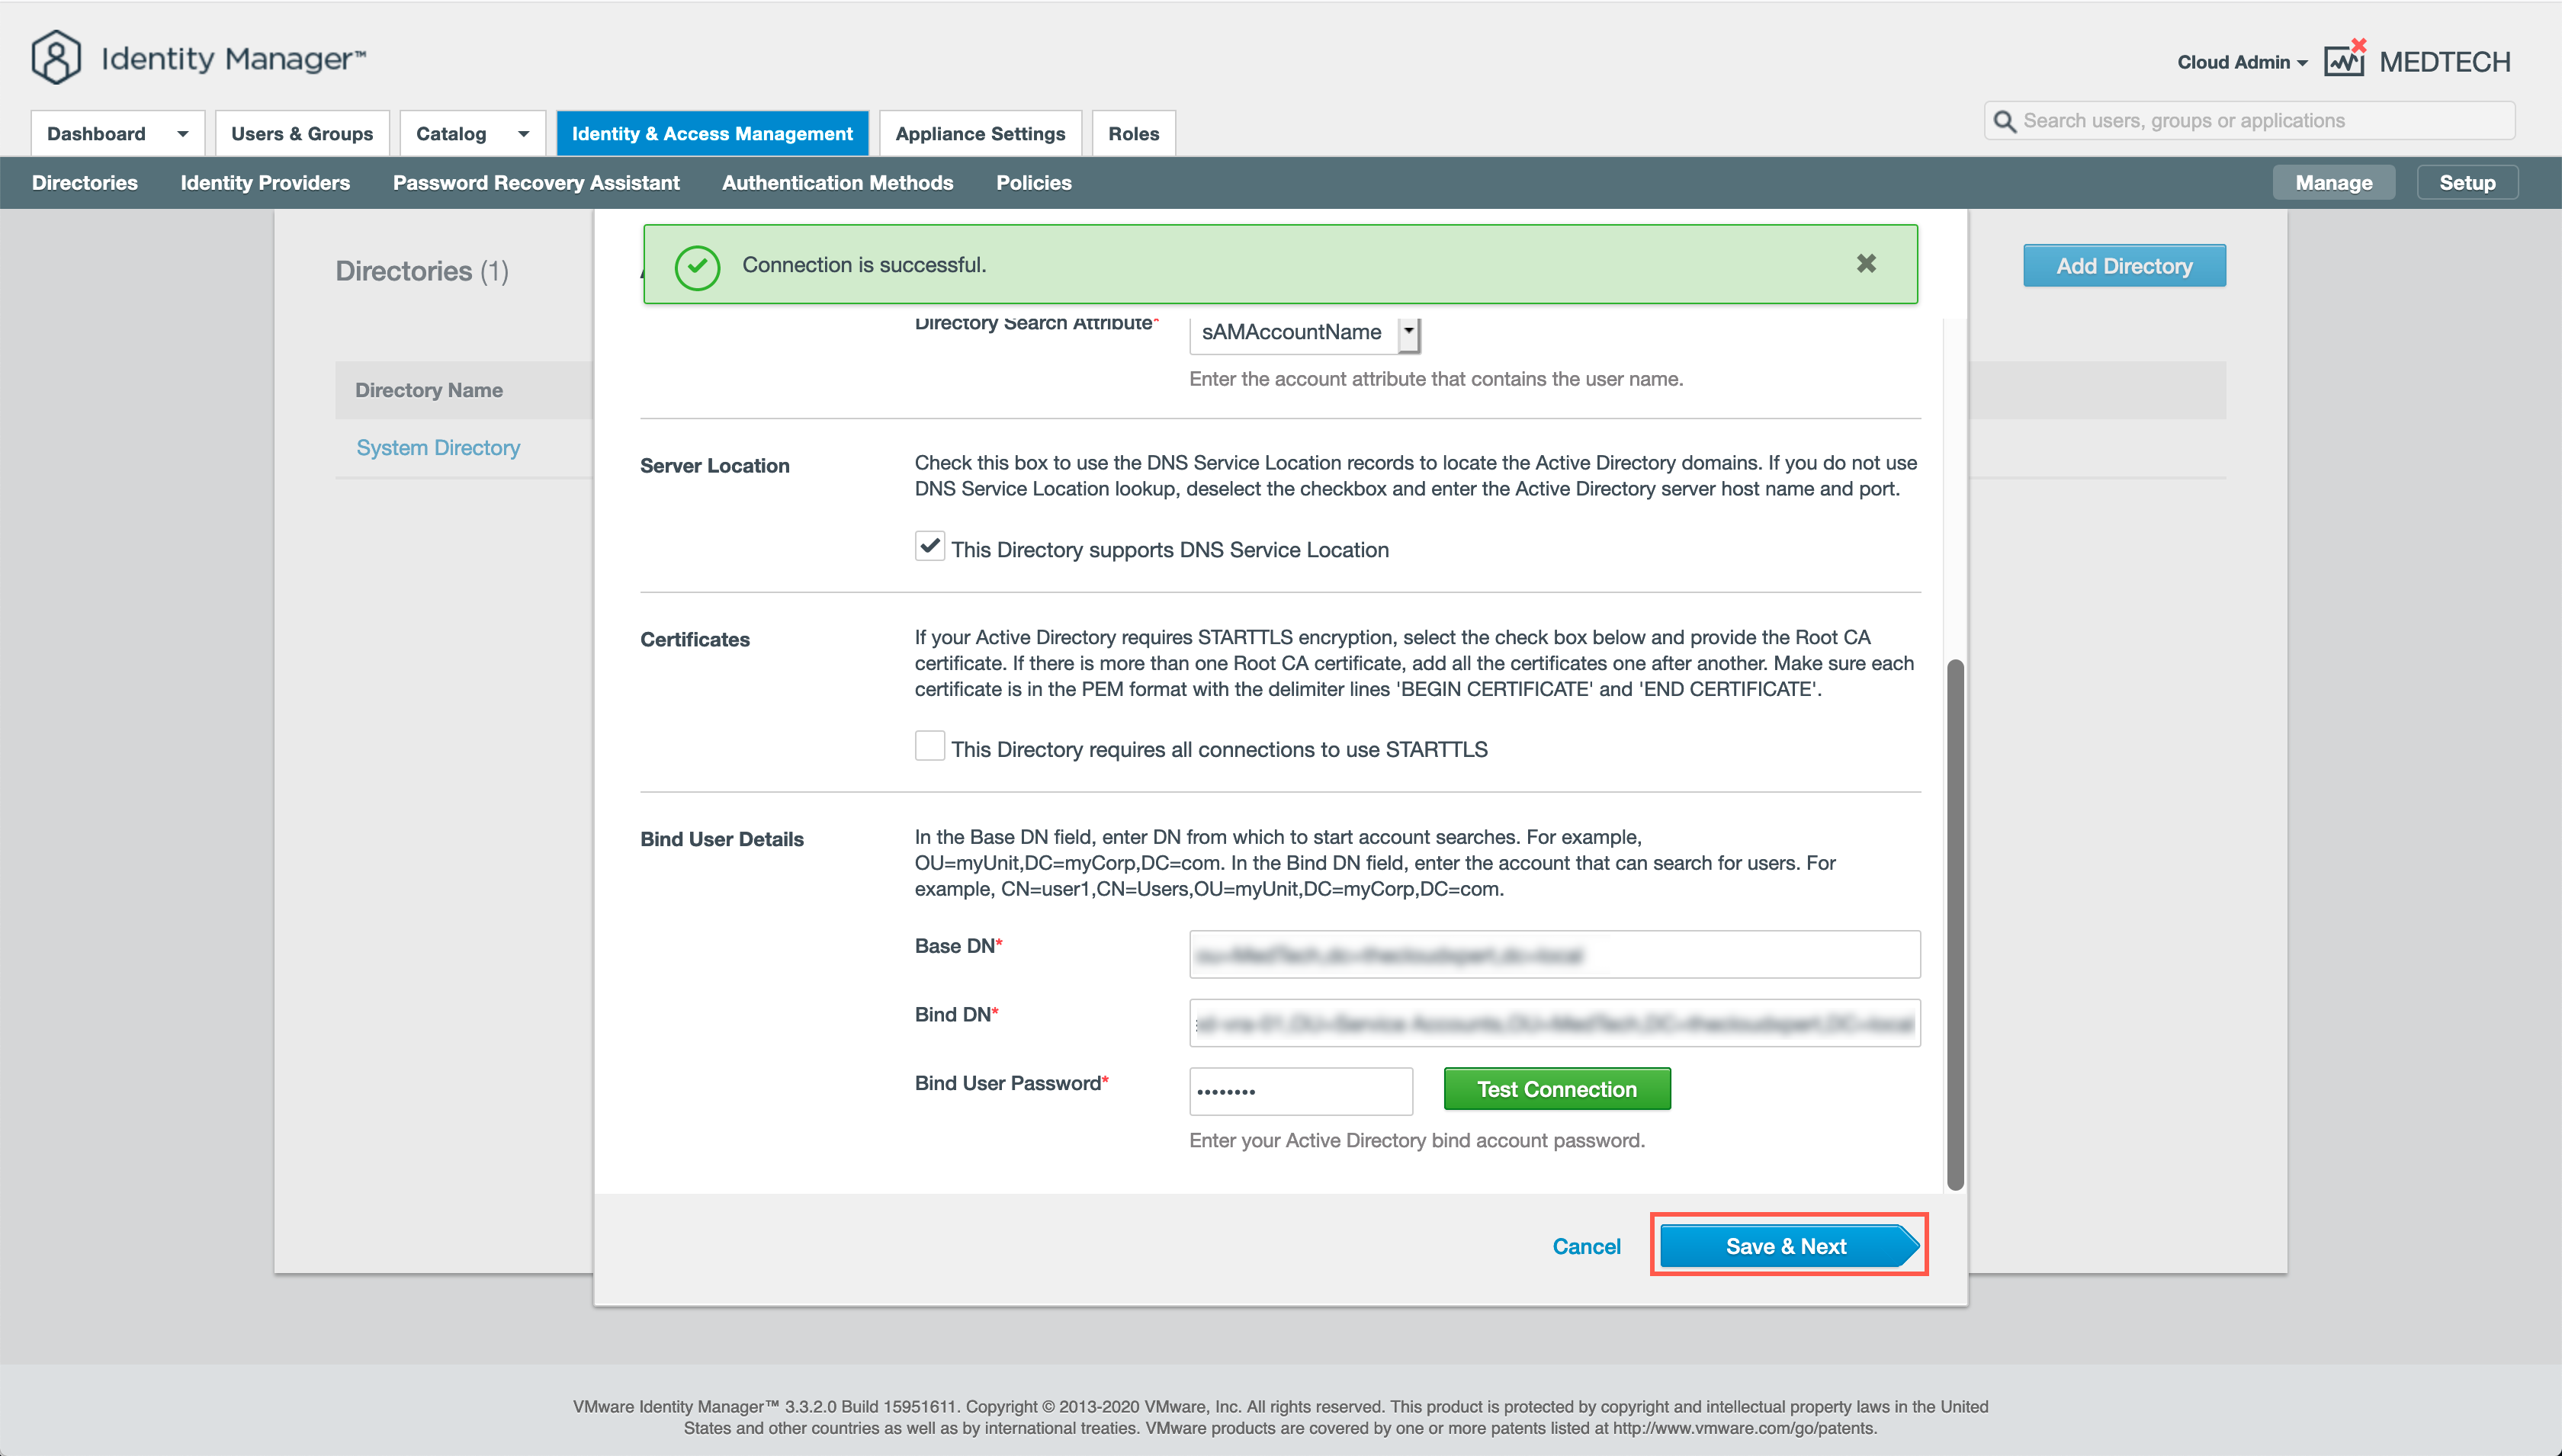
- At the Add Directory screen, under Bind User Details, enter the Base DN, Bind DN and Bind User Password and click Test Connection.
- At the Add Directory screen, click Save & Next.
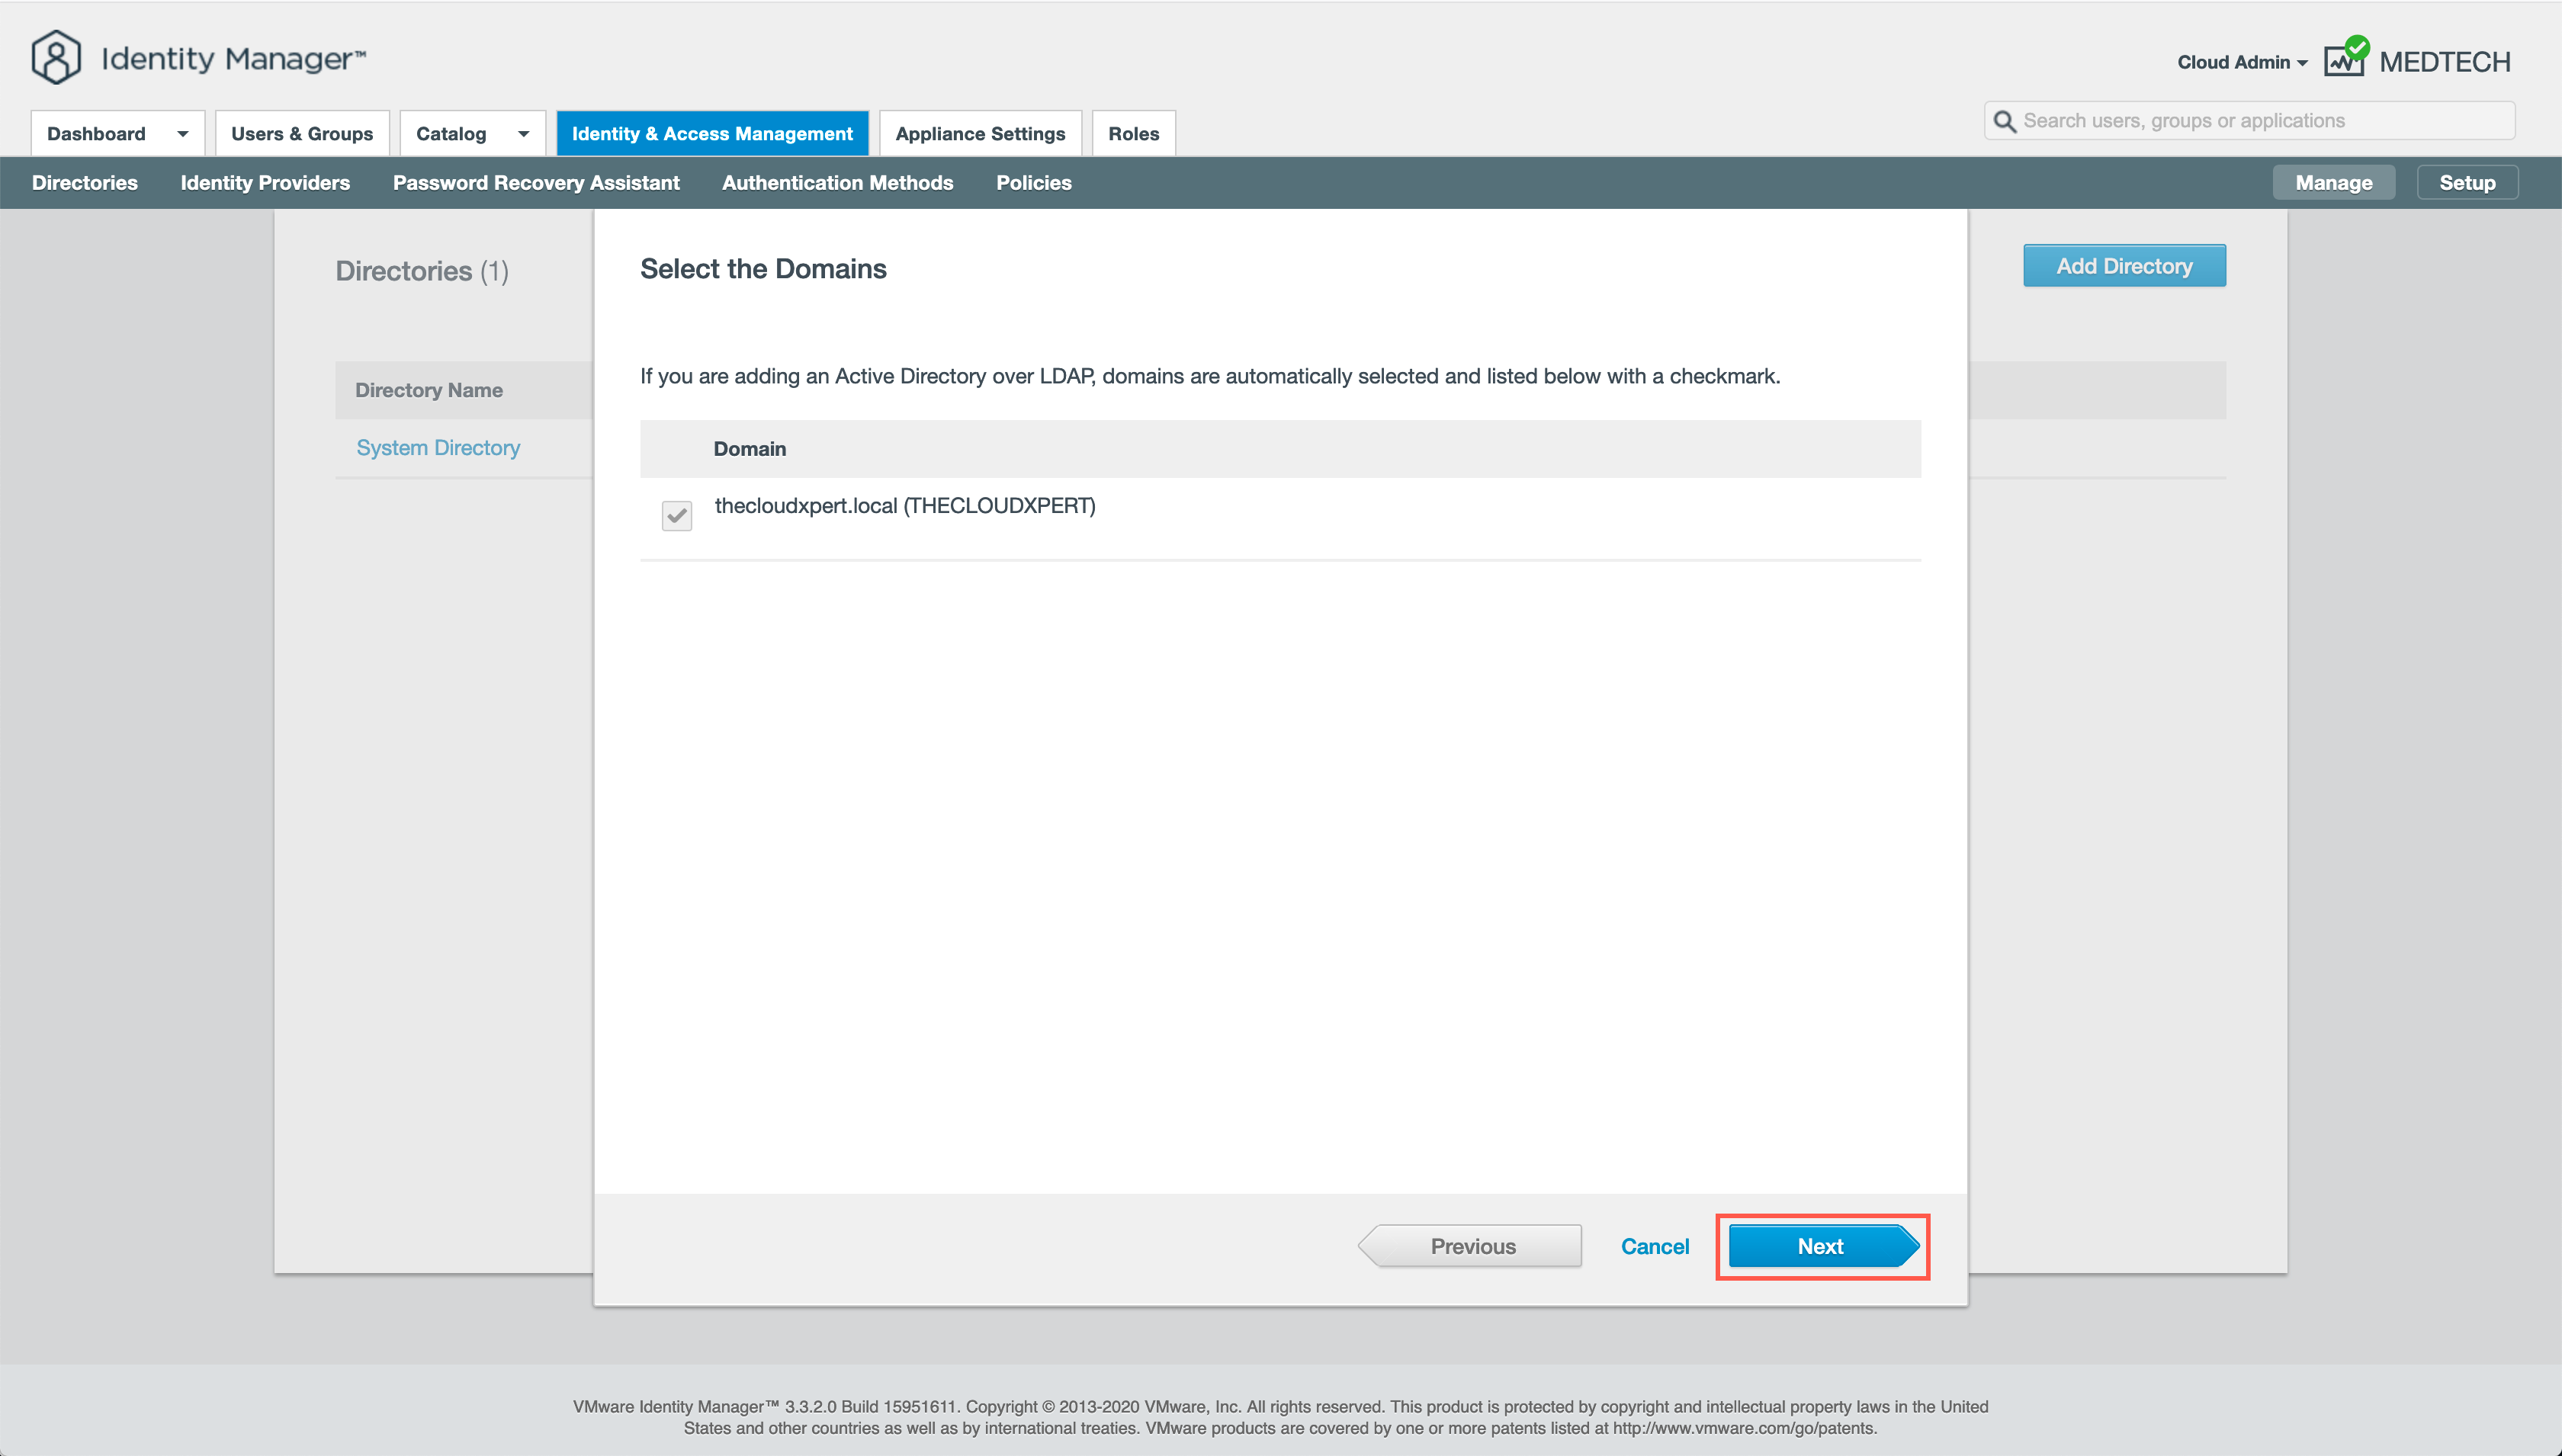
- At the Select the Domains screen, click Save & Next.
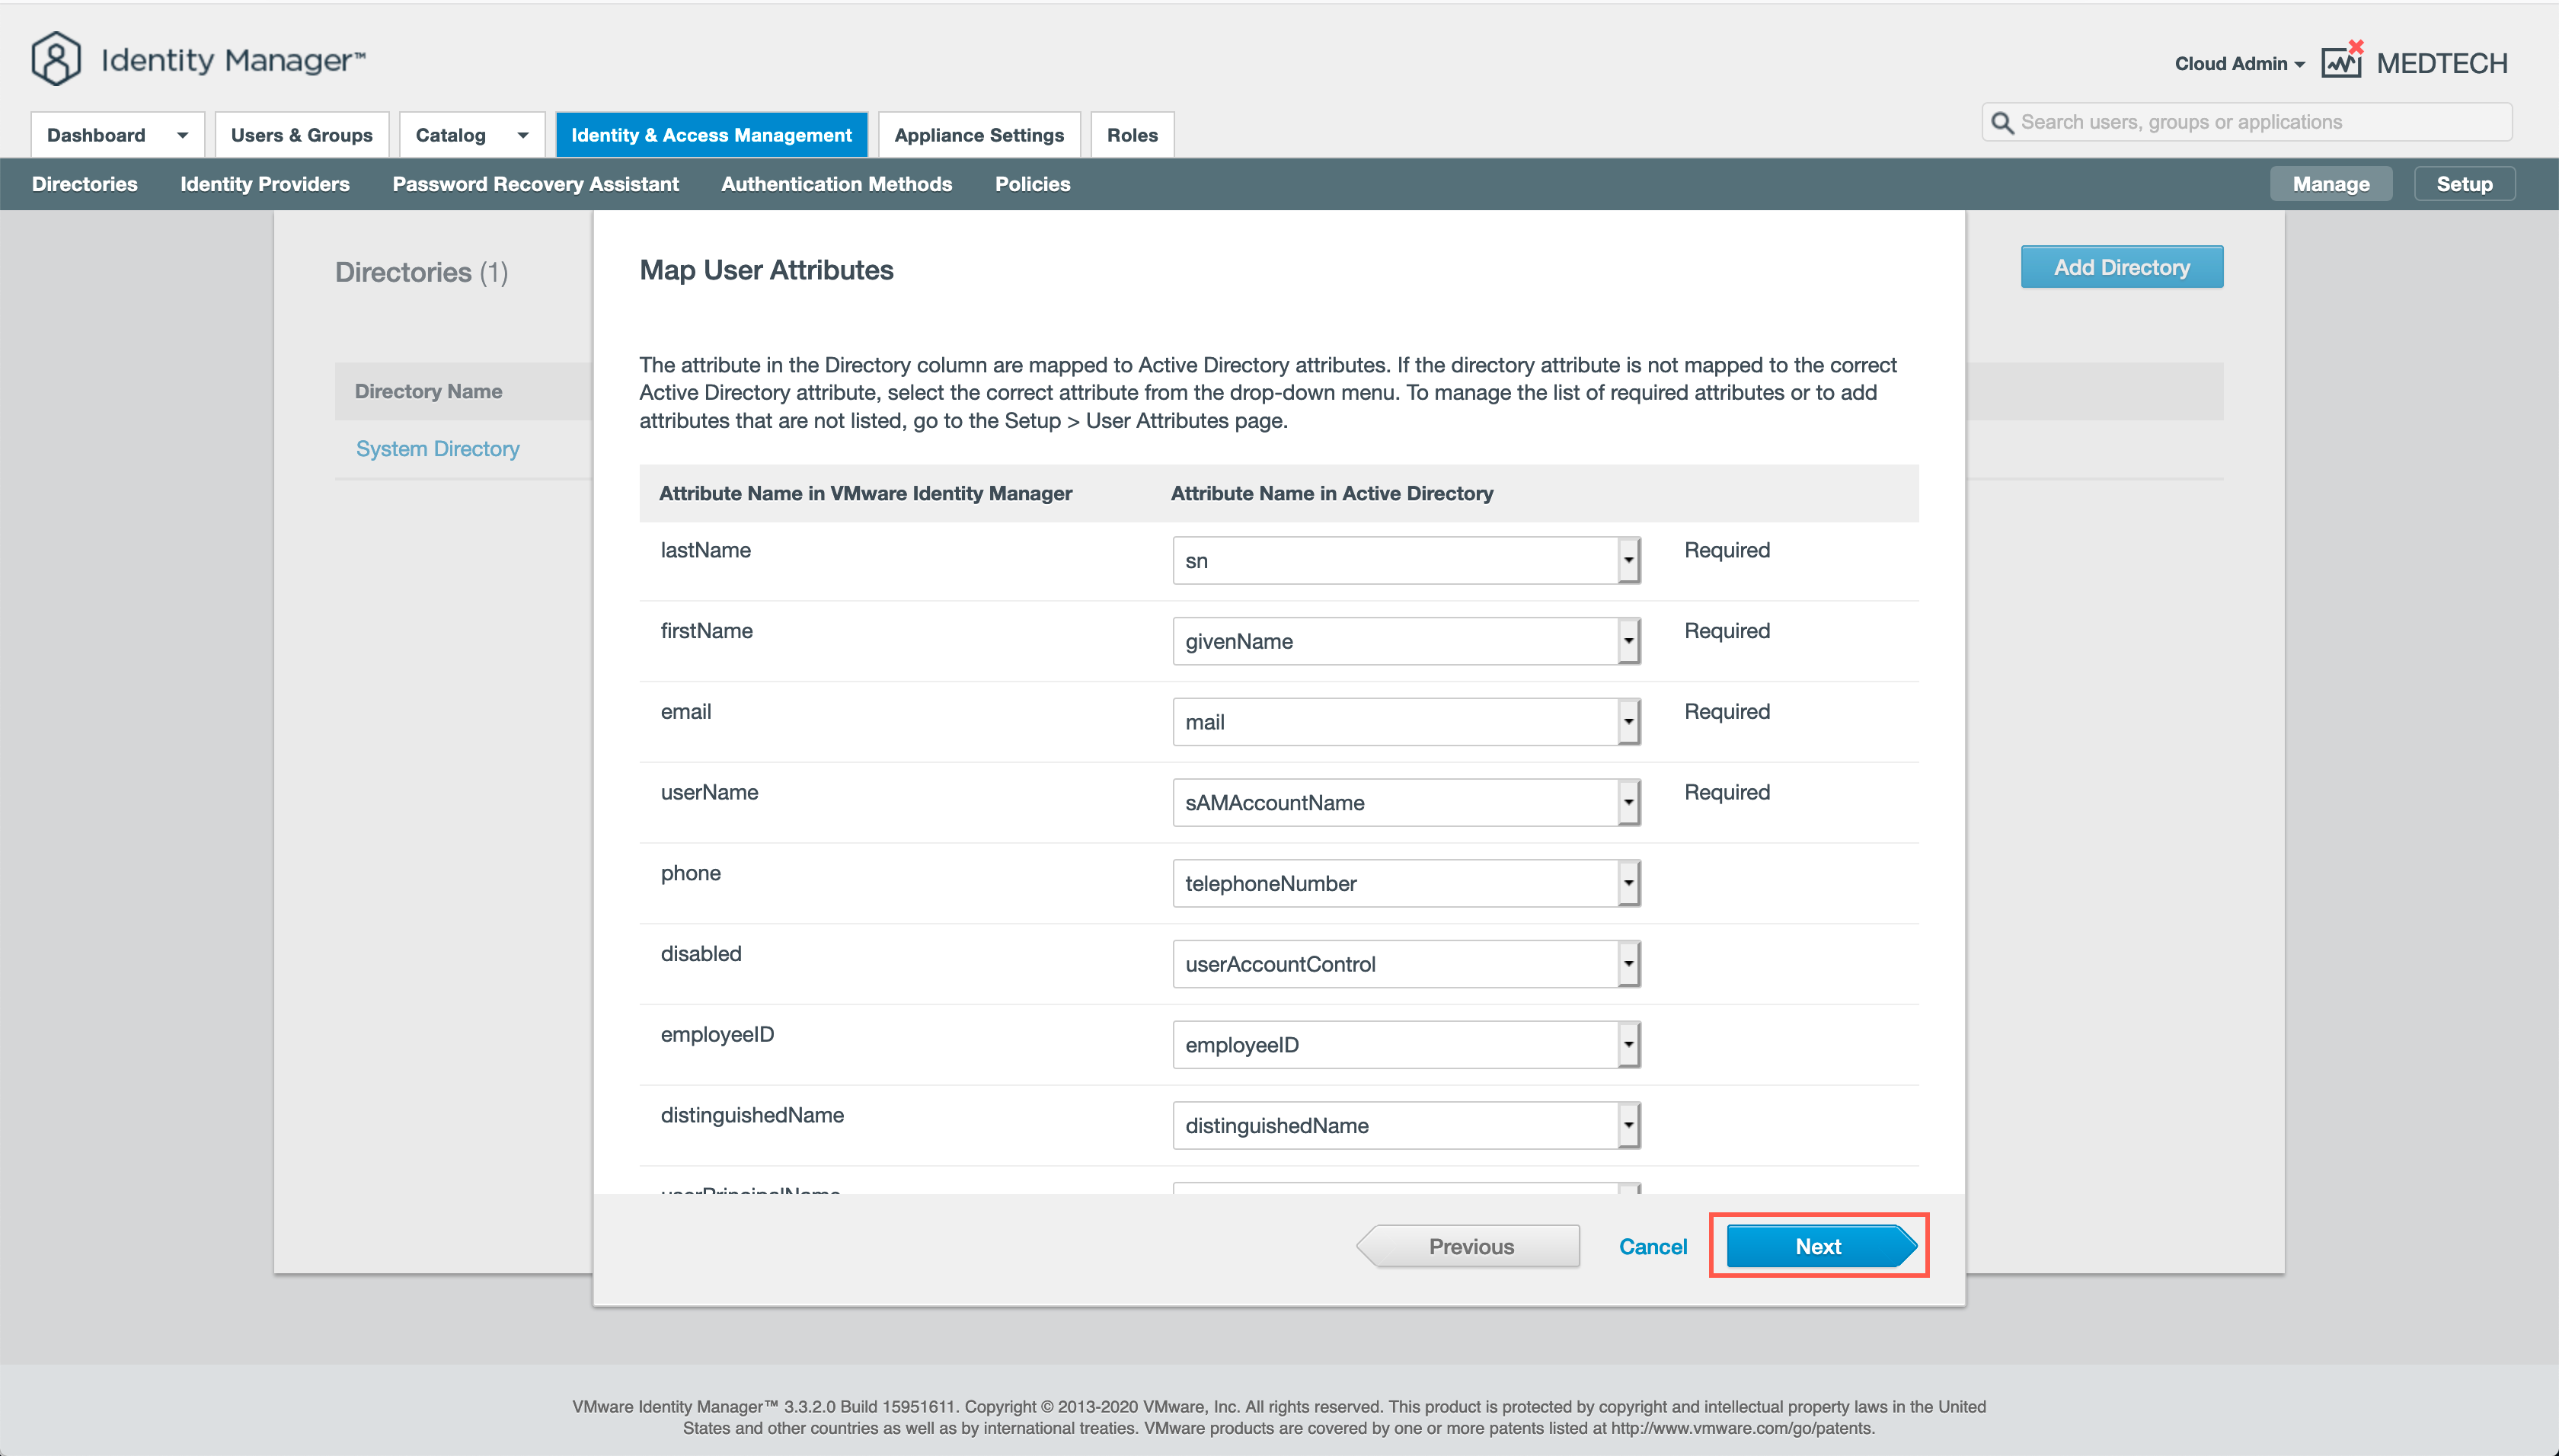
- At the Map User Attributes screen, leave all the defaults and click Next.
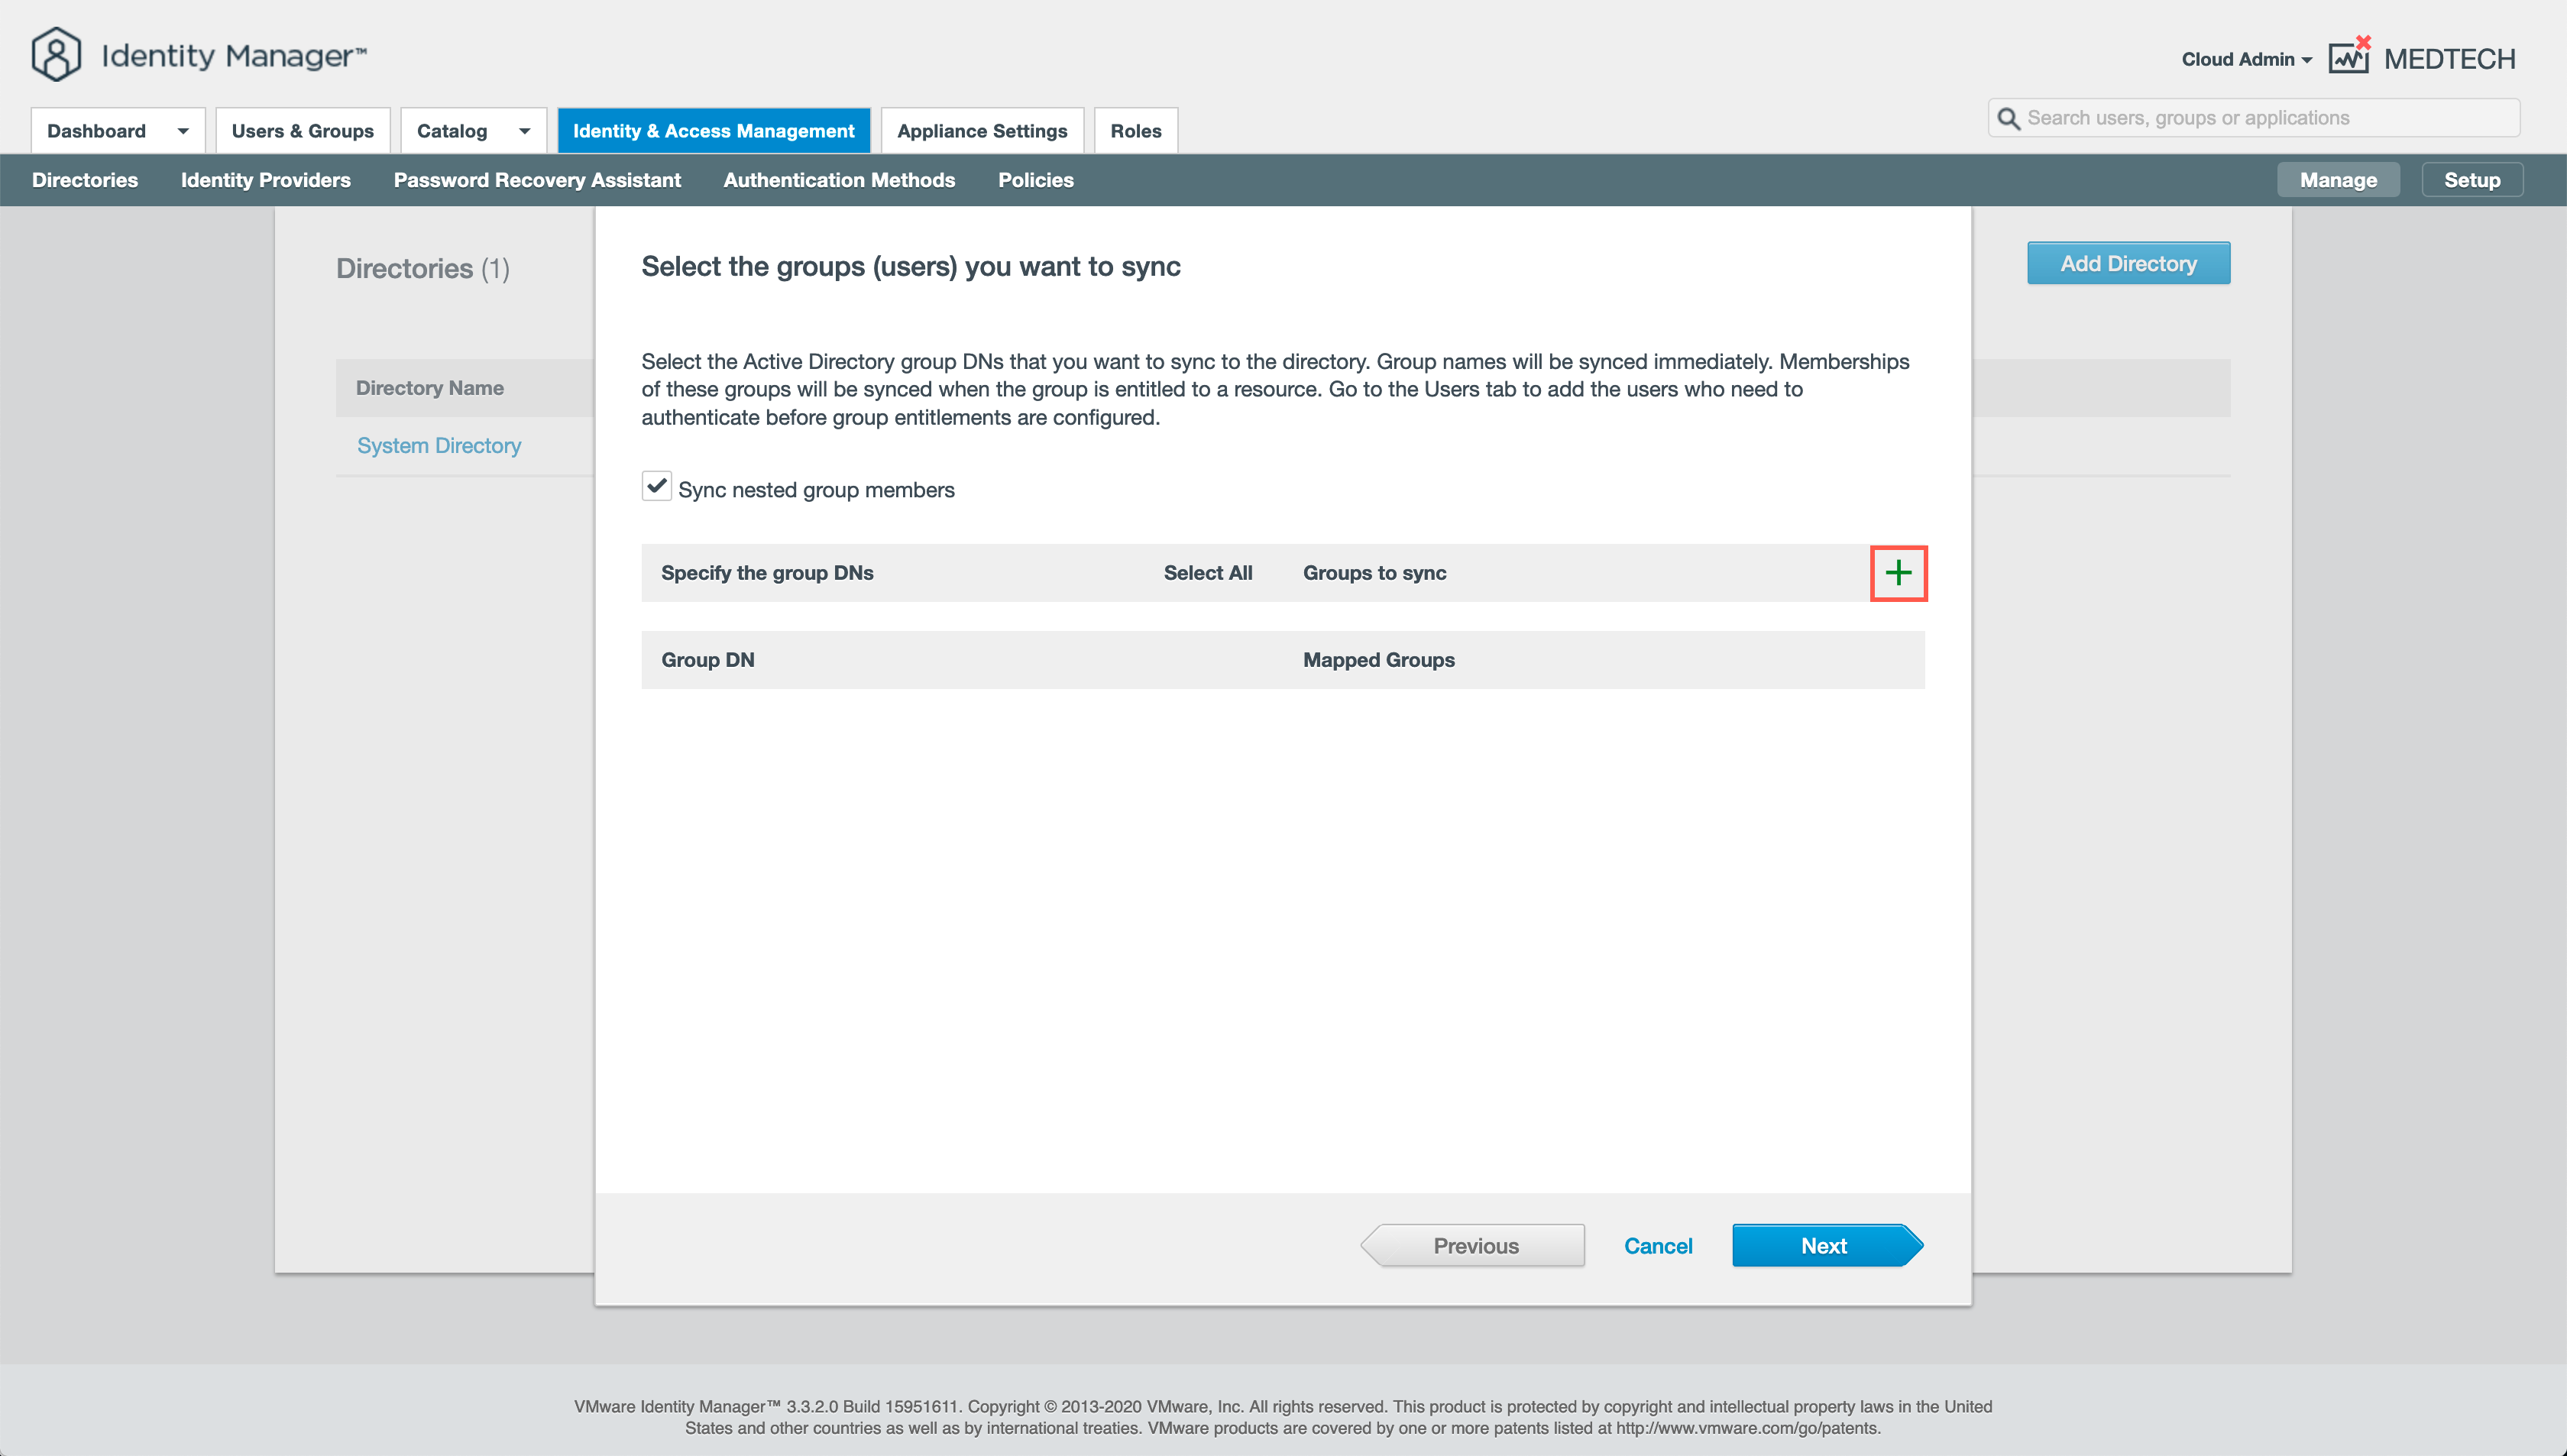
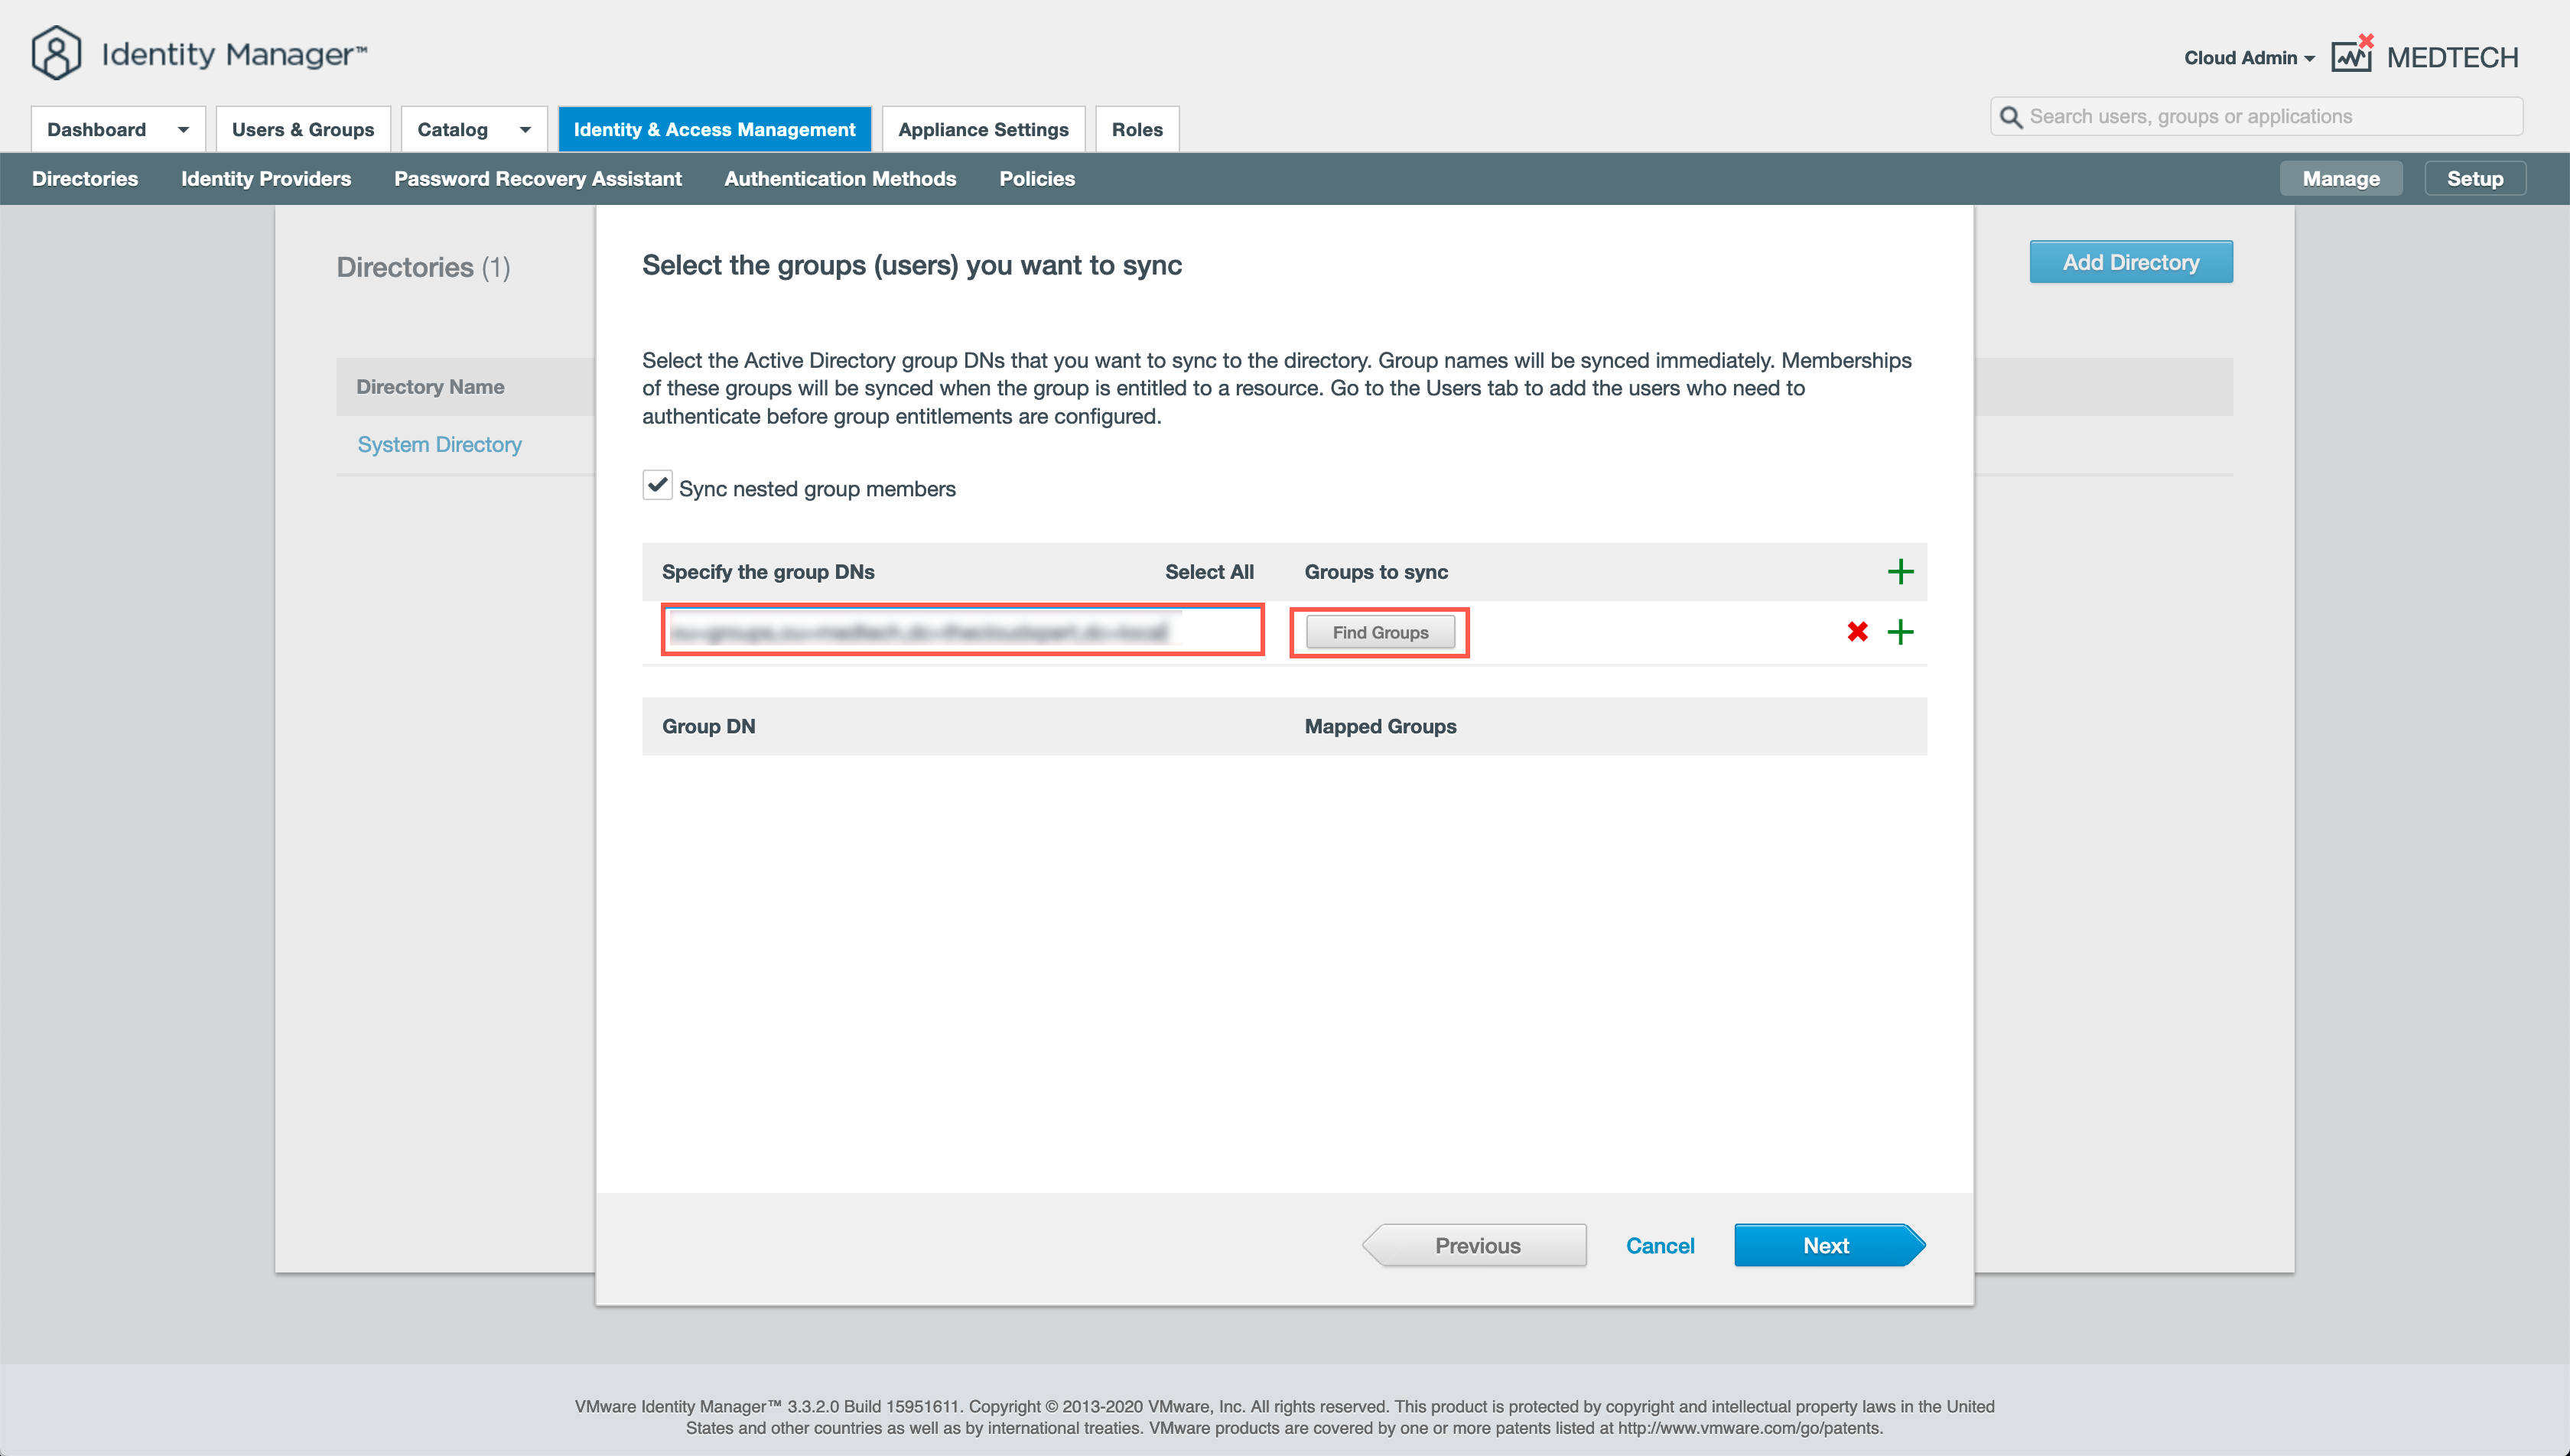
- At the Select the groups (users) you want to sync screen, click +.
- At the Select the groups (users) you want to sync screen, enter the group DN (such as ou=groups,dc=domain,dc=local) into the textbox and click Find Groups.
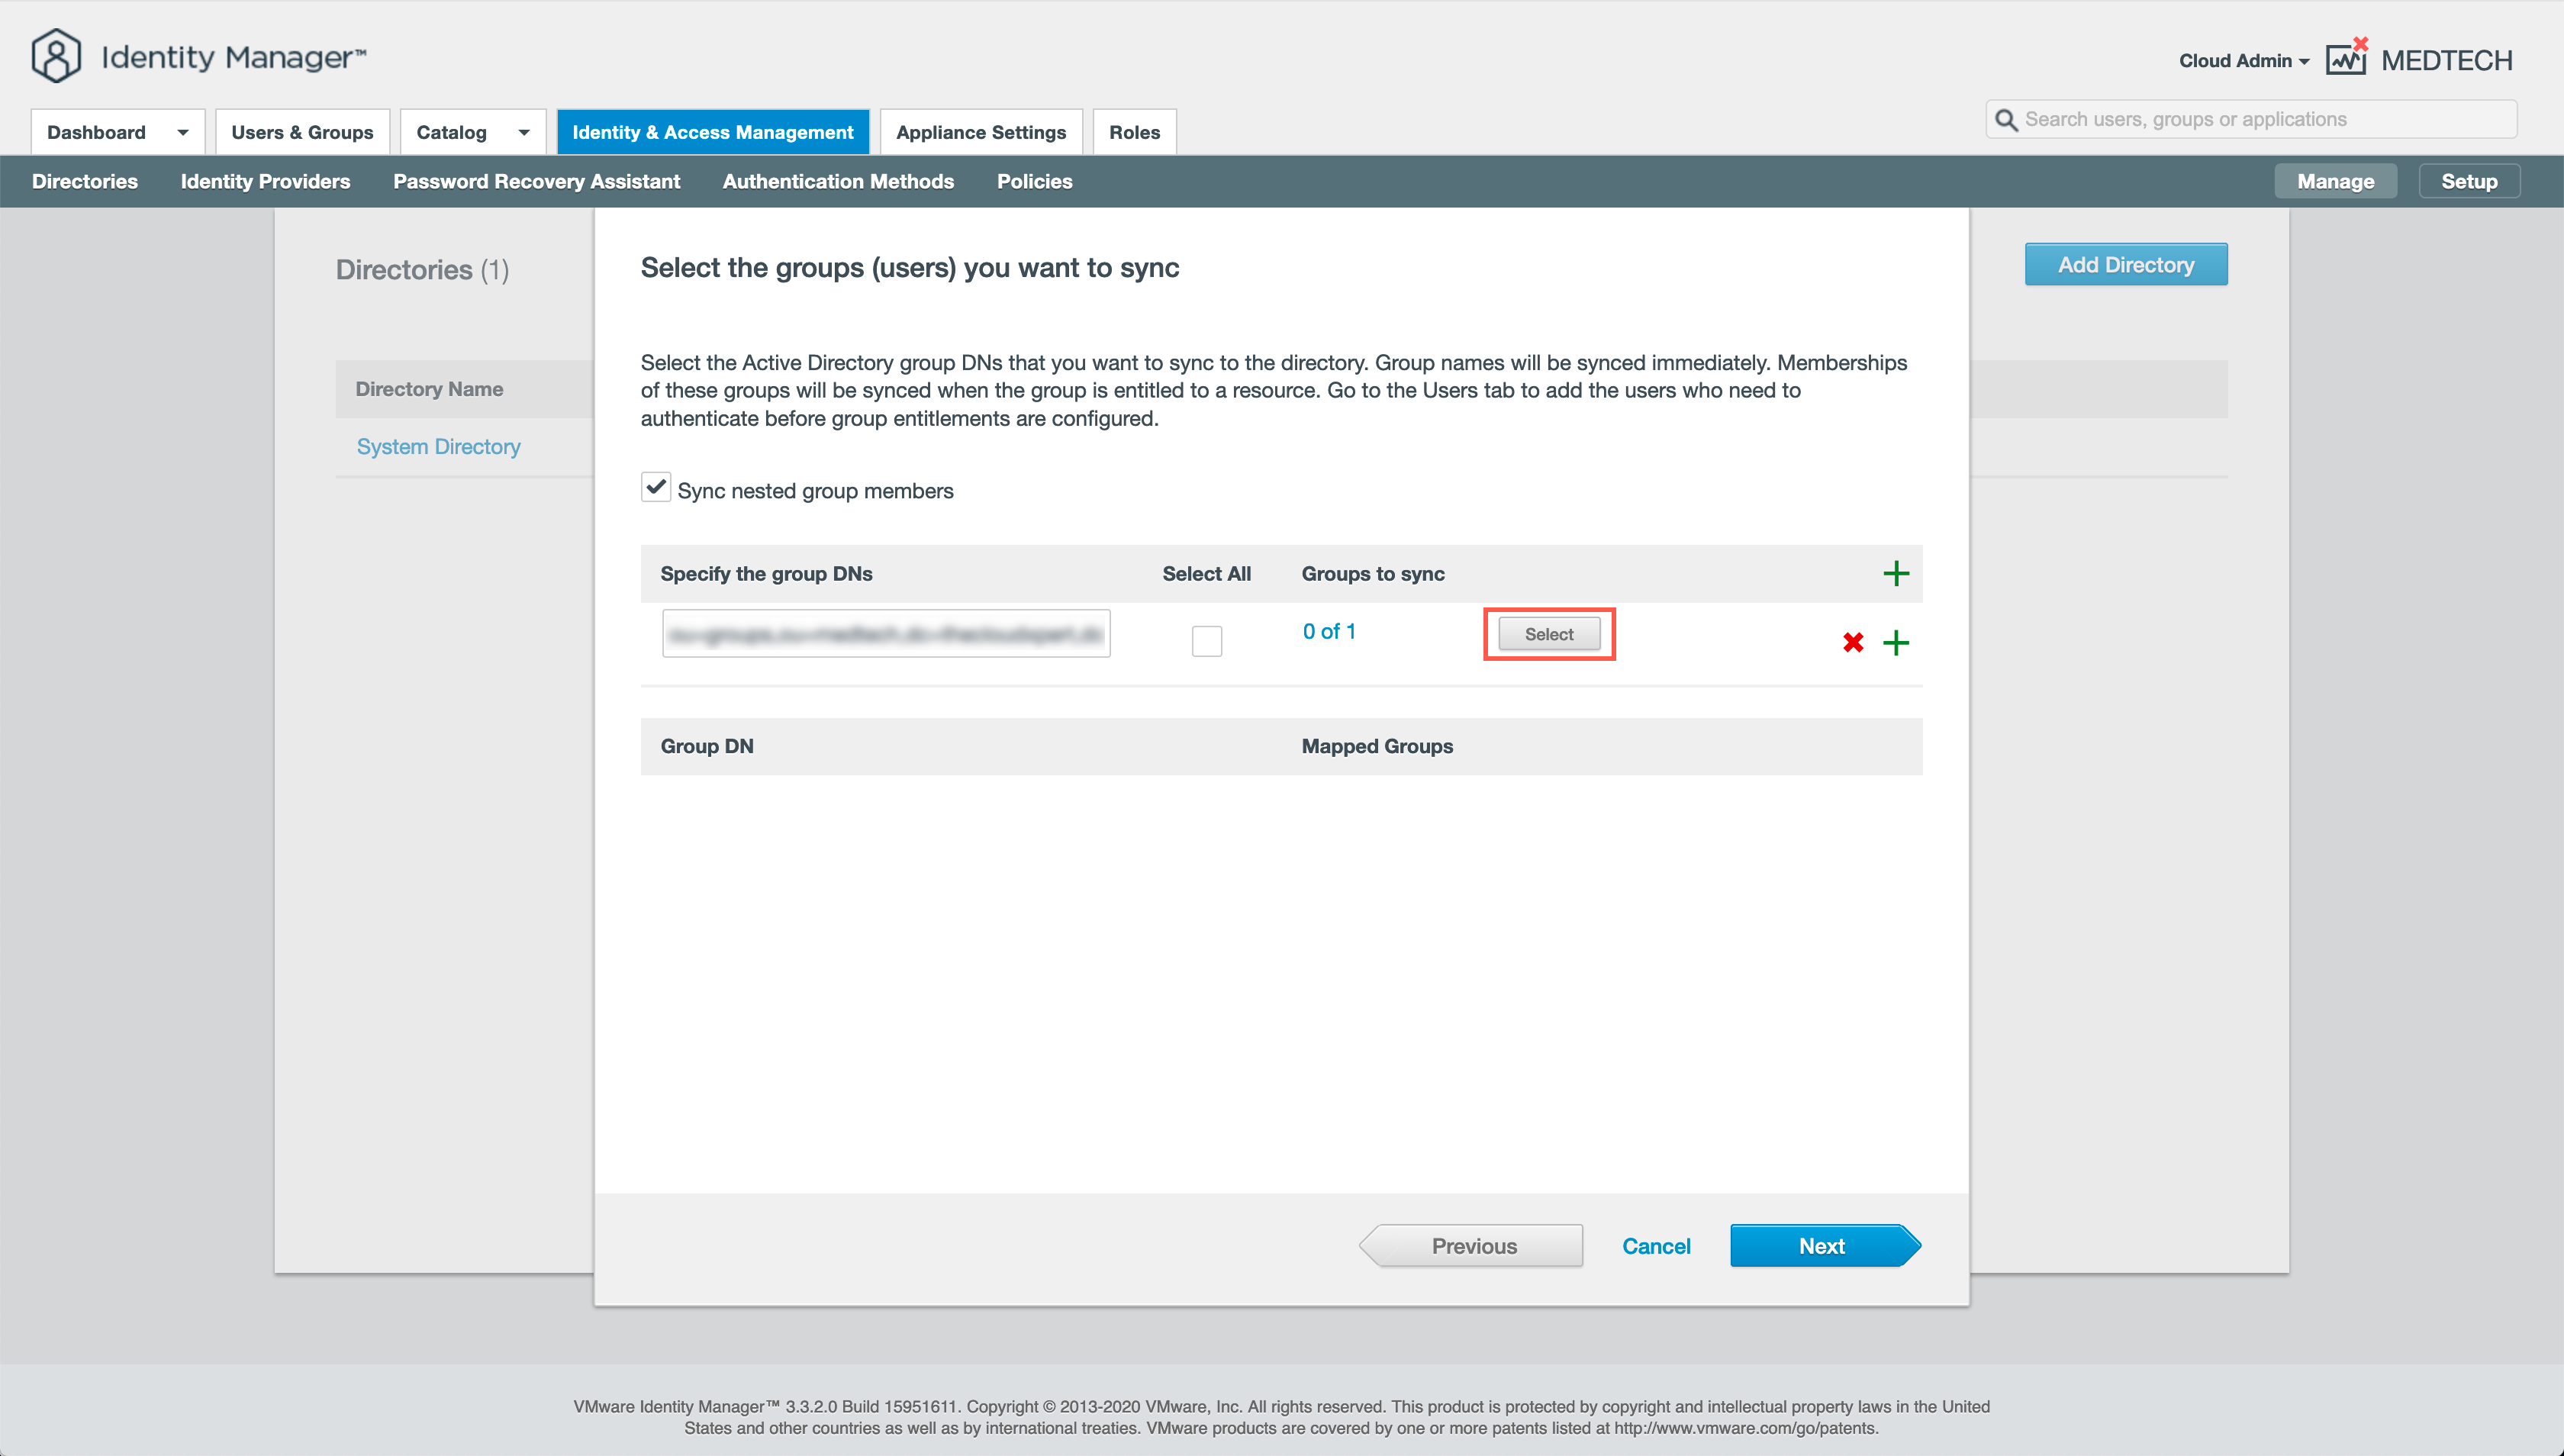
- At the Select the groups (users) you want to sync screen, click Select.
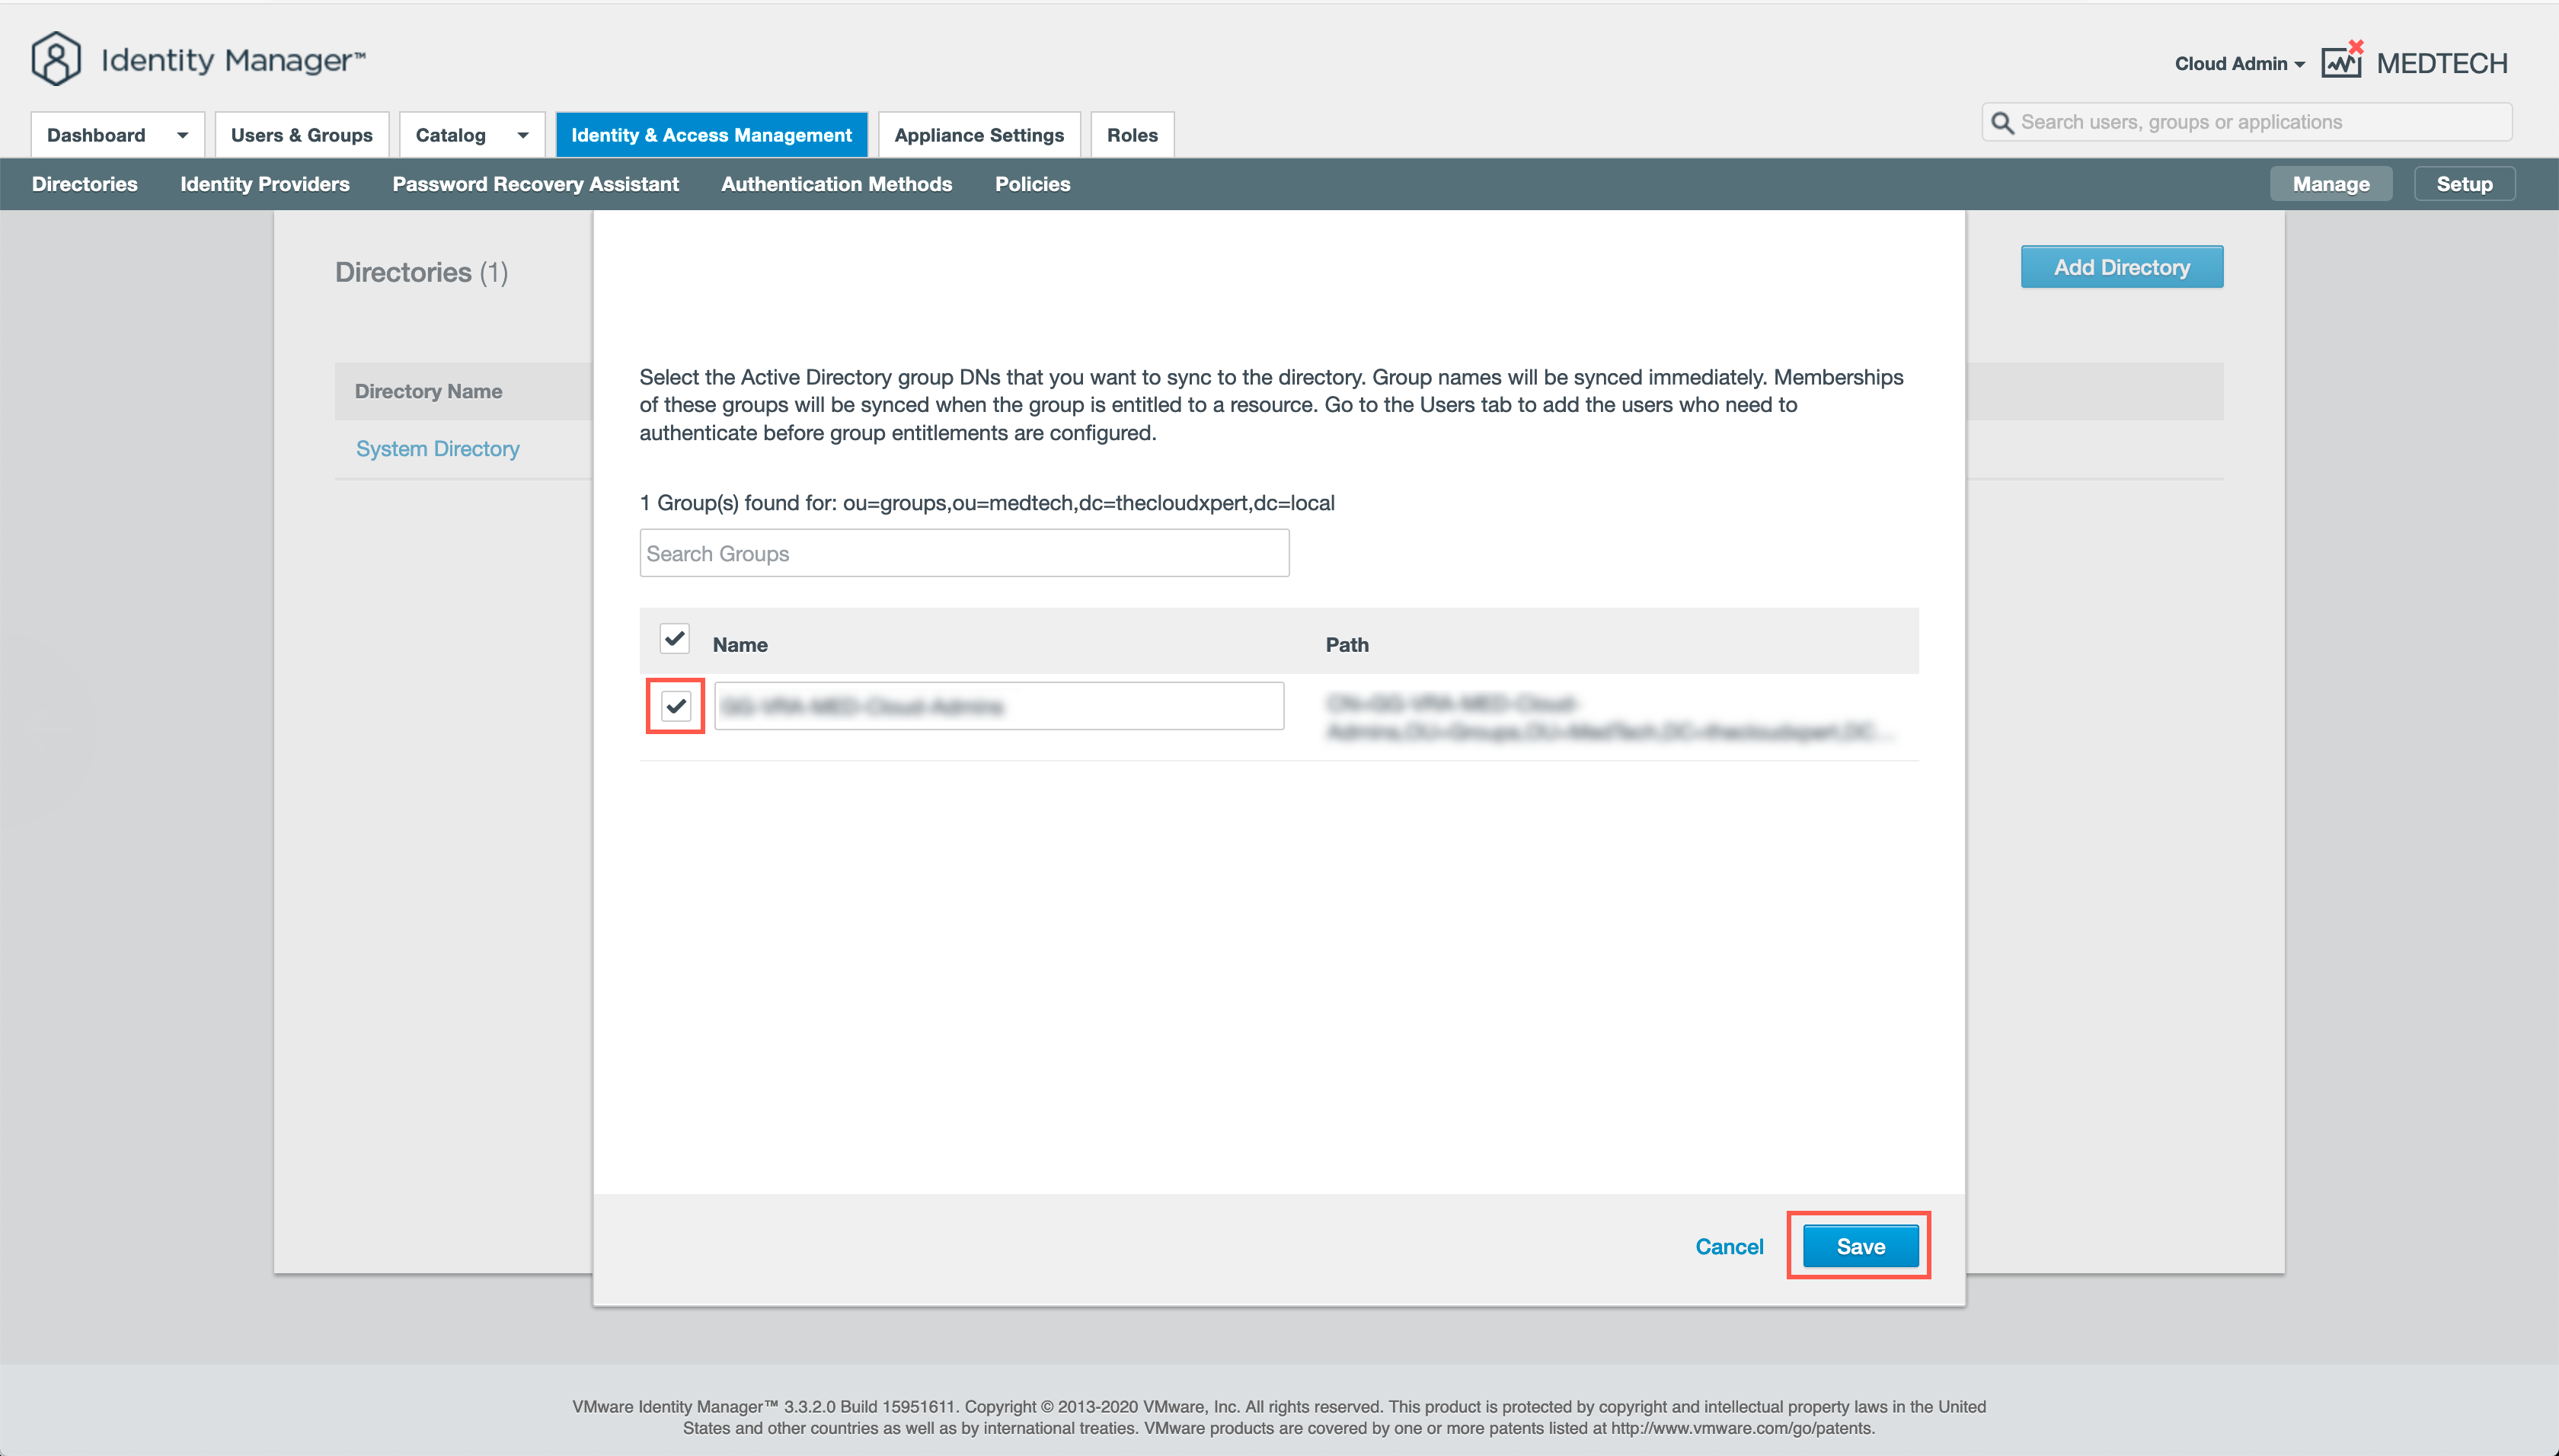
- At the Select the groups (users) you want to sync screen, locate each group that needs to be synchronized and check the check box next to its name and then click Save.
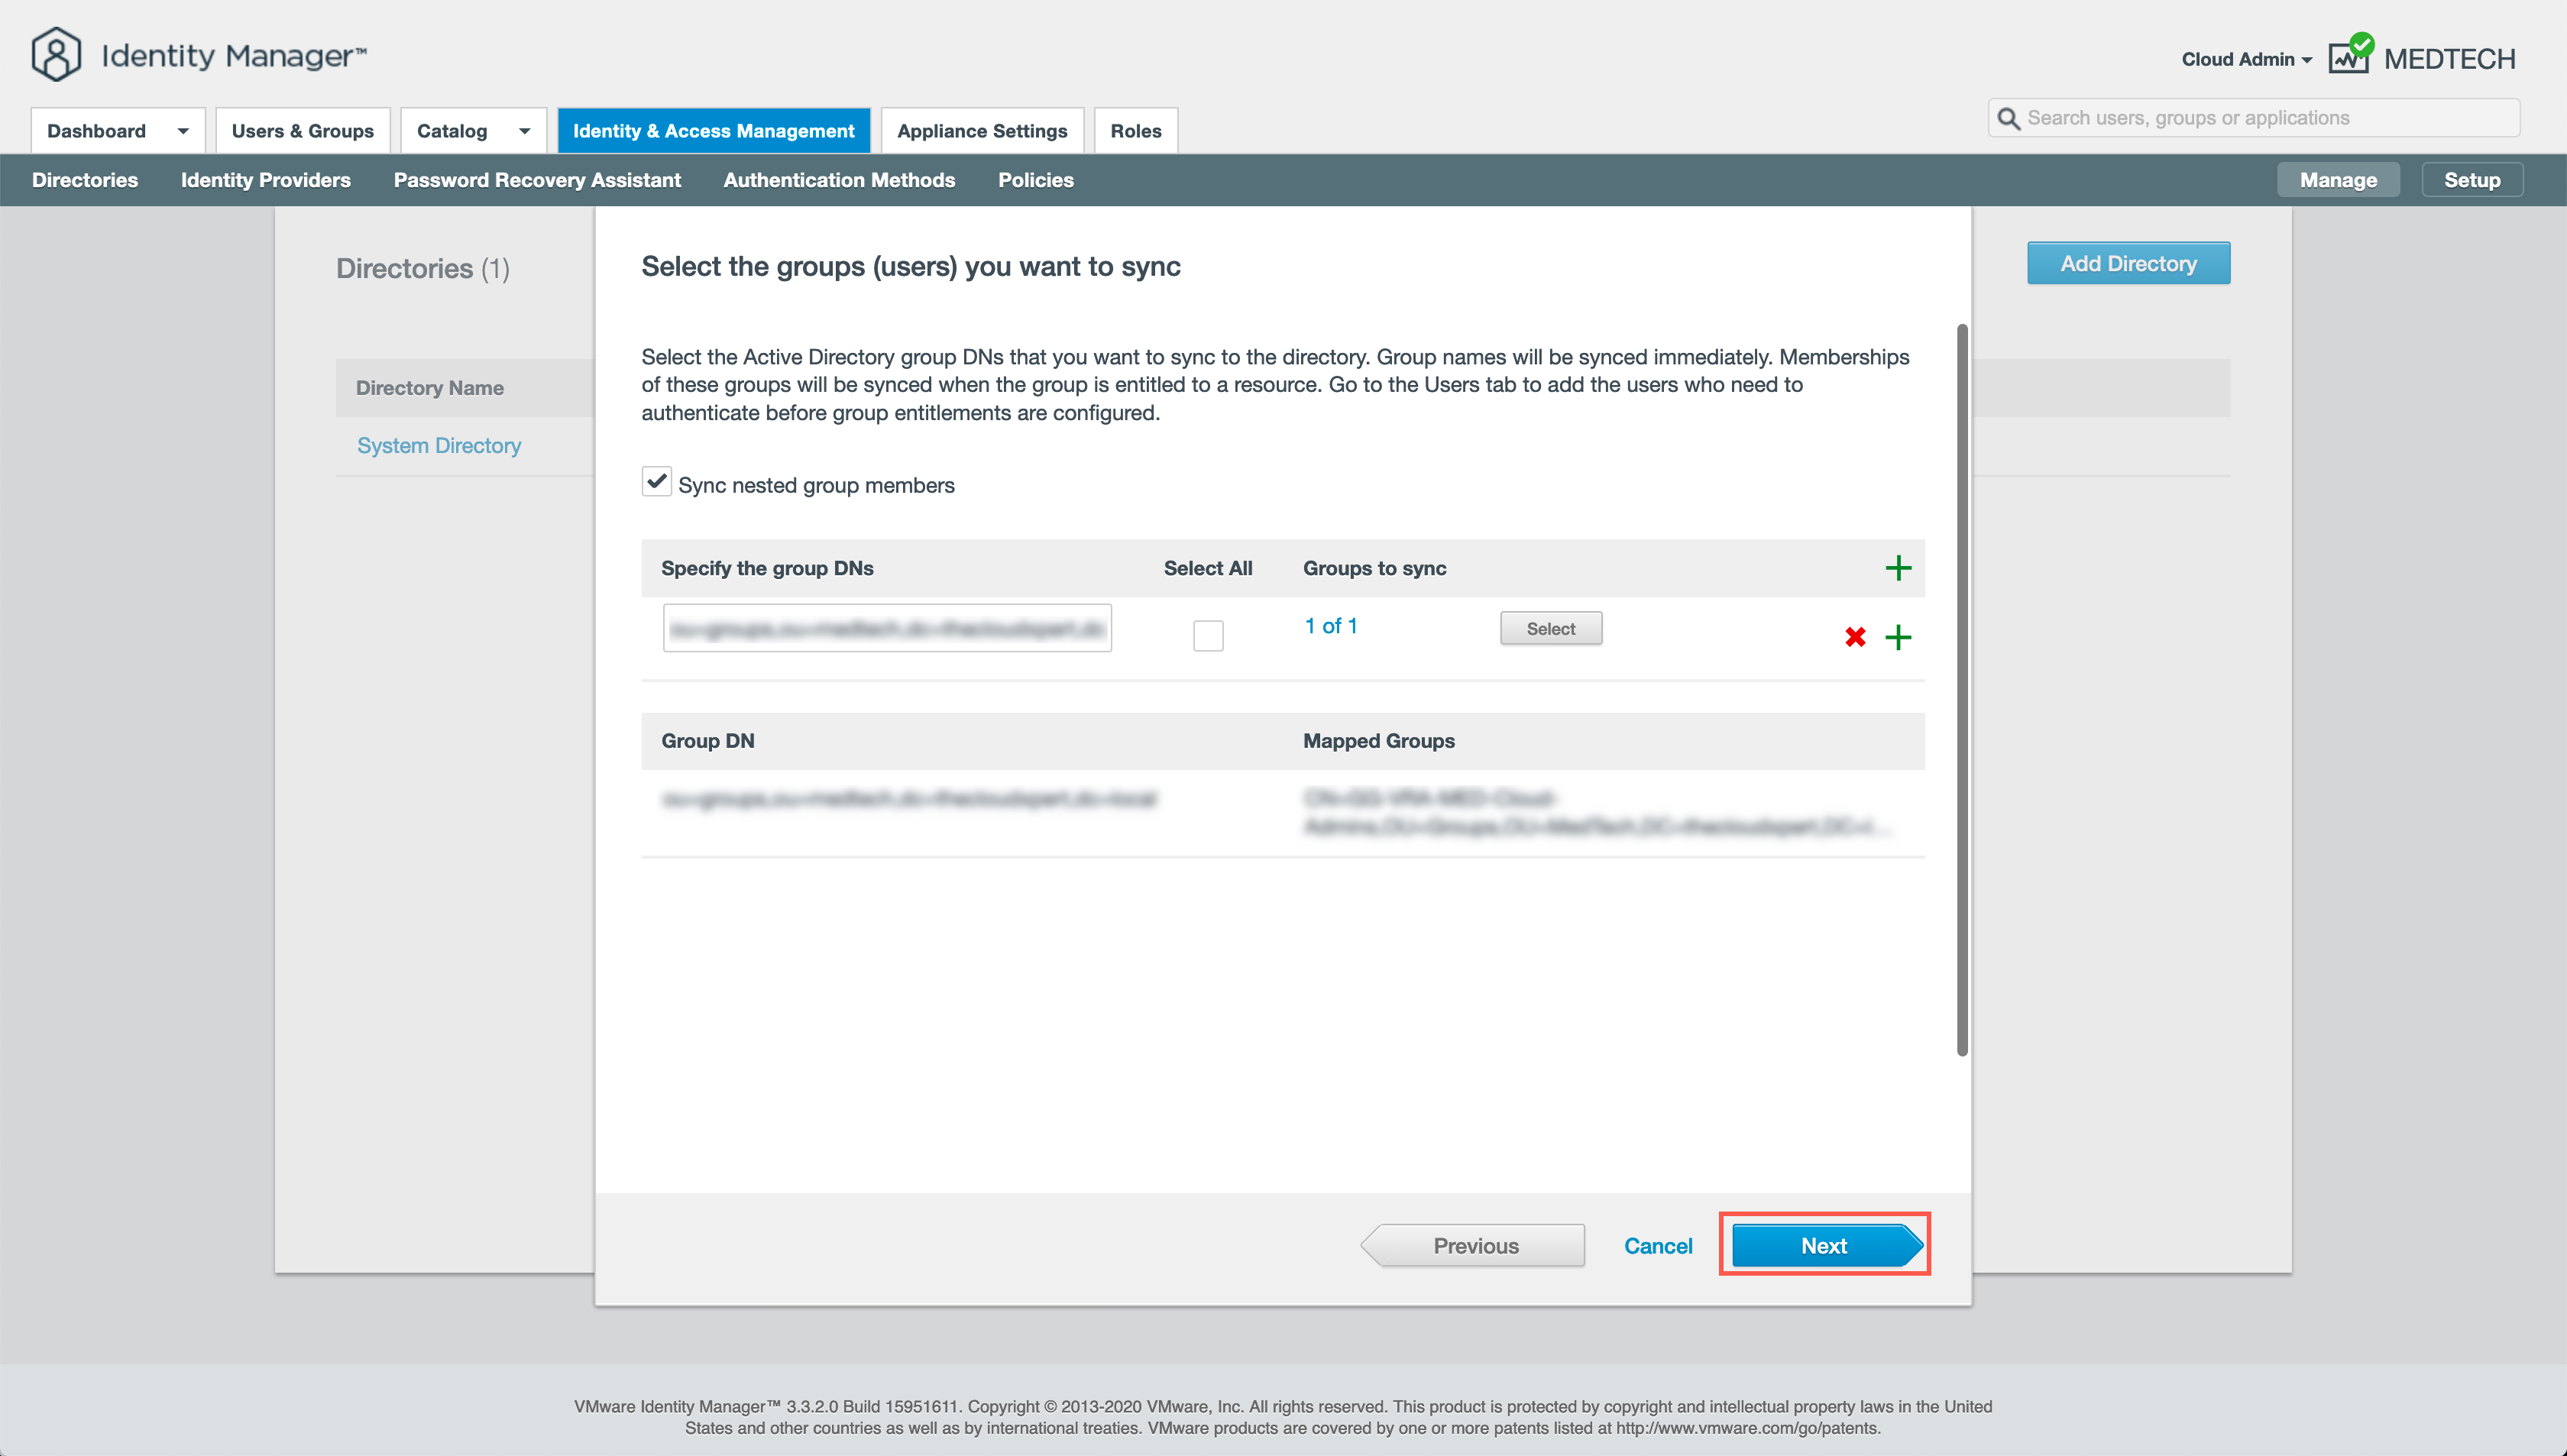
- At the Select the groups (users) you want to sync screen, click Next.
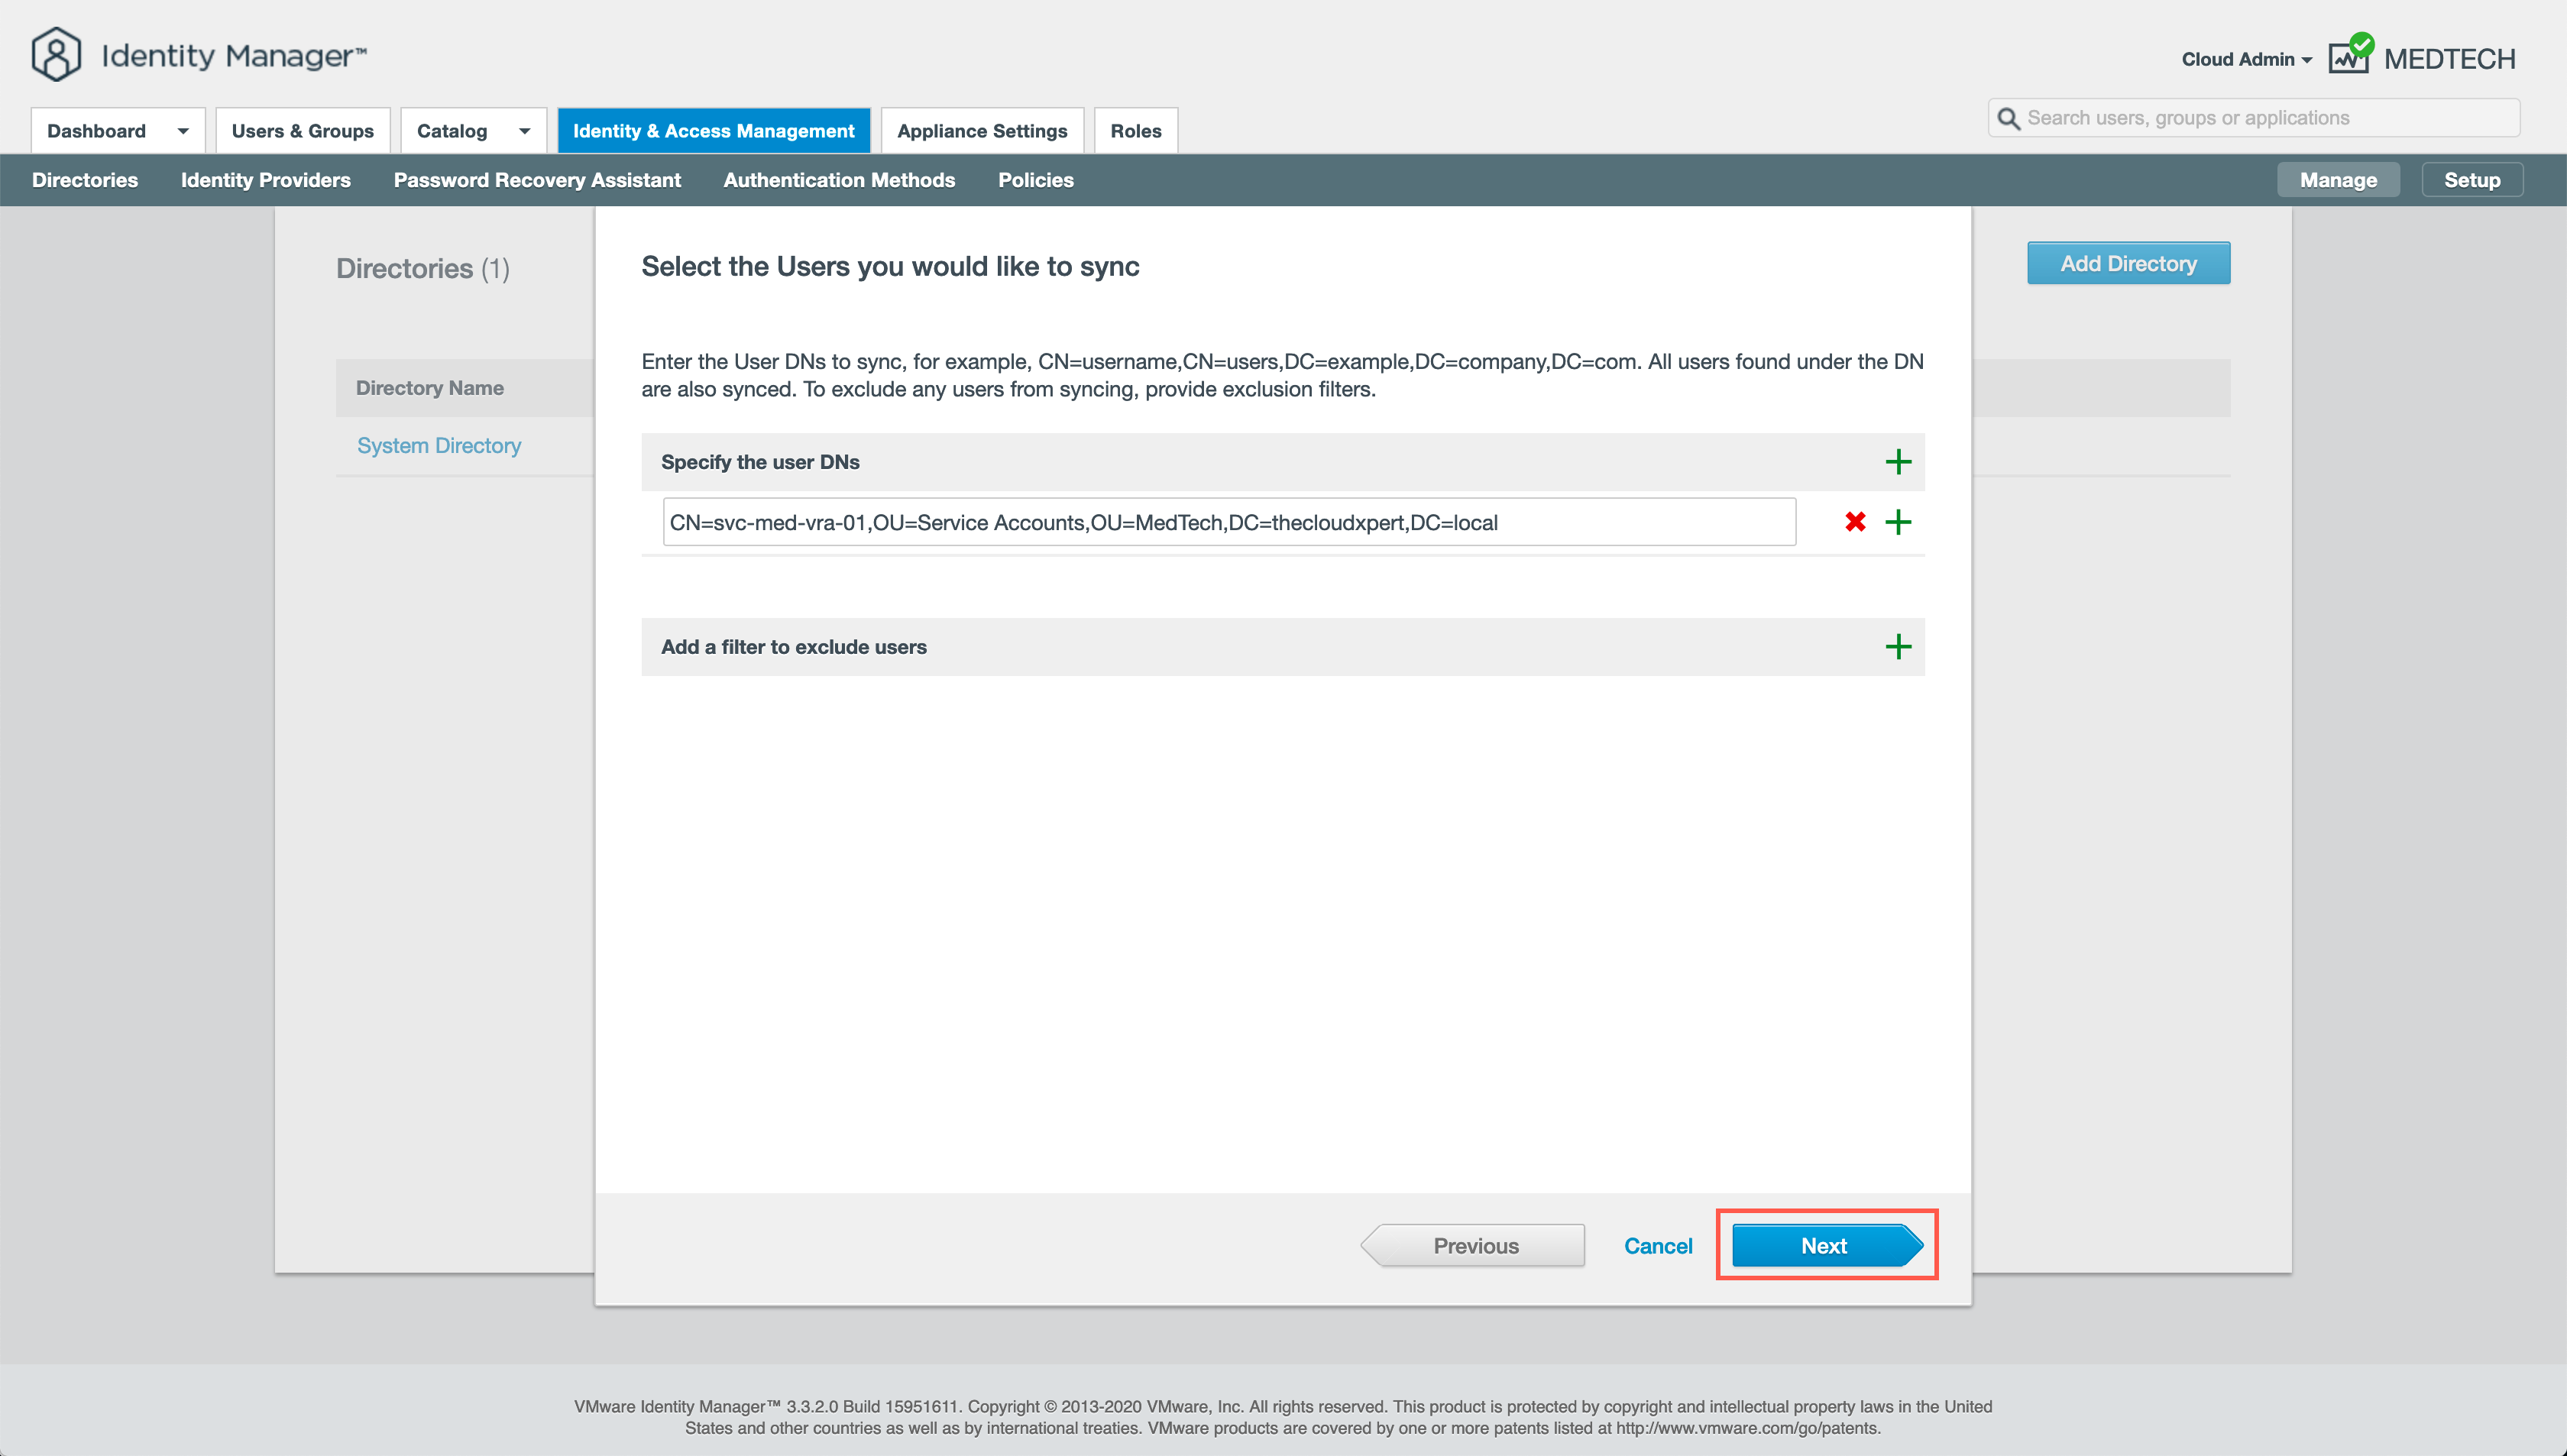
- At the Select the Users you would like to sync screen, click Next.
- At the Review screen, click Sync Directory.
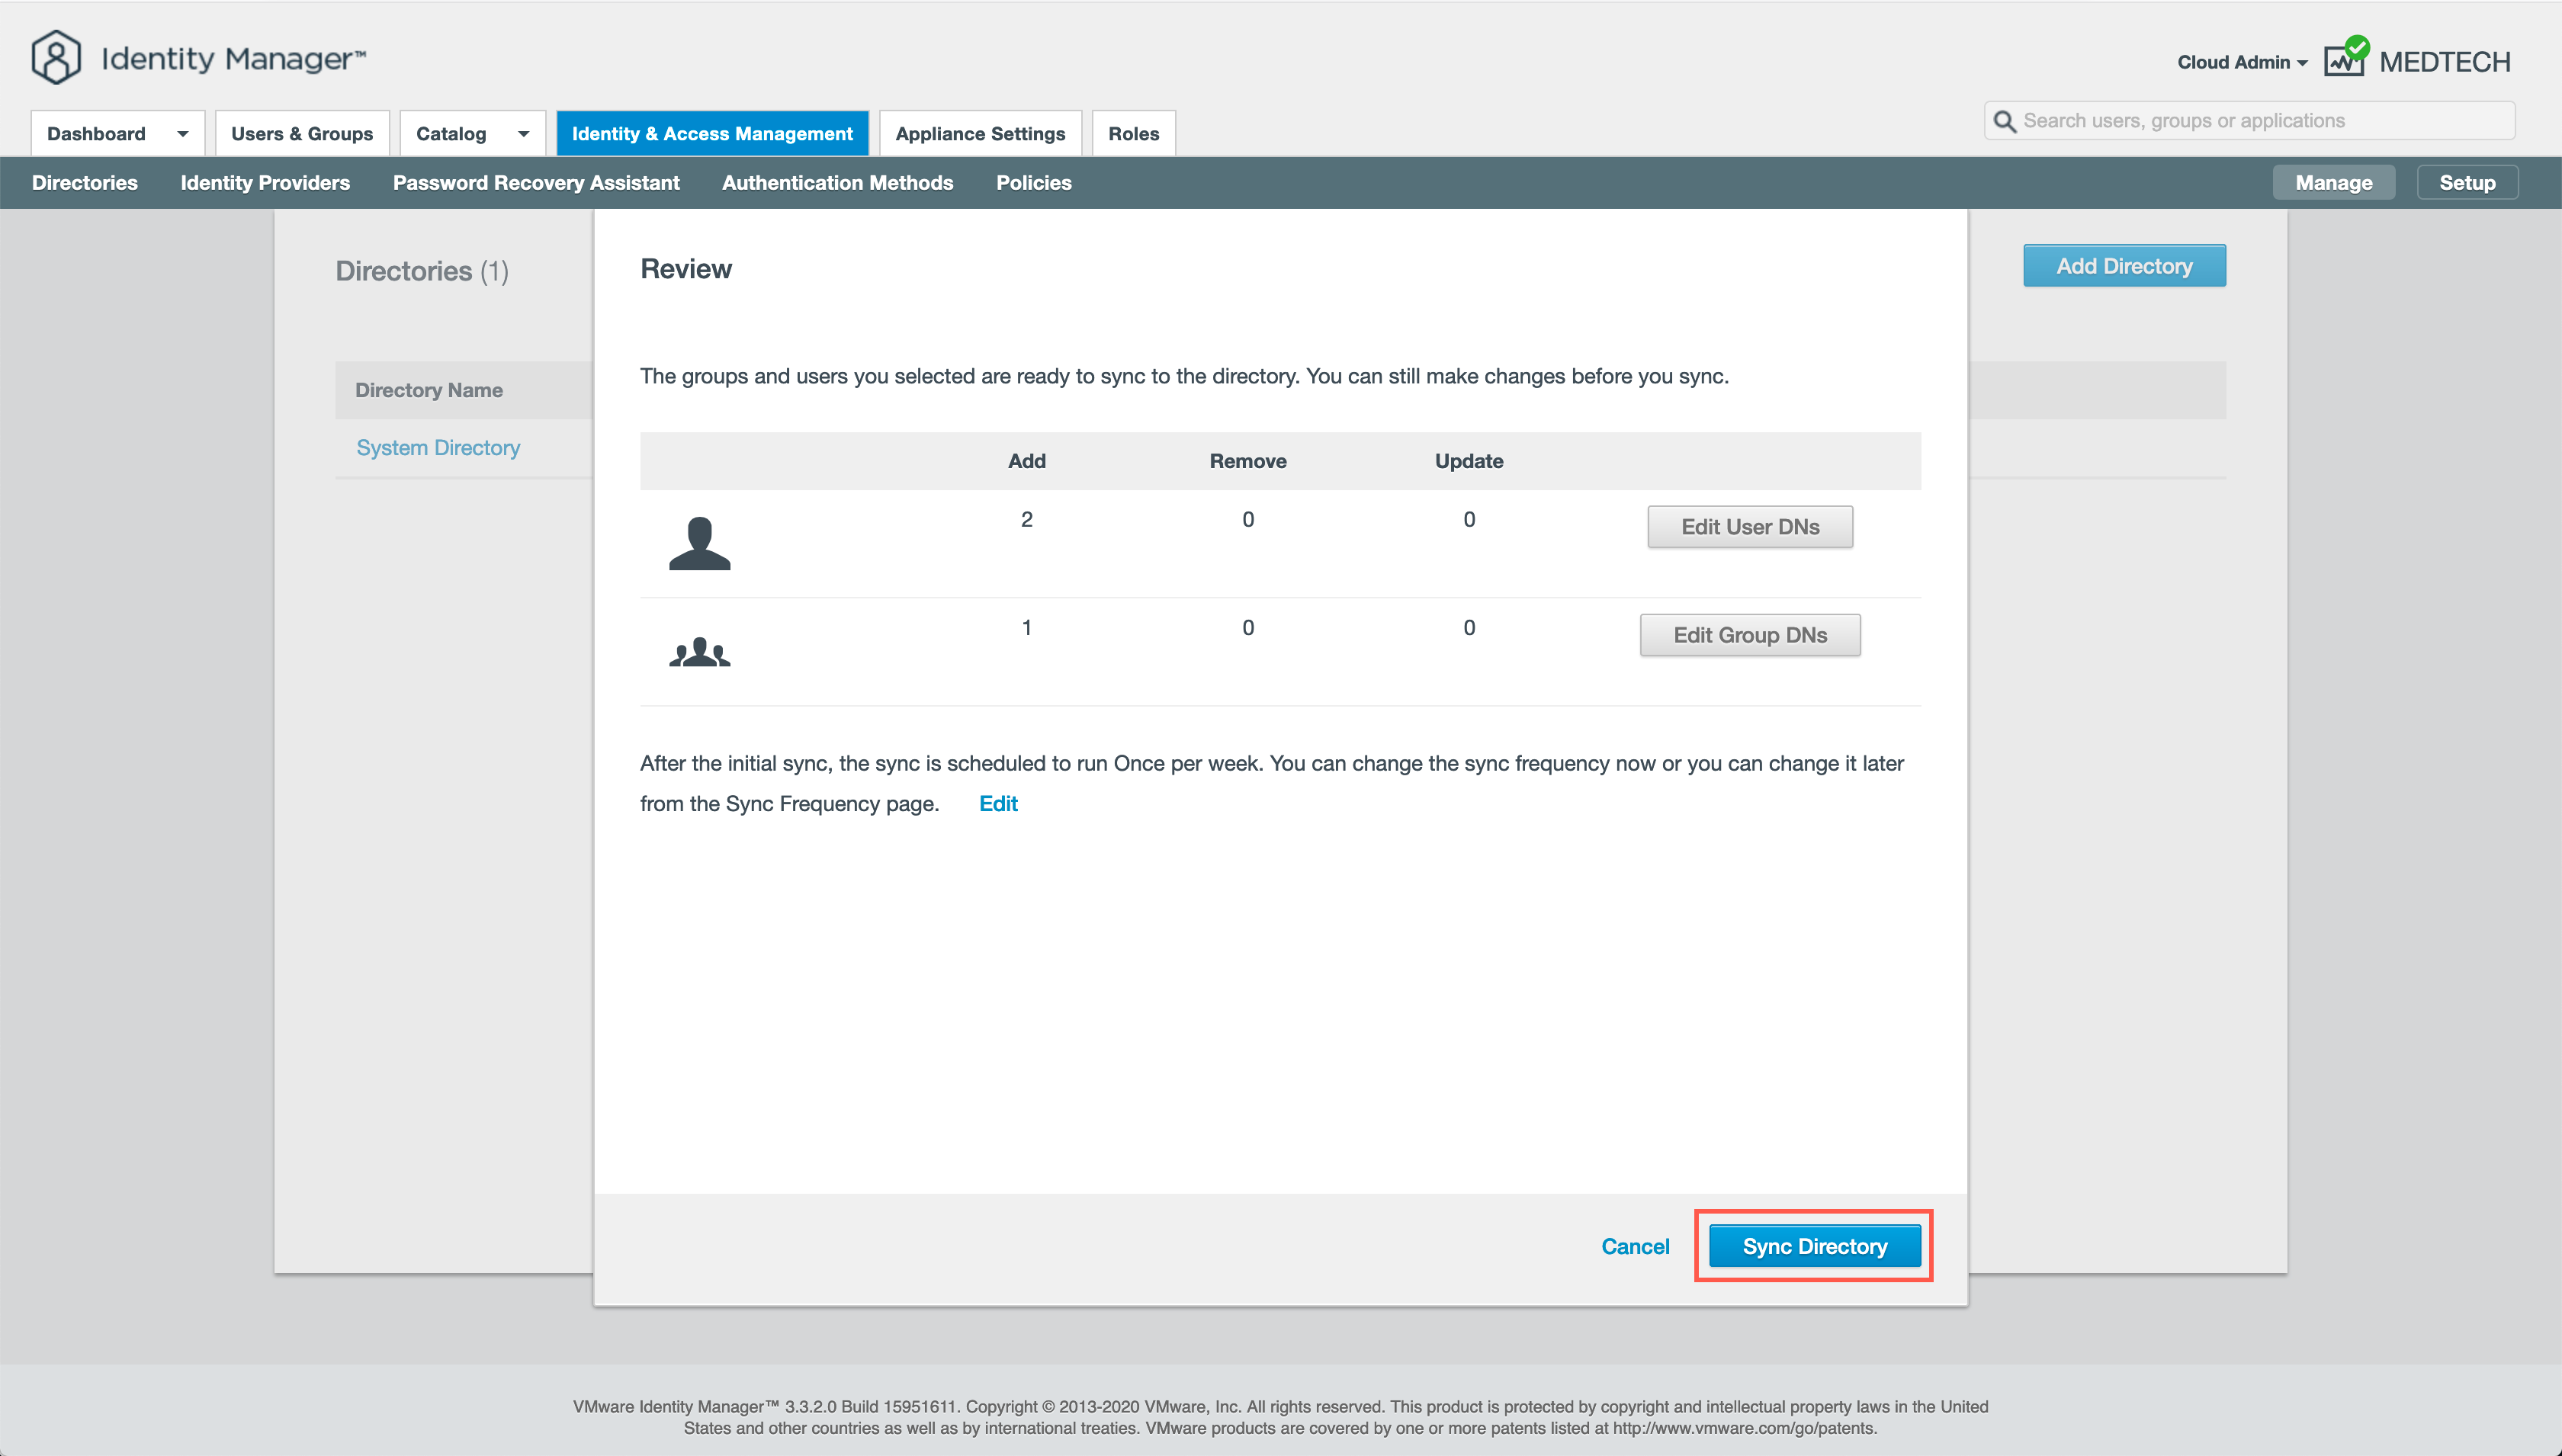
Let the Directory sync begin!
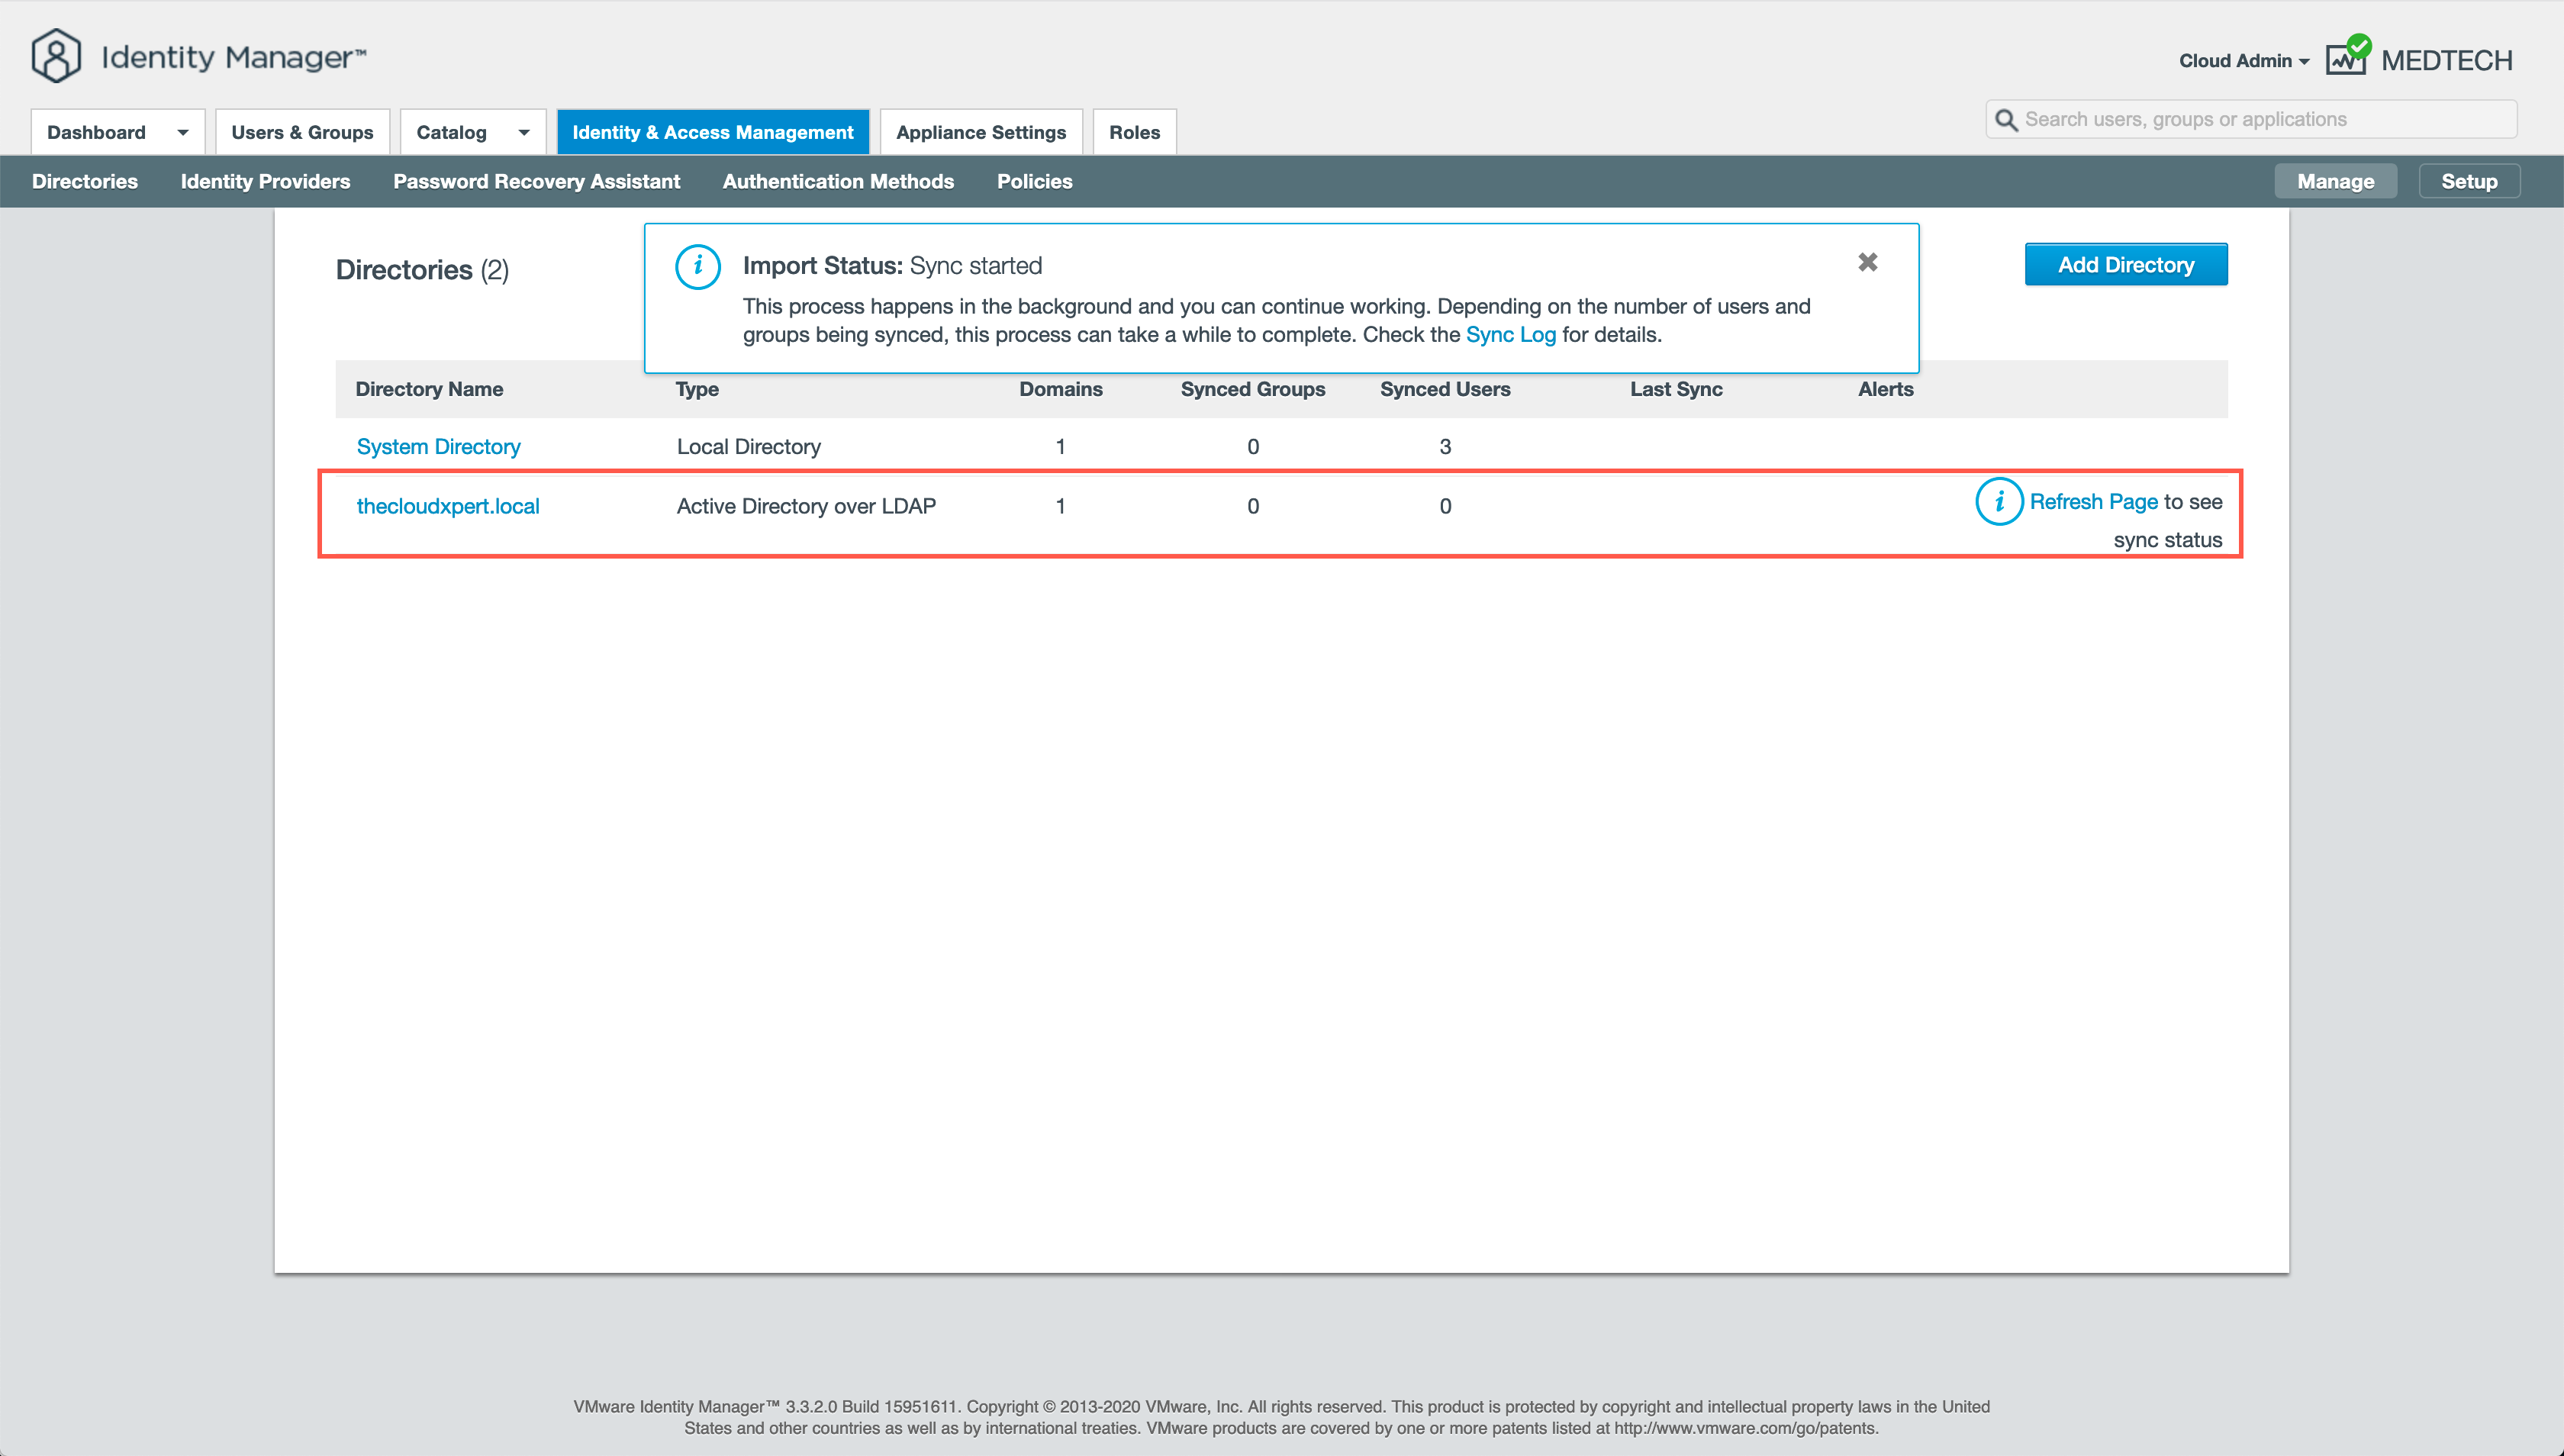
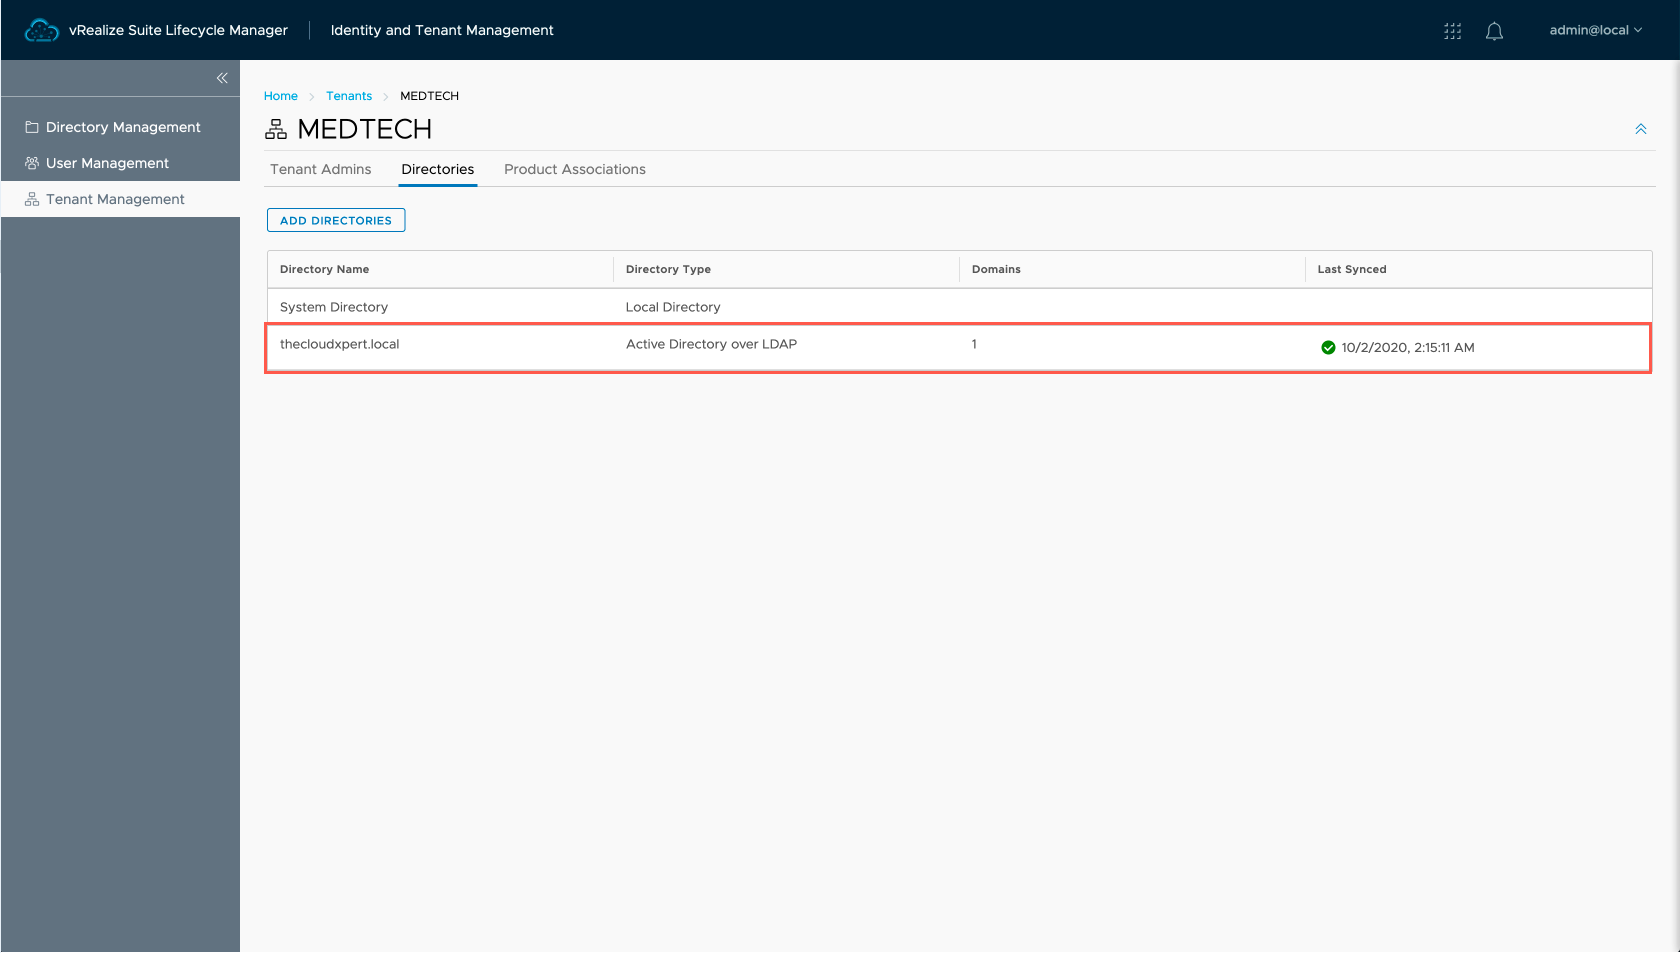
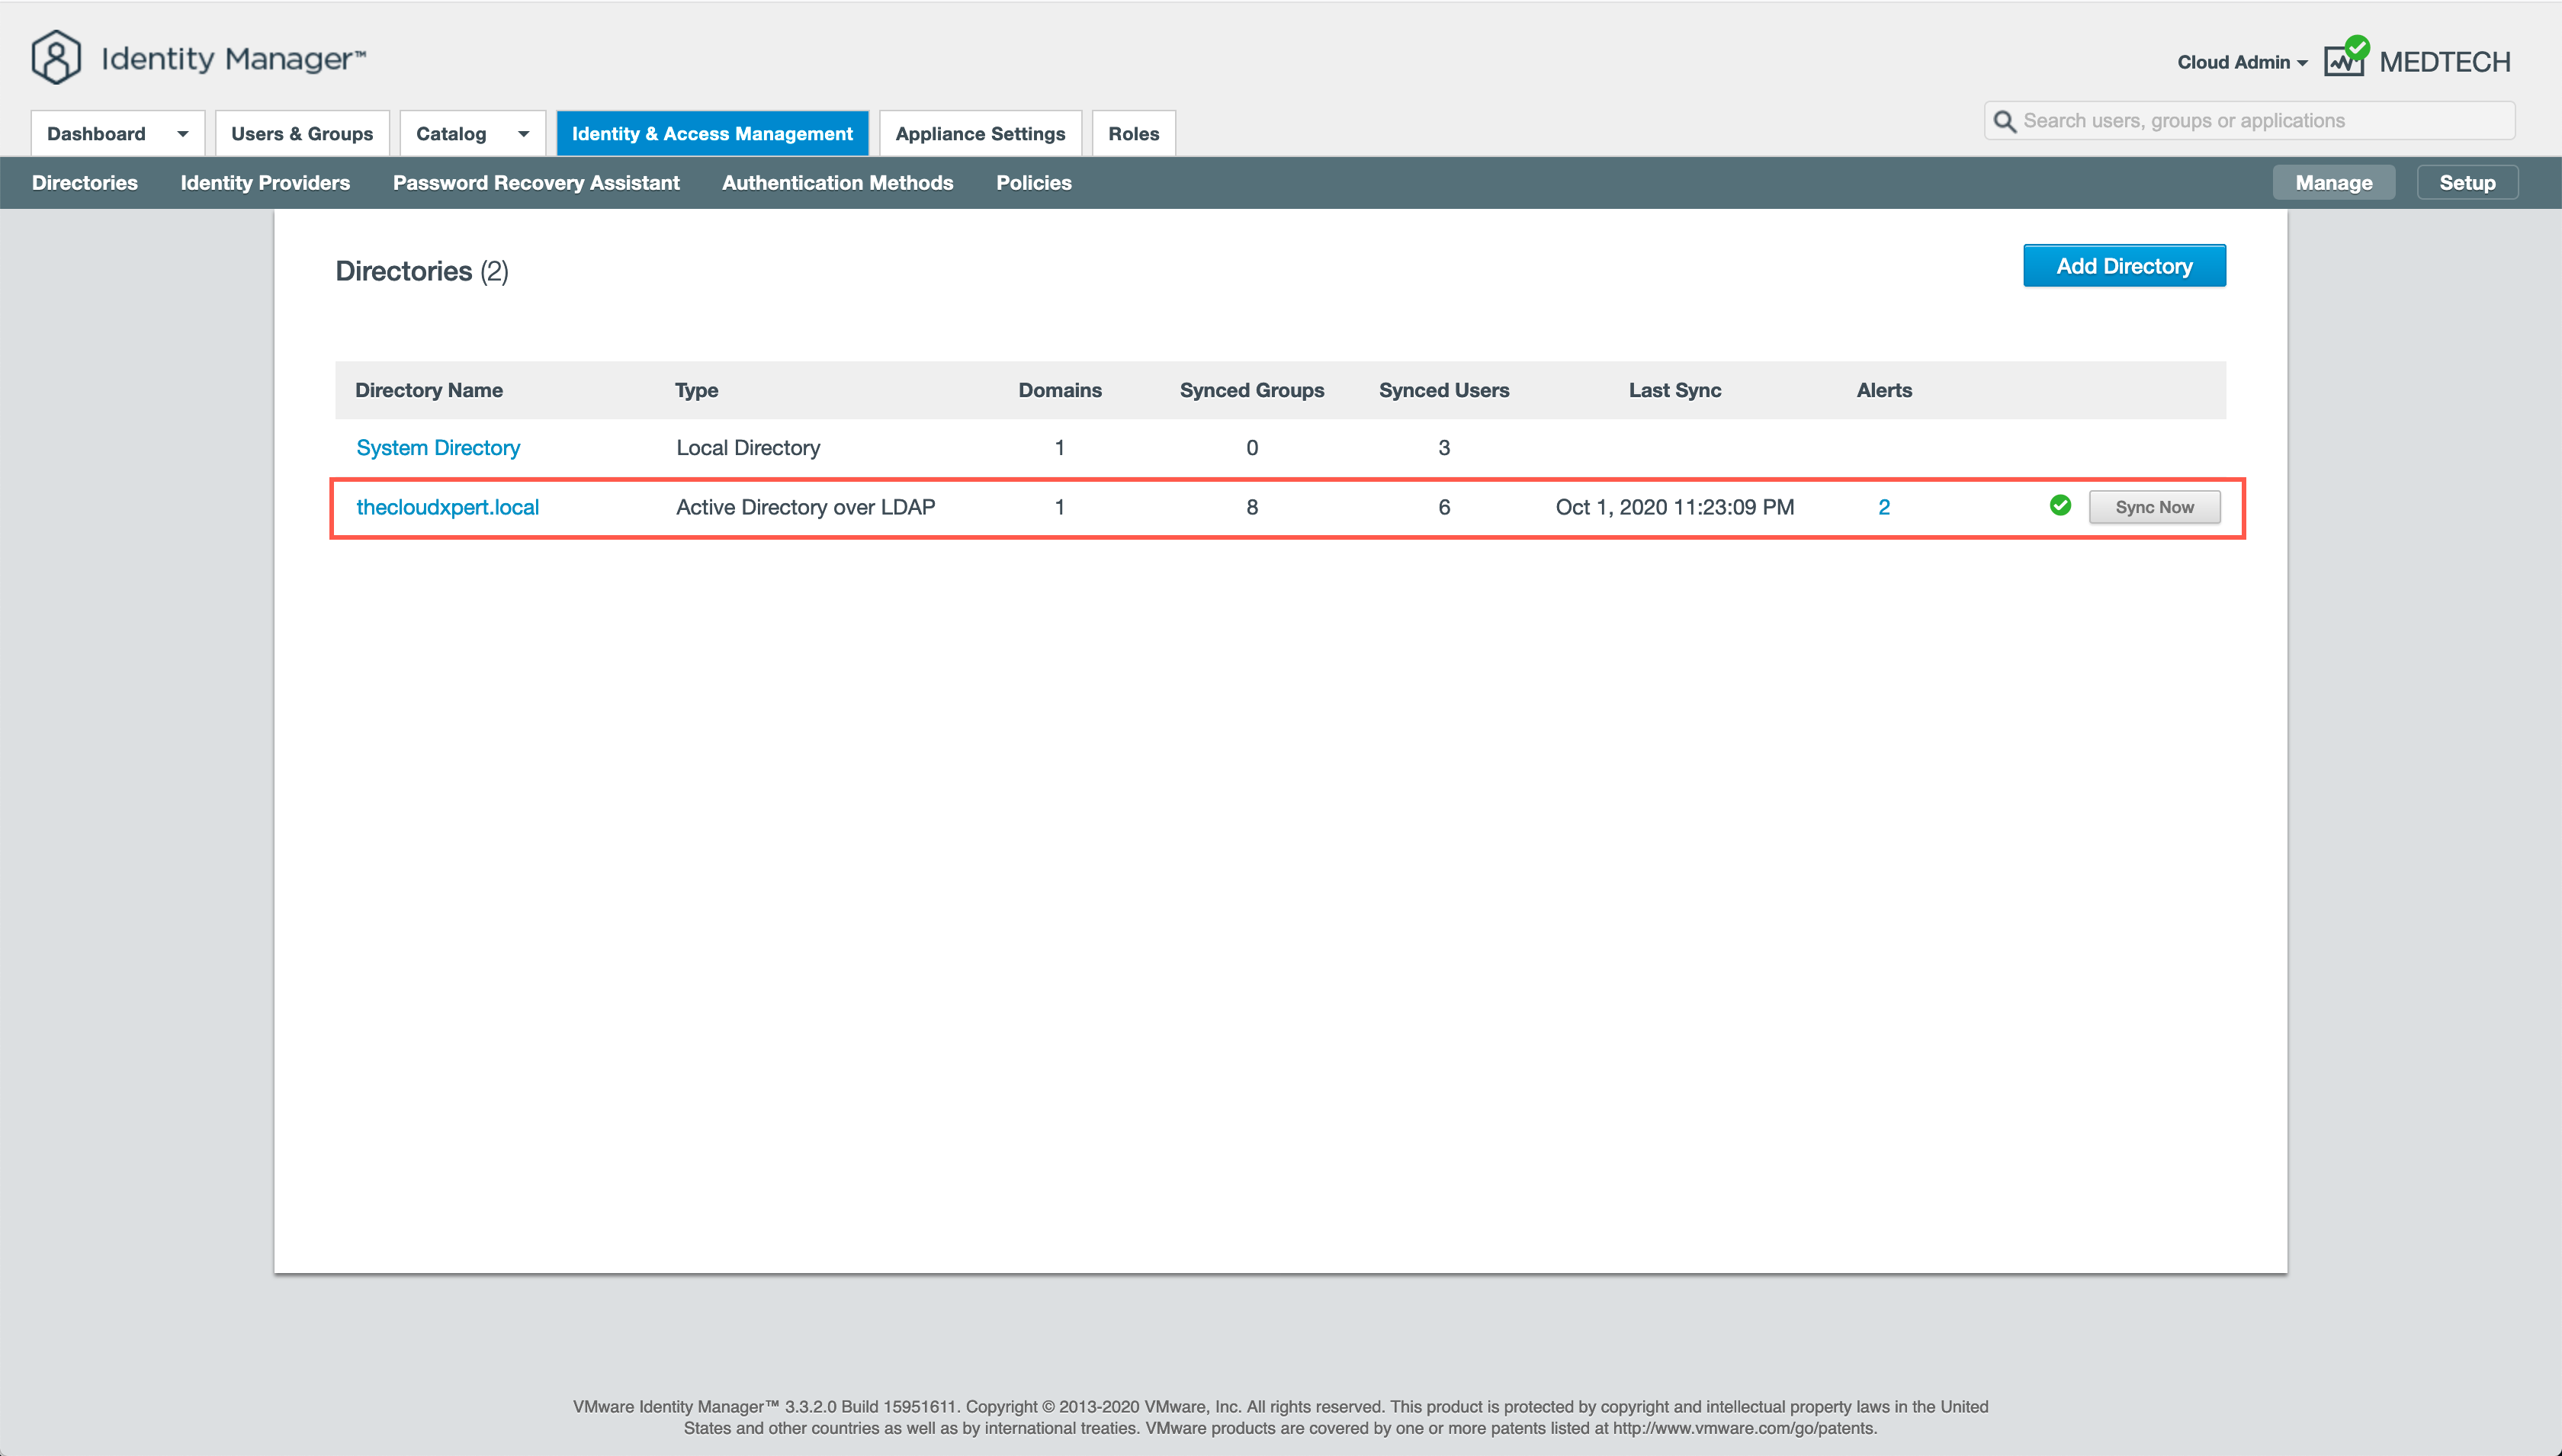
Again, we can switch back the vRSLCM and see the new User Directory in the MedTech Tenant.
Removing a New User Directory to the Customer Tenant using VMware Identity Manager
- Navigate to the vIDM Administrator portal for the tenant, https://tenant.idm.fqdn/admin

- At the login screen, select the System Domain value from the Select your domain dropdown.
- At the login screen, untick the Remember this setting checkbox and click Next.

- Enter the Tenant Administrator credentials for an Admin user and click LOGIN.
- At the Identity Manager screen, click Identity & Access Management.

- At the Directories screen, click the name of the directory to be removed.
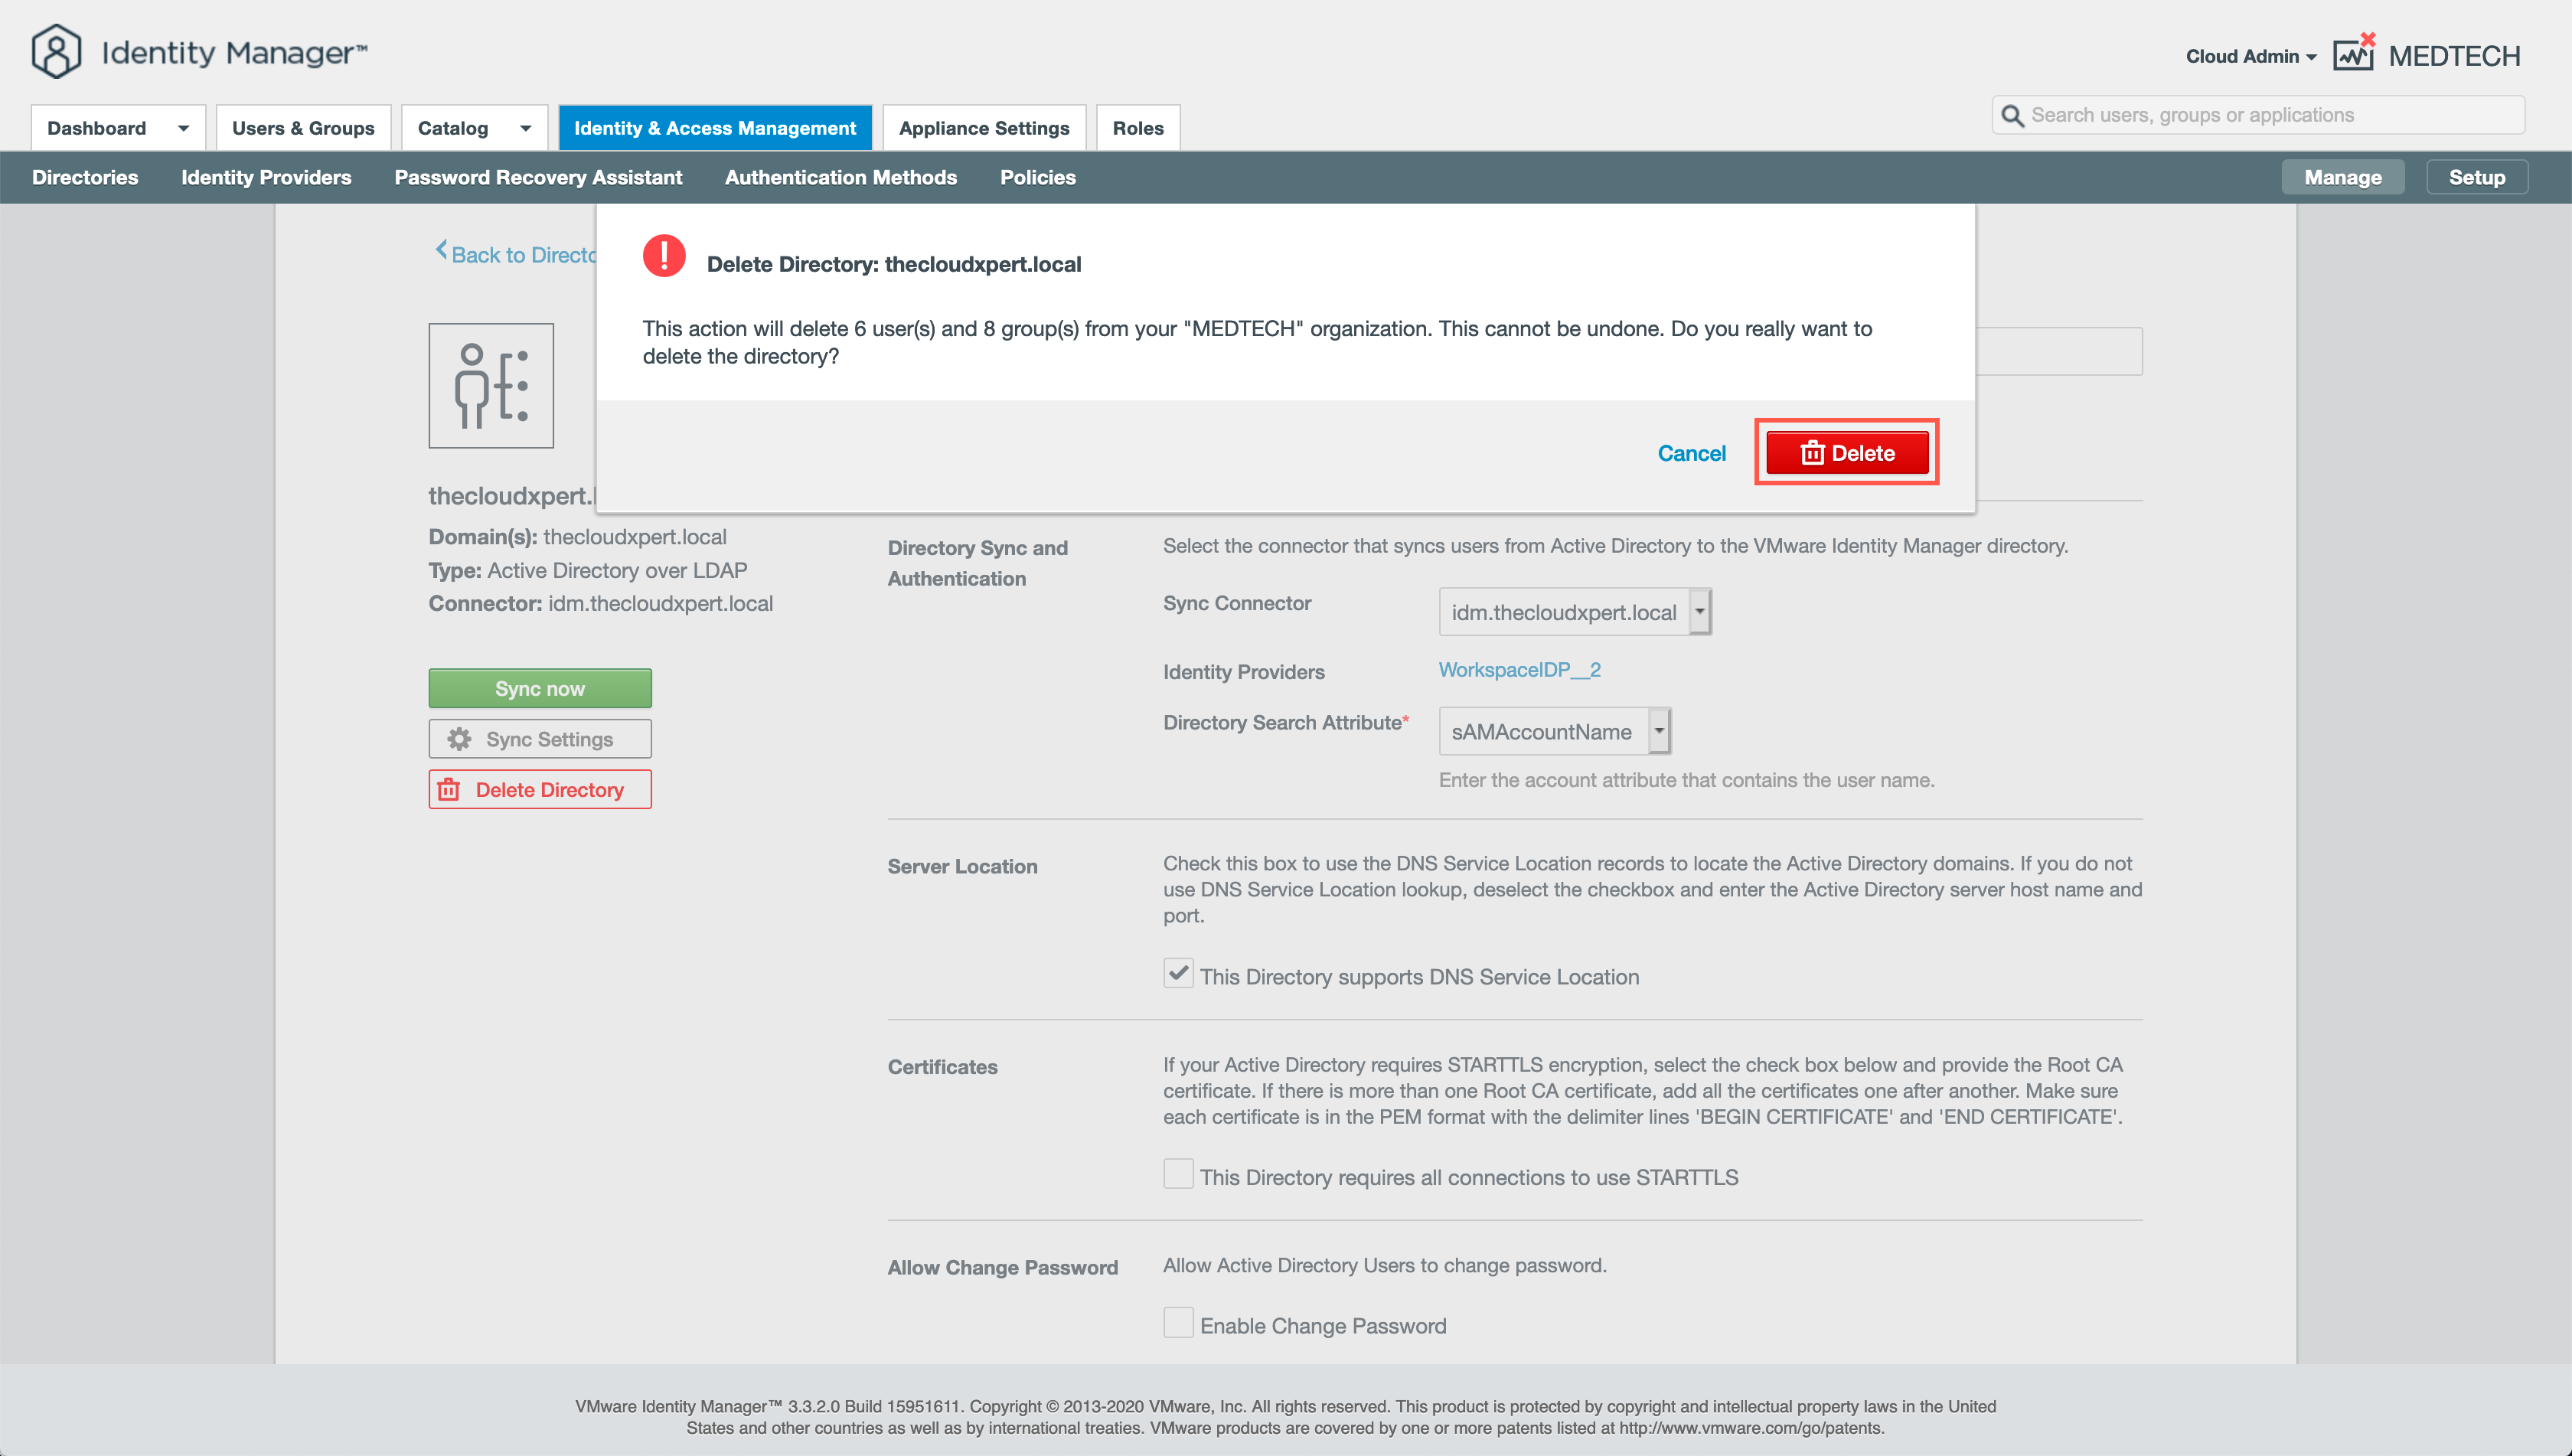
- At the MEDTECH Directory screen, click Delete Directory.

- At the Delete Directory warning dialog, click Delete.
- Wait patiently for the Directory to be deleted!
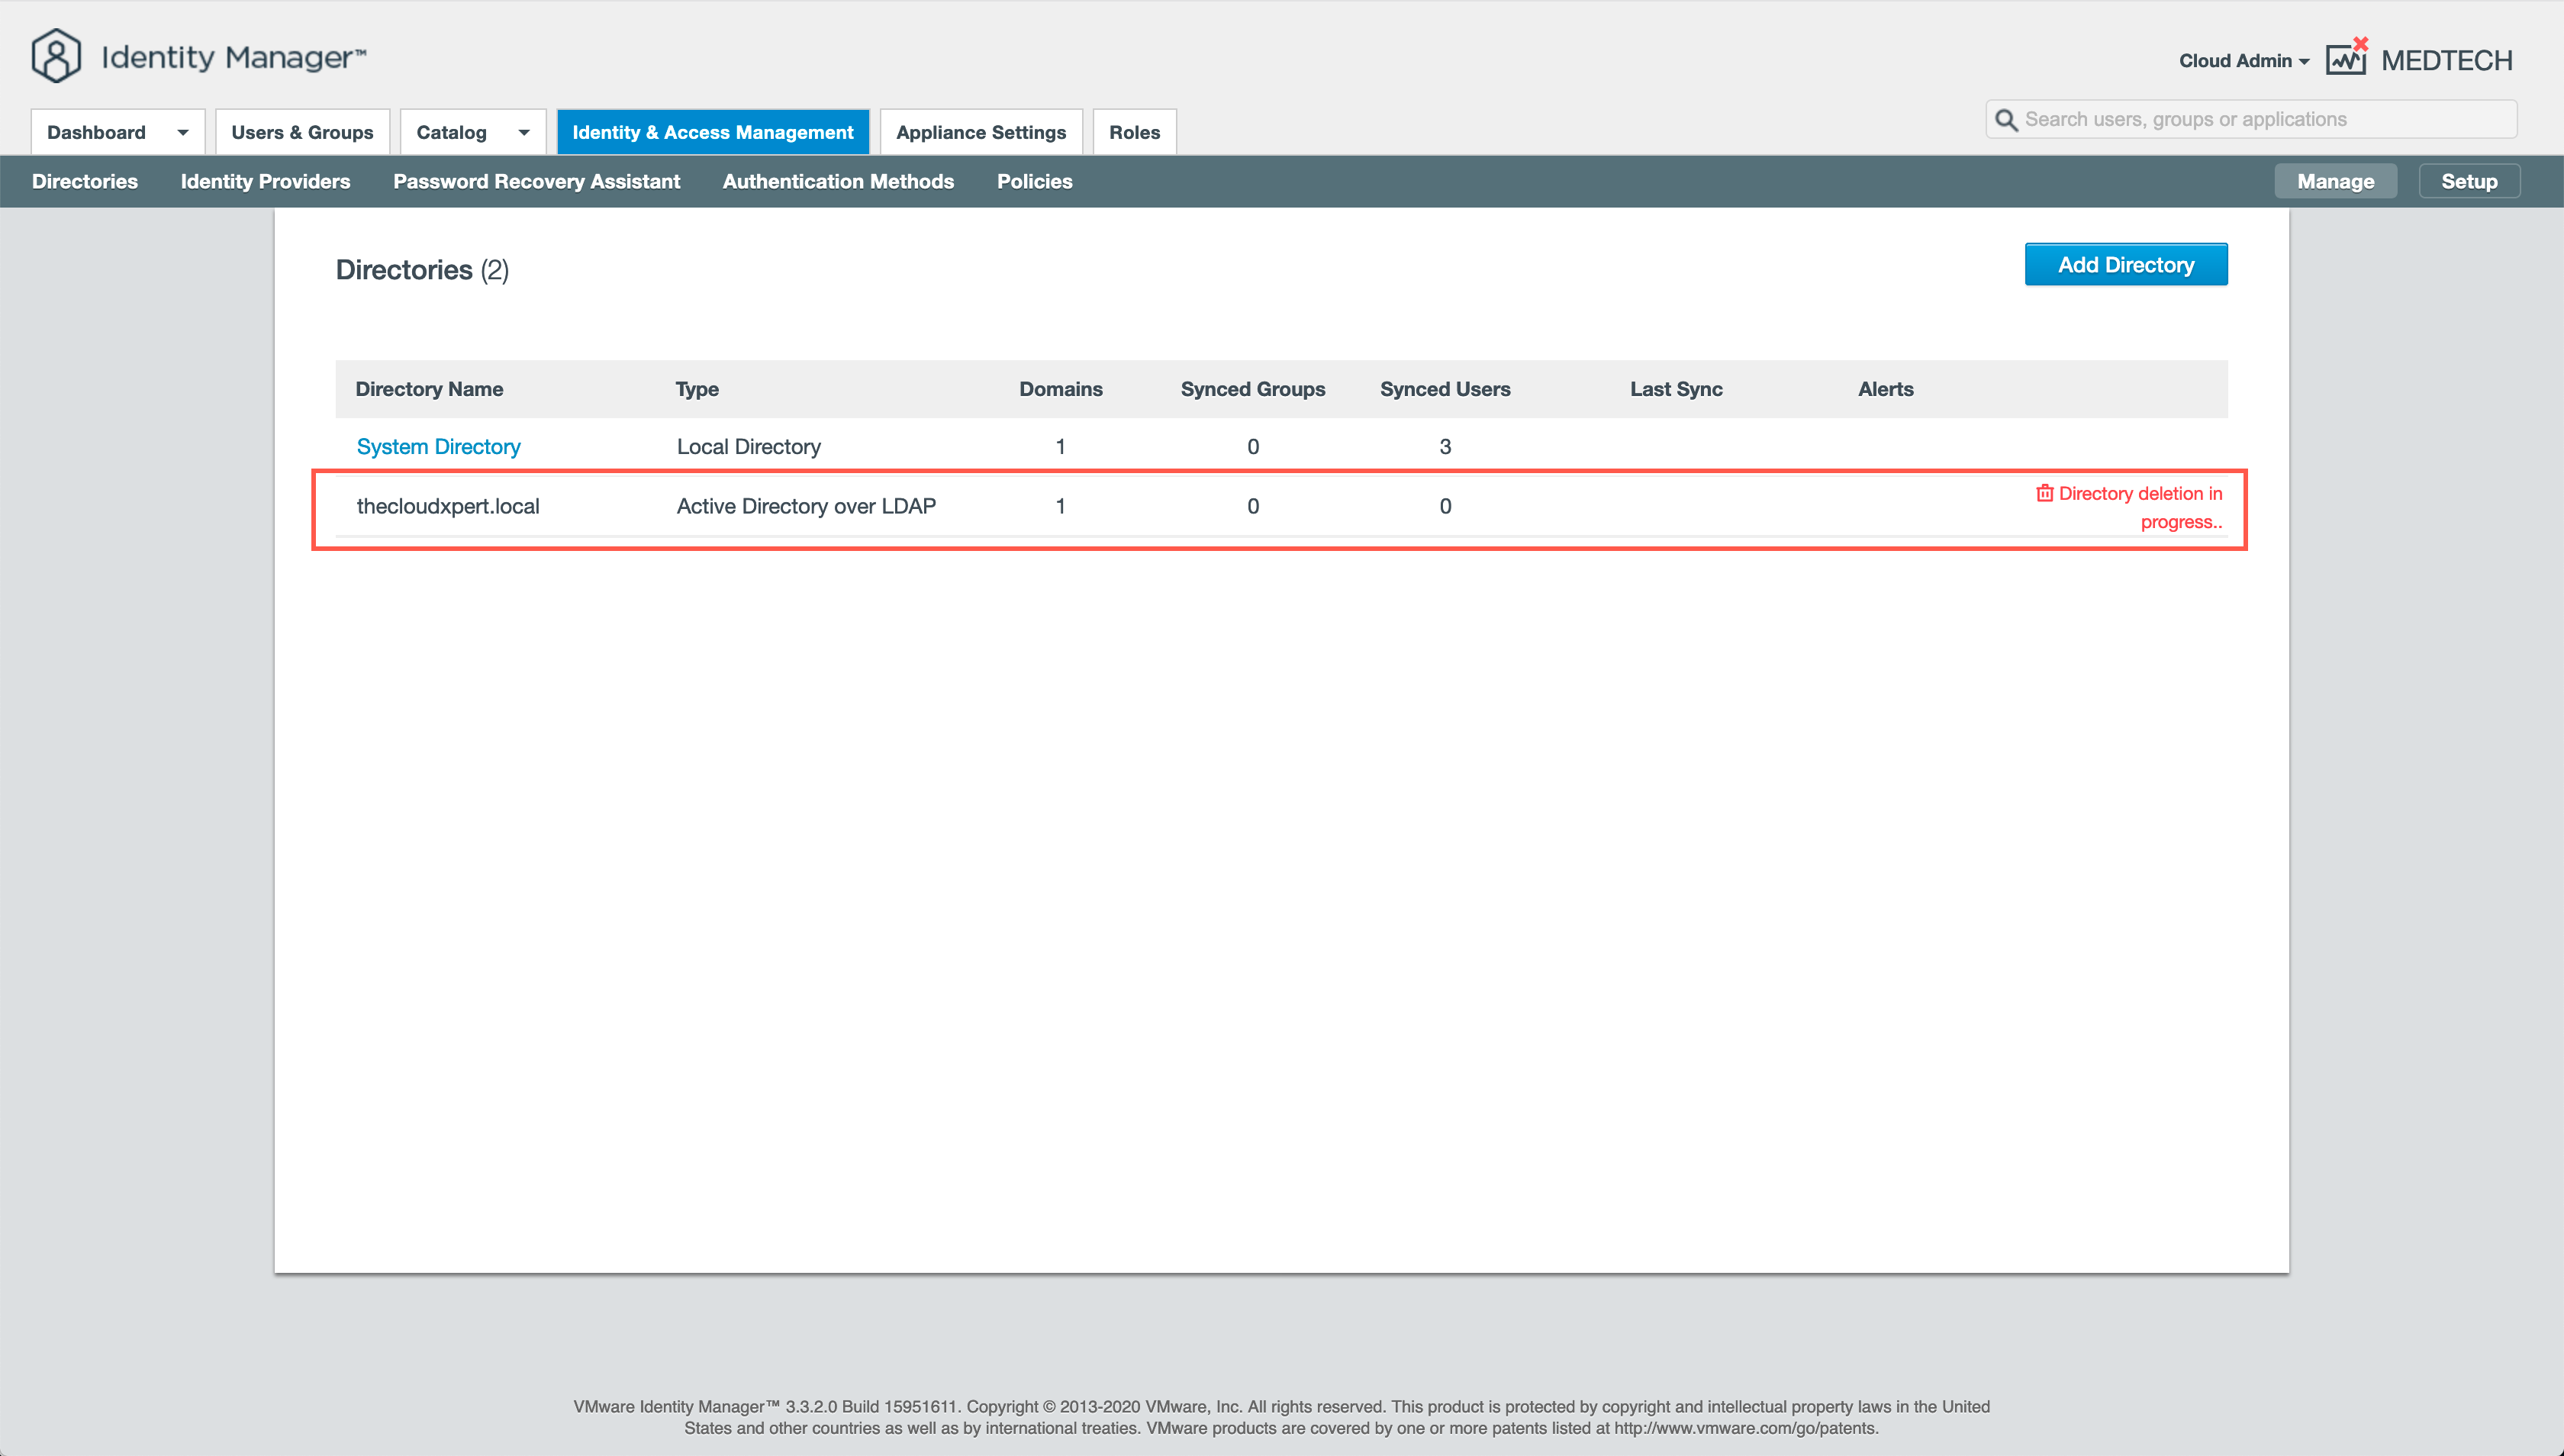
You can check back into vRSLCM and see that the directory has been removed from the Tenant.
Bringing it all together
In this post we have walked through the (hopefully successfully) steps required to add new and remove existing User Directories to an Organization/Tenant when the Multi-Organizational Tenancy is enabled. Hopefully you have noticed that this Day 2 action is relatively straight forward. Hopefully you also noticed that it is subtly different to adding User Directories in a deployment when Multi-Organizational Tenancy is not enabled.
Once you have configured one or more new Directories, remember to complete any necessary Role Based Access Control configuration at the Identity & Access Management screen within the tenant!
When I started to write this post, I was surprised to discover that you could not delete a User Directory from, or add a Directory directly to, a Customer Tenant from within vRSLCM. I believe this is a massive oversight and it is something I will be bringing up internally to see if there is a specific reason for this or whether we just didn’t enable the feature.
Hopefully you have found the walk through useful!
Published on 1 October 2020 by Christopher Lewis. Words: 1069. Reading Time: 6 mins.
- Configuring Multi-Organization Tenancy in vRealize Automation 8.x ()
- Configuring Multi-Org Tenancy in vRA 8.x - Part 4: Configuring Multi-Tenancy ()
- Configuring Multi-Org Tenancy in vRA 8.x - Part 3: Enabling Multi-Tenancy ()
- Configuring Multi-Org Tenancy in vRA 8.x - Part 2: SSL Cert Requirements ()
- Configuring Multi-Org Tenancy in vRA 8.x - Part 1: DNS Requirements ()